7530 G2 Hand-Held Computer Quick Reference Guide June 8, 2006 ISO 9001 Certified Quality Management System PN 8000090.
© Copyright 2006 by Psion Teklogix Inc., Mississauga, Ontario, Canada This document and the information it contains is the property of Psion Teklogix Inc., is issued in strict confidence, and is not to be reproduced or copied, in whole or in part, except for the sole purpose of promoting the sale of Psion Teklogix manufactured goods and services.
Return-To-Factory Warranty Psion Teklogix provides a return to factory warranty on this product for a period of twelve (12) months in accordance with the Statement of Limited Warranty and Limitation of Liability provided at www.psionteklogix.com/warranty. (If you are not already a member of Teknet and you attempt to view this warranty, you will be asked to register. As a member of Teknet, you’ll have access to helpful information about your Psion Teklogix products at no charge to you.
Waste Electrical and Electronic Equipment (WEEE) Directive 2002/96/EC This Product, and its accessories, comply with the requirements of the Waste Electrical and Electronic Equipment (WEEE) Directive 2002/96/EC. If your end-of-life Psion Teklogix product or accessory carries a label as shown here, please contact your local country representative for details on how to arrange recycling. For a list of international subsidiaries, please go to: www.psionteklogix.com/public.
neath the battery in the battery compartment (or on a related accessory such as the charger or docking station) signifies that the product is RoHS-compliant as per the EU directive. Other than as noted below, a Psion Teklogix product that does not have an accompanying RoHS logo signifies that it was placed on the EU market prior to July 1, 2006, and is thereby exempt from the directive.
Table Of Contents Safety Summary . . . . . . . . . . . . . . . . . . . . . . . . . . . . . . . . . . . . 3 Program License Agreements . . . . . . . . . . . . . . . . . . . . . . . . . 10 1. Basic Preparation . . . . . . . . . . . . . . . . . . . . . . . . . . . . . . . . . 17 1.1 Charging The Battery . . . . . . . . . . . . . . . . . . . . . . . . . . 17 1.2 Attaching The Handstrap . . . . . . . . . . . . . . . . . . . . . . . 18 1.3 Attaching A Pistol Grip . . . . . . . . . . . . . . . . . . . . . . . .
3. 4. 5. 6. 2 2.5.1 LEDs. . . . . . . . . . . . . . . . . . . . . . . . . . . . . . . . . . 31 2.5.2 Onscreen Indicators . . . . . . . . . . . . . . . . . . . . . . 33 2.5.3 Audio Indicators . . . . . . . . . . . . . . . . . . . . . . . . . 37 2.6 Monitoring The Network Connection . . . . . . . . . . . . . 37 2.7 Checking The Scanner . . . . . . . . . . . . . . . . . . . . . . . . . 38 2.7.1 Scanning Techniques . . . . . . . . . . . . . . . . . . . . . 38 2.7.2 Scan LED Indicators. . . . . . . . . . .
Safety Summary CE Marking When used in a residential, commercial or light industrial environment the product and its approved UK and European peripherals fulfil all requirements for CE marking. R&TTE Directive 1999/5/EC This equipment complies with the essential requirements of EU Directive 1999/5/EC (Declaration available: www.psionteklogix.com). Cet équipement est conforme aux principales caractéristiques définies dans la Directive européenne RTTE 1999/5/CE. (Déclaration disponible sur le site: www.
Dette udstyr opfylder de Væsentlige krav i EU's direktiv 1999/5/EC om Radio- og teleterminaludstyr. (Erklæring findes på: www.psionteklogix.com). Dette utstyret er i overensstemmelse med hovedkravene i R&TTEdirektivet (1999/5/EC) fra EU. (Erklæring finnes på: www.psionteklogix.com). Utrustningen uppfyller kraven för EU-direktivet 1999/5/EC om ansluten teleutrustning och ömsesidigt erkännande av utrustningens överensstämmelse (R&TTE). (Förklaringen finns att läsa på: www.psionteklogix.com).
FCC Information To Users Federal Communication Commission Interference Statement This equipment has been tested and found to comply with the limits for a Class B digital device, pursuant to Part 15 of the FCC Rules. These limits are designed to provide reasonable protection against harmful interference in a residential installation.
graph (d)(2), for use in a PDA. End users must follow the specific operating instructions for satisfying RF exposure compliance. This transmitter must not be co-located or operating in conjunction with any other antenna or transmitter. Some equipment in hospitals and aircraft are not shielded from radio frequency energy. Do not use the 7530 G2 hand-held onboard aircraft, or in hospitals, without first obtaining permission. Do not use near pacemakers.
Warning to Users This product is a Class I/Class II laser product according to CDRH 21 CFR 1040.10 and 1040.11 and Class1/Class 2 laser product according to IEC 60825-1:1993+A1:1997+A2:2001 Laser Warnings For your own safety, it is critical that you comply with the following warnings: Caution! Do not look into the laser beam or point the beam at people or animals. Aperture A label is affixed below the aperture.
Caution! The use of optical instruments with this product will increase eye hazard. Do Not Operate In An Explosive Atmosphere Operating Psion Teklogix equipment where explosive gas is present may result in an explosion. Do Not Remove Covers Or Open Enclosures To avoid injury, the equipment covers and enclosures should only be removed by qualified service personnel. Do not operate the equipment without the covers and enclosures properly installed.
Psion Teklogix Inc. 2100 Meadowvale Blvd. Mississauga, Ontario Canada L5N 7J9 Psion Teklogix Corp. 1810 Airport Exchange Blvd. Suite 500 Erlanger, Kentucky USA 41018 Psion Teklogix S.A. La Duranne; 135 Rue Rene Descartes; BP 421000 13591 Aix-En-Provence Cedex 3; France Warning: TO PREVENT the battery from leaking acid, generating heat or exploding, adhere to precautions below. • The battery incorporates built-in safety devices.
• Do not use the battery in combination with primary batteries (such as dry-cell batteries) or batteries of different capacities or brands. • Immediately remove the battery from the device or battery charger and stop use if the battery gives off an odour, generates heat, becomes discoloured or deformed, or in any way appears abnormal during use. • Do not continue charging the battery if it does not recharge within the specified charge time. • The battery may burst or ignite if the battery leaks.
INSTRUCTIONS ON RETURN OF THE UNUSED DEVICE(S) FOR A REFUND. ANY USE OF THE SOFTWARE, INCLUDING BUT NOT LIMITED TO USE ON THE DEVICE, WILL CONSTITUTE YOUR AGREEMENT TO THIS EULA (OR RATIFICATION OF ANY PREVIOUS CONSENT). GRANT OF SOFTWARE LICENSE. This EULA grants you the following license: • You may use the SOFTWARE only on the DEVICE. • NOT FAULT TOLERANT. THE SOFTWARE IS NOT FAULT TOLERANT. PSION TEKLOGIX INC.
• • • THE USE OR PERFORMANCE OF THE SOFTWARE. THIS LIMITATION SHALL APPLY EVEN IF ANY REMEDY FAILS OF ITS ESSENTIAL PURPOSE. IN NO EVENT SHALL MS BE LIABLE FOR ANY AMOUNT IN EXCESS OF U.S. TWO HUNDRED FIFTY DOLLARS (U.S. $250.00). Limitations on Reverse Engineering, Decompilation, and Disassembly. You may not reverse engineer, decompile, or disassemble the SOFTWARE, except and only to the extent that such activity is expressly permitted by applicable law notwithstanding this limitation.
You assume responsibility for the selection of the Software to achieve your intended results, and for the use and results obtained from it. 1. GRANT OF LICENSE We hereby grant you and you hereby accept a non-exclusive, non-transferable, limited license to install and use the Software in object code form only, subject to the terms and restrictions set forth in this Agreement.
g. Assignment. You may not assign or transfer the Software to a third party or allow a third party to use the same. h. Reverse Engineering. Modification, reverse engineering, reverse compiling, disassembly, unbundling or extraction of the Software is expressly prohibited. i. Export Restrictions.
5. LIMITATION OF LIABILITY We are liable for no more than the value of the license fee that you paid for the Software. This limitation is cumulative and our responsibility for multiple claims will not exceed in aggregate this limit.
Any rights and obligations under this Agreement that by their nature continue after it ends will remain in effect until they are completed. 9. GENERAL The laws of the Province of Ontario and the federal laws applicable therein, excluding the conflict of laws provisions, govern this Agreement.
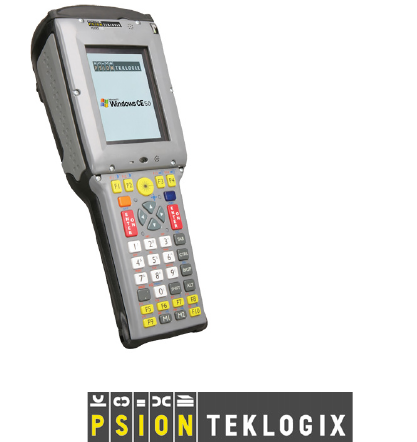
1. Basic Preparation Important: It is important that you review all safety guidelines described under “Lithium-Ion Battery Safety Precautions” on page 8 before charging a battery. This quick start guide provides basic information on the operation and features of the Psion Teklogix 7530 G2 Hand-Held Computer. For more detailed information, refer to the 7530 G2 Hand-Held Computer User Manual, or the documentation supplied with the application you are using.
1.2 Attaching The Handstrap Important: Do not use adhesives such as Loctite to secure the screws on the carrying accessories. These chemicals may damage the plastic casing. Two Phillips head screws are provided with the handstrap. • Use a Phillips screwdriver to attach the strap to the two threaded inserts at the back of the 7530 G2 at the top of the unit. • Stretch the handstrap toward the base of the 7530 G2, and hook the bottom of the handstrap into the slot near the base of the battery pack. 1.
Note: Prior to installation, make sure the trigger mechanism is securely snapped into the pistol grip body and that the trigger operates properly. • Position the pistol grip so that it fits snugly over the back of the unit and the inserts on the back of the 7530 G2 align with the holes in the pistol grip. • Use a Phillips screwdriver to securely fasten the pistol grip to the back of the 7530 G2.
1.4 Installing The Battery • Slide the charged battery with the contoured plastic facing you into the 7530 G2. Click the battery into place. CAUTION:Accidental removal and insertion of the battery during operation may result in the 7530 G2 not booting up normally. Should this occur, remove the battery and allow the internal backup power supply to deplete – approximately 15 minutes. Unsaved data may be lost. 1.5 Switching The 7530 G2 On • Press and hold down [ENTER] for at least one second.
1.6 Switching The 7530 G2 Off Important: Keep in mind that turning off the 7530 G2 does not result in a complete reboot; rather, the unit enters a power-saving, “suspend” state. When the 7530 G2 is turned on from suspend state, operation resumes within a few seconds. To switch off the 7530 G2: • Press the [BLUE] key, and then press [ENTER/ON]. Important: If the word ‘BLUE’ is displayed in uppercase in the taskbar area at the bottom of the screen, this key is locked “on” – the 7530 G2 will not switch off.
2. Getting To Know Your 7530 G2 2.
Tether Port Battery Pack Docking Port 2.2 The Battery The 7530 G2 hand-held operates with a Lithium-Ion battery pack. Preparing the hand-held unit for operation requires that a battery pack be charged and installed in the unit. A full charge is completed in 4 hours with a typical charge time of 1.5 hours Important: Before charging or using the battery pack, it is critical that the safety information on page 8 be reviewed and that all warnings are strictly followed. 2.2.
2.3 The Keyboard The 7530 G2 offers two types of keyboard layouts – a 63-key keyboard and a large button, 37-key keyboard. The [BLUE] and [ORANGE] modifier keys provide access to additional keys and system functions. These functions are colour coded in orange and blue print above the keyboard keys. 2.3.1 Modifier Keys The [SHIFT], [CTRL], [ALT], [BLUE] and [ORANGE] keys are modifier keys. Pressing a modifier key changes the function of the next key pressed.
2.3.2 The Keys The [SHIFT] Key Used to display uppercase alpha characters and provide access to the symbols above the numeric keys. The Arrow Keys Move the cursor around the screen in the direction of the arrow – up, down, left and right. The [BKSP/DEL] Key Moves the cursor one character to the left, erasing the incorrectly entered key stroke. [DEL] key ([BLUE] [BKSP]) erases the character at the cursor position.
2.3.3 The 63-Key Keyboard In addition to alphanumeric keys that are directly accessible on the keyboard (no key combination is required) and the keys described in this chapter, the 63-key keyboard also provides function keys and macro keys. They can be custom defined for each application. 2.3.4 The 37-Key Keyboard On 37-key 7530 G2s, all alpha characters are printed on the unit plastic in orange typeface above the numeric keys.
Creating Uppercase Letters To display a capital letter: • Press the [ORANGE] key and then the [SHIFT] key before typing the alpha character. Choosing Multiple Characters From The Same Key If you need to choose more than one alpha character from a single key, you’ll need to press the ‘Accept’ key between alpha selections. The ‘Accept’ key is presented as an arrow ⇒ symbol above the ‘0’ (zero) key. For example, suppose you want to type the letters ‘a’, ‘b’ and ‘c’.
Choosing Multiple Characters From A Range Of Keys If you plan on choosing alpha characters from a number of different keys, you are not required to press the ‘Accept’ [⇒] key after each alpha selection. The [⇒] key is only required when you are choosing more than one alpha character from the same key – e.g., ‘a’, ‘b’ and ‘c’ from the [2] key. Suppose you want to type the letters ‘a’, ‘d’ and ‘g’. These alpha characters are accessed from the numeric keys [2], [3] and [4].
• In the Keyboard Properties dialog box, tap on the Backlight tab. Adjusts light intensity. Determines the duration of time that the keyboard backlight stays on when unit is not in use. Keeps keyboard backlight on when unit is using external power. 2.4 The Display 7530 G2s are equipped with display backlighting to improve character visibility in low light conditions. The backlight switches on when a key is pressed and the ambient light is below the set threshold.
Note: Keep in mind that this option may be restricted to supervisory use only. Adjusts the intensity of the backlight. Sets duration of time the backlight stays on at the configured intensity when the unit is not in use. Sets duration of time the backlight stays on at half the configured intensity when the unit is not in use. 2.4.2 Adjusting The Contrast The display contrast can be adjusted from the unit keyboard using the [BLUE] key and function keys [F1] and [F2].
• Tap on the [Recalibrate] button. • Follow the onscreen directions to calibrate the display. 2.5 7530 G2 Indicators 7530 G2s use LEDs (Light Emitting Diodes), onscreen messages and audio tones as indicators. 2.5.1 LEDs The 7530 G2 is equipped with four tri-coloured LEDs. This section outlines what these LEDs indicate. Important: If an LED is illuminated in red, the operator should be cautious as this generally indicates an abnormal operating condition or active laser emission.
Radio Traffic LED User Application LED Scanner LED Charge LED Charge LED The lower-right LED is reserved for internal charger/power status. and is active even when the 7530 G2 is inserted in a docking station (and in suspend mode). Function Charge LED Behaviour External power not available. Fully charged to within 95% of charge capacity. Quick charge successfully completed to within 75% of charge capacity. Charge in progress. LED off. LED displays solid green colour. LED flashes slow green.
Radio Traffic LED The upper-left LED on your 7530 G2 flashes either yellow (transmit) or green (receive). Note: Keep in mind that while the standard 802.11 radio supports the transmit/receive LED, not all radios support this function. Scan LED Successful scans are indicated in two ways – with a scan LED and with an audio tone. Function Scan in progress Successful scan Unsuccessful scan Scan LED Behaviour LED displays solid red during scan. LED displays solid green after decode. Off when scan ended.
The taskbar changes dynamically, and only those icons that are applicable are displayed. For example, if a radio is not installed in your 7530 G2, the radio signal icon is not displayed in the taskbar. Note: Refer to “The Taskbar” on page 42 for additional details. Windows Start Button If you have a touchscreen, you can display the Start Menu by tapping on the Windows® Start button in the taskbar.
Battery Gauge The battery shaped icon displayed in the taskbar provides a visual indication of the remaining battery power. When the battery level is low – approximately 15 minutes from empty – a warning window pops up. When the battery power is completely depleted, a final warning window indicates that the 7530 G2 will be powered down. If the 7530 G2 is using external AC power, an AC icon is displayed.
Narrow Band Radio Signal Quality Good Reception Weak No Radio Reception Link Tethered Devices When a peripheral is attached to the tether port and activated, an associated icon appears in the taskbar. Scanner USB Device RFID Serial Device Docking Device When a 7530 G2 is inserted in a docking station, charger or cradle, an associated icon appears in the taskbar.
Bluetooth Radio This icon represents the Bluetooth radio installed in your 7530 G2. 2.5.3 Audio Indicators The 7530 G2 beeper provides a variety of sounds and can be configured to emit a sound under a variety of conditions. Refer to ‘Volume Adjustment’ in Chapter 5 of the ‘7530 G2 Hand-Held Computer User Manual’ for details about determining when your unit will beep.
To access the radio signal icon: • Tap on the radio icon in the taskbar to display the radio quality dialog box. Note: Moving in and out of the radio coverage area can have varying effects on a network session. At times, you may need to renew your connection by logging in again. 2.7 Checking The Scanner If your 7530 G2 is equipped with an internal scanner, you can test it to ensure that it is operating properly.
• Hold the scanner closer for bar codes with bars that are close together. 2.7.2 Scan LED Indicators The 7530 G2 scanner LED (the lower-left LED) indicates whether or not your scan is successful. Refer to “LEDs” on page 31 for details. A bar code icon appears on the screen during a scan. While the scanner beam is active, the onscreen message states – SCANNING. If the scan is successful, the bar code data is displayed on the screen until the scan button (or pistol trigger) is released. 3.
To open a file, launch an applet or open a folder: • Double-tap the stylus on the appropriate icon. 3.2 Navigating Using The Keyboard You can also choose icons and navigate dialog boxes, display the desktop, and so on using the keyboard (rather than the touchscreen). Keep in mind that unlike a desktop computer, the 7530 G2 does not support key chording (pressing two keys at the same time). You must press one key followed by the next in sequence.
3.3 The Startup Desktop When the 7530 G2 boots up, the startup desktop is displayed. Any applications stored in the Startup folder will start up immediately. The Startup folder is located in \Windows\Startup and \Flash Disk\Startup. 3.3.1 Accessing Desktop Icons • Tap on the icon to open a window or, in the case of an application icon, launch an application.
3.3.2 The Taskbar The 7530 G2 is equipped with a taskbar at the bottom of the screen. It displays icons through which you can view the security level, battery capacity and radio signal quality of your unit. A 7530 G2 attached to a charger, cradle, docking station or PDM displays the associated icon. The taskbar also displays active modifier keys – [SHIFT], [ALT], [CTRL], [BLUE] and [ORANGE]. Keys that have been locked “on” are displayed in uppercase letters.
• Press the [DOWN] arrow key to highlight the Shortcut menu. Press the [RIGHT] arrow key to display the sub-menu. Type [Y] to choose System Tray from the menu. • Press the [LEFT] and [RIGHT] arrow keys to highlight the icon in the taskbar about which you’d like more information. As each taskbar is highlighted, a tooltip is displayed, providing the status of the icon. • To display the dialog box associated with a taskbar icon, press the [ENTER] key. 3.
The Desktop Choosing Desktop from the Start Menu displays the 7530 G2 desktop. Security Settings To assign a security level: • Choose Security from the Start Menu. • Choose a security level from the dialog box. To allow access to all the Start Menu and taskbar options, choose the Supervisor security level. To change the password: Note: Keep in mind that this is the same password as that assigned through the Password control panel applet.
Programs Program displays a sub-menu of options with which you can work access applications. Shortcuts Choosing Shortcuts provides access to the System Tray, Cycle Tasks and the Task Manager.
The System Tray The System Tray option allows access to the icons in the taskbar at the bottom of the screen. The taskbar displays indicators such as a battery capacity gauge and the security level. These indicators are attached to dialog boxes that provide additional information. • Choose System Tray from the Start Menu. When System Tray is chosen, the taskbar icons become accessible.
• Press [ALT][ESC]. Settings The Settings menu provides access to the Control Panel applets, lets you configure your radio (Network and Dial-up Connections) and customize the Taskbar and Start Menu.
Run Choosing the Run option displays a dialog box in which you can enter the name of the program, folder or document you want to open. Shutdown With Shutdown highlighted, pressing the [RIGHT] arrow key displays options for shutting down you 7530 G2. Suspends the 7530 G2 immediately – equivalent to turning the unit off. Resets the 7530 G2, leaving all saved files and (registry) settings intact. Unsaved data is lost. Resets the 7530 G2. Files stored outside of permanent memory are lost.
Note: The Shutdown menu varies depending on the security level chosen. At ‘Supervisor’ security level, a sub-menu like the one in the sample screen is displayed. At ‘User’ security level, choosing ‘Suspend’ causes the computer to shut down immediately. A sub-menu is not available. 3.5 Using A Dialog Box A dialog box like the samples below appears when you need to make selections and enter further information.
Dropdown: This type of menu is identified by up and down arrows next to the dropdown menu to indicate that additional options are available. Tap on the menu to highlight it, and tap on the arrows attached to the menu to cycle through the options. Checkbox: This box allows you to select or deselect an option. To select or deselect a checkbox, tap the stylus in the checkbox. A checkmark is displayed in an active checkbox. Radio buttons: These buttons allow you to choose from a number of options.
Parameter SE 1200HP Scan Angle/ 42º ± 2º Field of View Symbologies Most linear codes Supported SE 1200LR SE 1200ALR 23º ± 2º 13º ± 2º Most linear codes Most linear codes 4.2 SE 1224HP, SE 2223 PDF & SE 1524ER Parameter SE 1224HP Type Laser Class 2 Visible laser diode Light Source 650 nm Output Power 1.35 mW Scan Patterns Linear Scan Angle/ 42º typical, Field of View 30º narrow Symbologies Supported Most linear codes SE 2223 PDF SE 1524ER Laser Class 2 Visible laser diode 650 nm 0.
5. General Maintenance 5.1 Caring For The Touchscreen The touchscreen can be permanently damaged by harsh chemicals and is susceptible to abrasions and scratches. Using sharp objects on the touchscreen can scratch or cut the plastic or crack the internal conductive coating. Protect the touchscreen from the following chemicals: • mustard, ketchup • sodium hydroxide, • concentrated caustic solutions, • benzyl alcohol, and • concentrated acids.
6. Support Services & Worldwide Offices Psion Teklogix provides a complete range of product support services to its customers worldwide. These services include technical support and product repairs. 6.1 Technical Support For technical support in North America: Call Toll free: +1 800 387 8898 Option 3 or Direct Dial: +1 905 813 9900 Ext. 1999 Option 3 For technical support in EMEA (Europe, Middle East and Africa), please contact the local office listed in the website below: http://www.psionteklogix.
6.2 Product Repairs For repair service in North America: Call Toll free: +1 800 387 8898 Option 2 or Direct Dial: +1 905 813 9900 Ext. 1999 Option 2 For repair service in EMEA (Europe, Middle East and Africa), please contact the local office listed in the website below: http://www.psionteklogix.com/EMEASupport For repair service in Asia, please contact the local office listed in the website below: http://www.psionteklogix.com 6.3 Worldwide Offices COMPANY HEADQUARTERS Psion Teklogix Inc.
NORTH AMERICAN HEADQUARTERS AND U.S. SERVICE CENTRE Psion Teklogix Corp. 1810 Airport Exchange Boulevard Suite 500 Erlanger, Kentucky USA 41018 Tel: +1 859 371 6006 Fax: +1 859 371 6422 E-mail: salesusa@psion.com INTERNATIONAL SUBSIDIARIES (SEE ALSO WWW.PSIONTEKLOGIX.COM) Psion Teklogix S.A. La Duranne 135 Rue Rene Descartes BP 421000 13591 Aix-En-Provence Cedex 3; France Tel: +33 4 42 90 88 09 Fax: +33 4 42 90 88 88 E-mail: tekeuro@psion.