
User manual


Table Of Contents
- WORKABOUT PRO Hand-Held Computer With Windows Mobile 2003 SE
- Program License Agreements
- Approvals And Safety Summary
- Introduction 1
- Basic Checkout 2
- Getting To Know The WORKABOUT PRO 3
- 3.1 Features Of The WORKABOUT PRO C
- 3.2 Features of the WORKABOUT PRO S
- 3.3 The Batteries
- 3.4 Switching The Hand-Held On And Off
- 3.5 The WORKABOUT PRO C Keyboard
- 3.6 The WORKABOUT PRO S Keyboard
- 3.7 The Display
- 3.8 Indicators
- 3.9 Monitoring The Battery And Maximizing Run Time
- 3.10 Uploading Data In A Docking Station
- 3.11 Bluetooth Radio
- 3.12 The SD/MMC Card-Adding Memory
- 3.13 General Maintenance
- Working With Windows Mobile 2003 SE 4
- 4.1 Navigating In Windows Mobile 2003 SE And Applications
- 4.2 Windows Mobile 2003 Desktop-Today Screen
- 4.3 Start Menu
- 4.4 New Menu
- 4.5 Managing Files And Folders
- 4.6 Using Menus
- 4.7 The Taskbar
- 4.8 Programs-Using Applications
- 4.9 Settings
- 4.10 Help
- 4.11 Entering Text
- Connecting To A LAN With 802.11b 5
- Settings 6
- 6.1 Personal Settings
- 6.2 Buttons Icon
- 6.3 Input
- 6.4 Menus
- 6.5 Owner Information
- 6.6 Password
- 6.7 Sound & Notifications
- 6.8 Today Screen
- 6.9 System Settings
- 6.10 About
- 6.11 About Device
- 6.12 Backlight
- 6.13 Certificates
- 6.14 Clock & Alarms
- 6.15 Memory
- 6.16 Power Icon
- 6.17 Regional Settings
- 6.18 Remove Programs
- 6.19 Screen Icon
- 6.20 Scanner Settings
- 6.20.1 Decoded (Internal) Scanners
- 6.20.1.1 Options - Decoded (Internal) Scanner
- 6.20.1.2 Data Options - Decoded (Internal) Scanner
- 6.20.1.3 Code 39
- 6.20.1.4 Code 128
- 6.20.1.5 EAN 13
- 6.20.1.6 EAN 8
- 6.20.1.7 UPC A
- 6.20.1.8 UPC E
- 6.20.1.9 UPC/EAN Shared Settings
- 6.20.1.10 Codabar
- 6.20.1.11 Code 93
- 6.20.1.12 Interleaved 2 of 5
- 6.20.1.13 MSI Plessey
- 6.20.1.14 Discrete 2 of 5
- 6.20.1.15 2D PDF-417 (not supported)
- 6.20.1.16 2D Micro PDF-417 (not supported)
- 6.20.1.17 2D RSS Code (not supported)
- 6.20.1.18 Composite (not supported)
- 6.20.2 Decoded (Intermec ISCP)
- 6.20.3 Imager
- 6.20.3.1 Options - Imager
- 6.20.3.2 Code 39 Settings
- 6.20.3.3 Code 128 Settings
- 6.20.3.4 UPC/EAN
- 6.20.3.5 Codabar
- 6.20.3.6 Code 93
- 6.20.3.7 Interleaved 2 of 5
- 6.20.3.8 Postal: Australian
- 6.20.3.9 Postal: Japanese
- 6.20.3.10 Postal: Korean
- 6.20.3.11 Postal: PlaNET
- 6.20.3.12 Postal: PostNET
- 6.20.3.13 Postal: Royal
- 6.20.3.14 2D DataMatrix
- 6.20.3.15 2D Maxicode
- 6.20.3.16 2D PDF-417
- 6.20.3.17 2D Micro PDF-417
- 6.20.3.18 2D QR Code
- 6.20.3.19 2D RSS Code
- 6.20.3.20 Aztec
- 6.20.3.21 Composite
- 6.20.4 Options Tab
- 6.20.5 Translations Tab
- 6.20.1 Decoded (Internal) Scanners
- 6.21 Wireless WAN
- 6.22 Total Recall
- 6.23 Connections
- 6.24 Setting Up A Network Card
- 6.25 Bluetooth Setup
- Programs 7
- 7.1 Games
- 7.2 ActiveSync®
- 7.3 Calculator
- 7.4 Calendar
- 7.5 Contacts
- 7.6 File Explorer
- 7.7 Find
- 7.8 Messaging-The Inbox
- 7.8.1 Folders
- 7.8.2 Synchronizing E-mail With Outlook
- 7.8.3 Changing Synchronization Settings
- 7.8.4 Mail Server Accounts-Creating, Editing & Deleting
- 7.8.5 Downloading Messages From A Remote Server
- 7.8.6 Replying And Forwarding Messages
- 7.8.7 Receiving Attachments
- 7.8.8 Creating And Sending A Message
- 7.8.9 Attaching A File
- 7.8.10 Deleting A Message
- 7.8.11 Storage Options
- 7.9 MSN Messenger
- 7.10 Notes
- 7.11 Pictures
- 7.11.1 Moving Photos To The WORKBOUT PRO
- 7.11.2 Opening A Photo
- 7.11.3 Deleting A Photo
- 7.11.4 Editing A Photo
- 7.11.5 Creating A Slide Show
- 7.11.6 Pocket Excel
- 7.11.7 Workbook Components
- 7.11.8 Moving Between Worksheets
- 7.11.9 Adding, Deleting And Renaming Worksheets
- 7.11.10 Entering Data In A Worksheet
- 7.11.11 Working With Cells, Rows and Columns
- 7.11.12 Creating Formulas
- 7.12 Pocket Word
- 7.13 Tasks
- 7.14 Terminal Services Client
- 7.15 Windows Media
- Expansion Modules 8
- Peripheral Devices & Accessories 9
- 9.1 Carrying Accessories
- 9.2 The Batteries
- 9.3 Chargers And Docking Stations
- 9.4 Desktop Docking Station
- 9.4.1 Charging A Battery Installed In The WORKABOUT PRO
- 9.4.2 Charging A Spare Battery
- 9.4.3 Battery Charge Duration
- 9.4.4 Charger LED Indicators
- 9.4.5 Troubleshooting The Charging Operation Of The Dock
- 9.4.6 Desktop Docking Station Ports
- 9.4.7 Linking A WORKABOUT PRO To A PC
- 9.4.8 Linking A WORKABOUT PRO To An Ethernet Network
- 9.4.9 Troubleshooting The Docking Station Operations
- 9.5 Single Battery Charger-Model #WA3001
- 9.6 Quad Battery Charger-Model #WA3004
- 9.7 Quad Docking Station-Model #WA4004
- 9.8 AC Wall Adaptor And Tether Cable
- 9.9 Cigarette Lighter Adaptor
- 9.10 The Vehicle Cradle
- 9.11 Bluetooth Peripherals
- Specifications 10
- Support Services And Worldwide Offices
- Port Pinouts
Psion Teklogix WORKABOUT PRO With Windows Mobile 2003 SE User Manual 29
Chapter 3: Getting To Know The WORKABOUT PRO
Locking Modifier Keys
3.5.1.2 Locking Modifier Keys
Note: The locking behaviour of the modifier keys can be changed so that, for
example, pressing any of these keys once will lock the keys ‘on’. Refer to
“One Shots” on page 82 for details. Note too that by default, the
<ORANGE> key is locked ‘on’ when pressed only once.
When a modifier key is pressed twice to lock it ‘on’, it will remain active until it is
pressed a third time to unlock or turn it off.
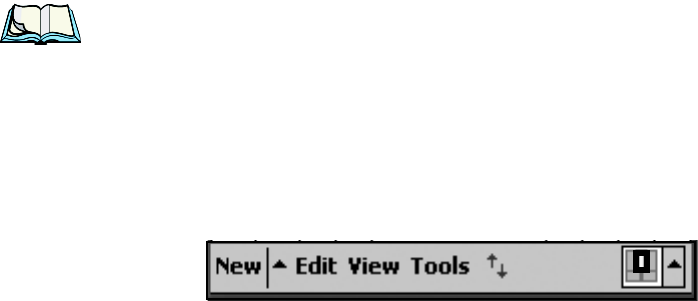
To help you identify when a modifier key is locked ‘on’, the key is represented in
the shift-state indicator icon with a black frame around it.
Figure 3.7 Shift-State Indicator Icon – Locked Modifier Key
Once a modifier key is unlocked, the shift-state indicator icon is replaced by the soft
keyboard icon in the taskbar.
3.5.2 The Keys
The <SHIFT> Key
The <SHIFT> key is used to display uppercase alpha characters and provide access
to the symbols above the numeric keys. Pressing this key twice locks it ‘on’ so that
when you press an alpha key, an upper case character is displayed. When you press
a numeric key, the associated symbol on the numeric key is displayed on the screen.
Pressing <BLUE> <SHIFT> allows the <SHIFT> key to act as a <CAPS> key, dis-
playing uppercase characters.
The Arrow Keys
The Arrow keys are located on the grey, circular key at the top of the keyboard,
directly below the display. The arrow keys move the cursor around the screen
–up,
down, left and right. The cursor is the flashing box or underline character that indi-
cates where the next character you type will appear.
The <BKSP/DEL> Key
The <BKSP> key (sometimes referred to as destructive backspace) moves the
cursor one character to the left, erasing the incorrectly entered key stroke.
The <DEL> key (<BLUE> <BKSP>) erases the character at the cursor position.