
Installation guide

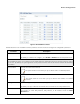


Table Of Contents
- Preface
- Introduction
- Management and Monitoring Capabilities
- Device Initialization
- Basic Configuration
- Device Configuration
- Device Management
- Device Monitoring
- Troubleshooting
- Frequency Domains and Channels
- Bootloader CLI and Scan Tool
- ASCII Character Chart
- Frequently Asked Questions (FAQs)
- Glossary
- Abbreviations
- Statement of Warranty
- Technical Services and Support
Device Configuration
ORiNOCO® 802.11n Access Points - Software Management Guide 88
Click OK and COMMIT, to save the configured parameters.
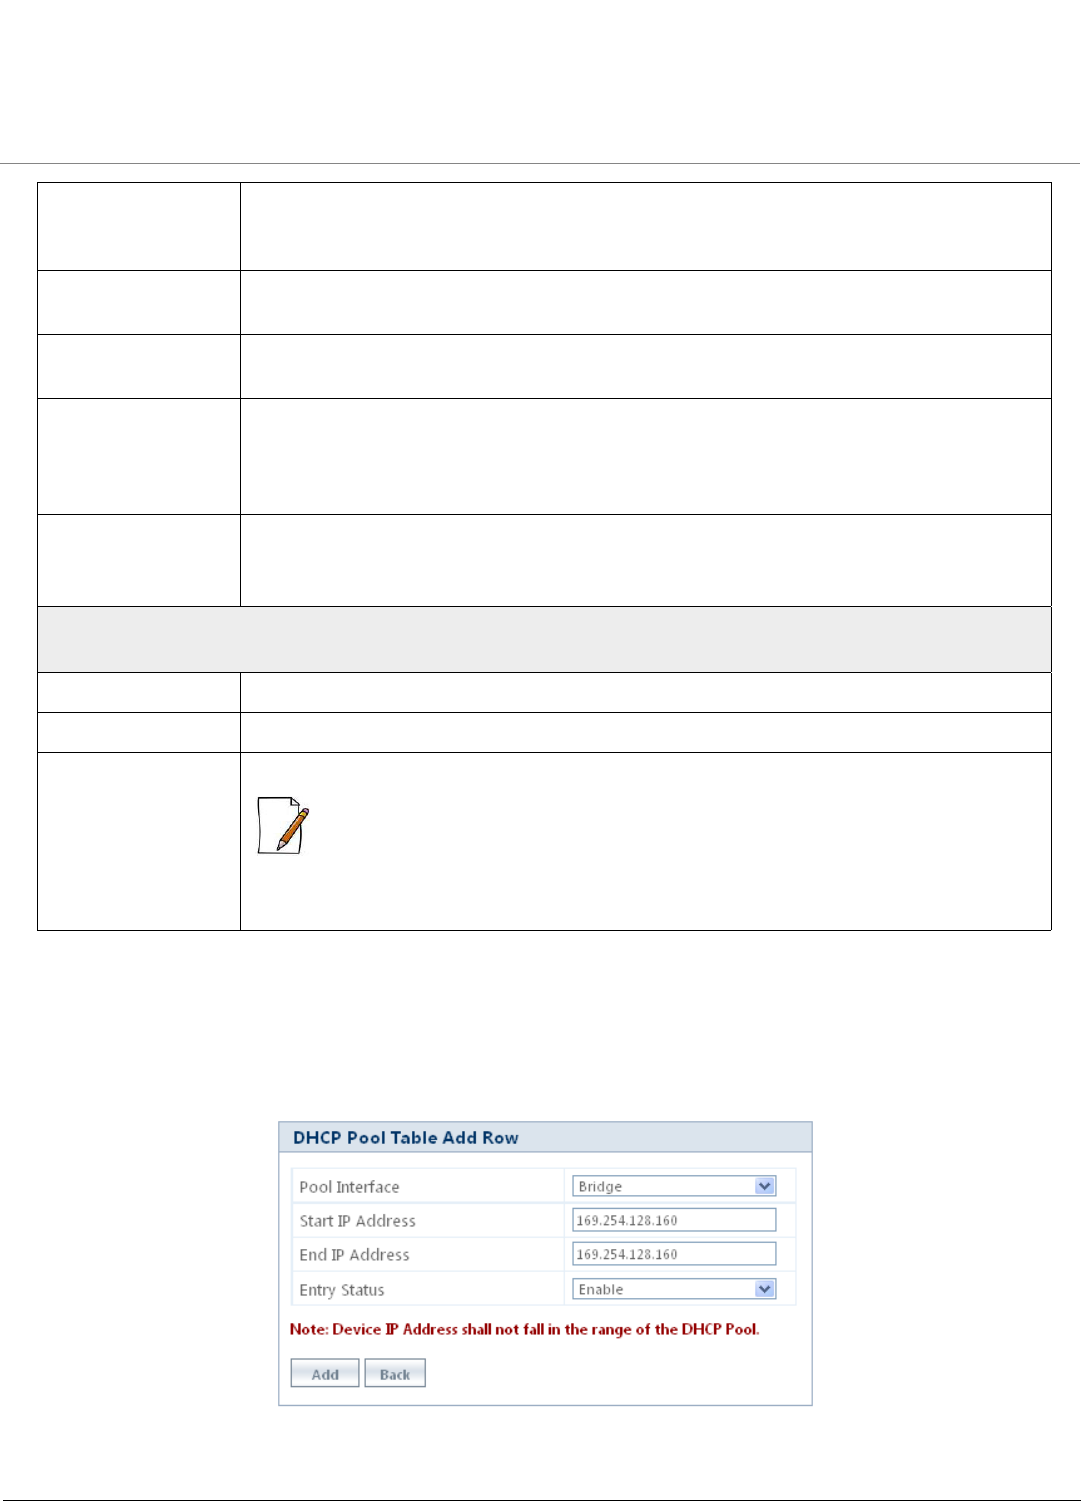
5.9.1.1 Add an Entry to DHCP Pool Table
To add an entry to the DHCP Pool Table, click Add in the DHCP Server screen. The DHCP Pool Table Add Row screen
appears.
Figure 5-48 DHCP Pool - Add an Entry
Default Gateway Specifies the default gateway to be sent to the client along with the assigned IP Address.
Default Gateway is a node that serves as an accessing point to another network. To
configure, enter the Default Gateway address.
Primary DNS Specifies the primary DNS (Domain Name Server) IP address to be sent to the client. To
configure, enter the Primary DNS address.
Secondary DNS Specifies the secondary DNS IP address to be sent to the client. To configure, enter the
Secondary DNS address.
Default Lease Period Specifies the least time offered by the DHCP server, to the client on that interface.
By default, it is taken as 86400 seconds. To configure, enter a value ranging from 3600 to
172800 seconds.
Status Specifies the status of DHCP server functionality over the interface.
By default, it is disabled. To configure, select Enable or Disable from the drop down menu.
DHCP Pool Table
The DHCP Pool Table contains the following information:
Start IP Address Specifies the Start IP Address of the pool.
End IP Address Specifies the End IP Address of the pool.
Delete This parameter allows you to delete the added pool entry.
:
• A pool entry can be deleted but not edited.
• To enable DHCP Server, atleast one pool must be configured.