
System information


Switch Station Locator
213
• “Community” text box—Enter the IP community of the switch on which you want to
locate stations. Note that this string is case sensitive.
• “SNMP Version” dropdown box—Make sure that you match this entry to the version
SNMP running on the switch.
• “Use Alias List” dropdown box—Choose either “no alias list” or a local Observer (or
Remote Probe) alias lookup table to display the alias in addition to the MAC address
for each station found.
• “Refresh every xxxx minutes” checkbox/spinbox:—Checking this option causes the
Switch Station Locator to repeat the station query every given number of minutes
(from 0-9999)
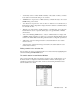
• “Choose from Existing SNMP devices...” button—Click this button to display a list
of SNMP-configured switches recognized on your network. Double-click the desired
switch to auto-fill the Edit Switch dialog with that switch's configuration parameters.
• “OK” button—Save the settings and return to the Switch Station Locator switch
selection window.
• “Cancel” button—Abandon the changes and return to the Switch Station Locator
switch selection window.
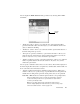
Editing a Switch in the Selection List
You can change any of the properties listed above for a listed switch by highlighting that
switch and clicking the Edit Switch button.
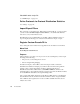
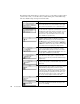
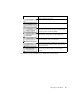
The Switch Station Locator Monitor Window
Once you have added all of the new switches you want to query, double-click on one of
the listed switches to display the Switch Station Monitor window, which displays the
switch being queried in the window title, and shows the following information about
stations attached to the switch: