
Installation guide


Chapter 6
62 Sniffer Technologies
9 Click OK.
Windows 2000 scans for the appropriate driver and presents the Driver
Files Search Results window indicating that it has found the driver you
specified in the previous step.
10 Click Next in the Driver Files Search Results window.
11 The Digital Signature Not Found warning appears asking you if you
want to continue the installation. Click Yes to continue the installation.
The Wizard installs the selected driver. When it has finished, it presents
the Completing the Found New Hardware Wizard window.
12 Click Finish to finish the installation.
13 Restart the computer.
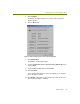
14 Verify that the correct driver is installed correctly by examining its
Device Name entry in the Network and Dial-Up Connections window:
a Right-click the My Network Places icon on the desktop and select
Properties.
b Select the entry in the Network and Dial-Up Connections window
for the wireless adapter and verify that the entry in the Device
Name column appears in the following format:
Sniffer (vendor name) - card description
If the driver for the wireless adapter does not appear in this format,
you will need to repeat the installation procedure to install the
driver.
15 At this point, the Aironet 340/350 wireless adapter should be installed
with the Network General driver in Windows 2000. See Creating a Local
Agent to Use the Wireless LAN Adapter on page 79 to create a new local
agent in the Sniffer software to use the adapter.
Updating Existing Drivers
For Windows 2000, you update an existing driver using the Device Manager.
The procedure is the same regardless of whether you are updating the
vendor’s existing driver or a previous version of the Sniffer driver.
To update an existing driver for the Cisco Aironet adapter in Windows
2000:
1 If the currently installed driver is the native Cisco driver:
a Remove any installed copies of the Aironet Client Utility.