
User`s guide
Troubleshooting 62
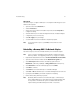
Windows NT
Follow these steps to configure a Harmony 802.11a adapter’s networking protocols in
a Windows NT computer:
1. Open the Control Panel’s Network icon.
2. Click the Protocols tab.
3. Select a protocol from the list of installed components and click Properties to
configure its settings.
4. Select the Harmony 802.11a network adapter from the list of installed adapters.
5. Configure the protocol as necessary.
6. Click OK or Apply save your changes.
7. Close the Network screen and restart the computer if prompted.
Note: To add a new client or protocol, click Add... and follow the on-screen
instructions.
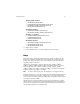
Uninstalling a Harmony 802.11a Network Adapter
Follow these steps if you need to uninstall a Harmony 802.11a network adapter:
Note: You do not need to uninstall the current software to upgrade to the latest
Harmony software. See “Upgrading to Version 1.4” on page 22 for details.
1. Right-click the Status Monitor and choose Remove Status Monitor From Task Bar.
2. Open the Control Panel and double-click the Add/Remove Programs icon.
3. Select Harmony 802.11a from the list of installed programs and click
Add/Remove... (Windows 98/ME/NT) or Change/Remove (Windows XP/2000).
4. Select Automatic from the list of uninstall options and click Next.
5. Click Finish to continue.
6. Click Remove to remove the Harmony 802.11a Network Adapter.
7. Cl i ck Close or OK after the Harmony 802.11a Network Adapter has been removed.
8. If prompted, click Cancel to prevent the computer from restarting.
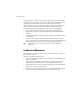
9. Remove the following driver files, if present:
Note: By default, Windows will hide some of these file types. Confirm that you
have configured Windows to show all files before assuming that these files
are not present. The Hidden Files option is available under the Folder
Options heading of the Windows Explorer’s View or Tools menu.