
Installation guide


Chapter 1
6 Sniffer Portable
data, you can re-enable the unused adapter if desired.
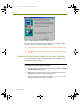
2 From the Sniffer Portable Application CD, double-click SnifferPro.exe.
If the target PC supports the autorun function, an installation menu will
automatically appear after inserting the Application CD. Select the
Install Product option from this menu.
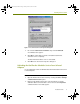
NOTE: If the installation menu does not appear automatically, you can
also go to Start > Run, and enter <
drive letter>:\setup and click OK.
<drive letter> is the physical drive letter of the CD-ROM drive.
3 During the installation of the Sniffer Portable software, the Setup
program will perform some different steps depending on the target
system’s operating system and existing configuration. The following
notes describe some common occurrences during Sniffer Portable
installations, as follows:
Uninstalling the QoS Packet Scheduler Service on page 7
(Windows XP and Windows 2000)
Removing the MAC Bridge Miniport Driver on XP on page 10
(Windows XP)
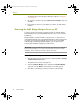
4 In the Setup Complete window, click Finish and restart your computer
as prompted.
5 Start Sniffer Portable from Start > Programs > Network General >
Sniffer Portable > Sniffer.
Sniffer Portable is installed with a temporary license configured to
expire 15 days after the application is started for the first time. After
connecting to Sniffer Portable for the first time, you will see a message
indicating you need to authorize the software within 15 days. The
15-day period is called the "pre-authorization" period.
Before the 15 day pre-authorization period expires, you must authorize
the Sniffer Portable software option(s) that you legally own. Failure to
authorize the Sniffer Portable software will cause the hardware to
automatically reboot and revert to an "unauthorized" state. You will not
be able to use the Sniffer Portable software until it is properly
authorized. See
Authorizing Sniffer Portable on page 13 for more
information.
100413Portable_Install.book Page 6 Friday, March 25, 2005 2:22 PM