Access Point User Guide
Table Of Contents
- Introduction
- Installation and Initialization
- System Status
- Advanced Configuration
- System
- Network
- Interfaces
- Management
- Filtering
- Alarms
- Bridge
- QoS
- Radius Profiles
- SSID/VLAN/Security
- Monitoring
- Commands
- Troubleshooting
- Command Line Interface (CLI)
- General Notes
- Command Line Interface (CLI) Variations
- CLI Command Types
- Using Tables and Strings
- Configuring the AP using CLI commands
- Set Basic Configuration Parameters using CLI Commands
- Set System Name, Location and Contact Information
- Set Static IP Address for the AP
- Change Passwords
- Set Network Names for the Wireless Interface
- Enable 802.11d Support and Set the Country Code
- Enable and Configure TX Power Control for the Wireless Interface(s)
- Configure SSIDs (Network Names), VLANs, and Profiles
- Download an AP Configuration File from your TFTP Server
- Backup your AP Configuration File
- Set up Auto Configuration
- Other Network Settings
- Configure the AP as a DHCP Server
- Configure the DNS Client
- Configure DHCP Relay
- Configure DHCP Relay Servers
- Maintain Client Connections using Link Integrity
- Change your Wireless Interface Settings
- Set Ethernet Speed and Transmission Mode
- Set Interface Management Services
- Configure Syslog
- Configure Intra BSS
- Configure Wireless Distribution System
- Configure MAC Access Control
- Set RADIUS Parameters
- Set Rogue Scan Parameters
- Set Hardware Configuration Reset Parameters
- Set VLAN/SSID Parameters
- Set Security Profile Parameters
- CLI Monitoring Parameters
- Parameter Tables
- CLI Batch File
- ASCII Character Chart
- Specifications
- Technical Support
- Statement of Warranty
- Regulatory Compliance

Advanced Configuration AP-4000 Series User Guide
Alarms
96
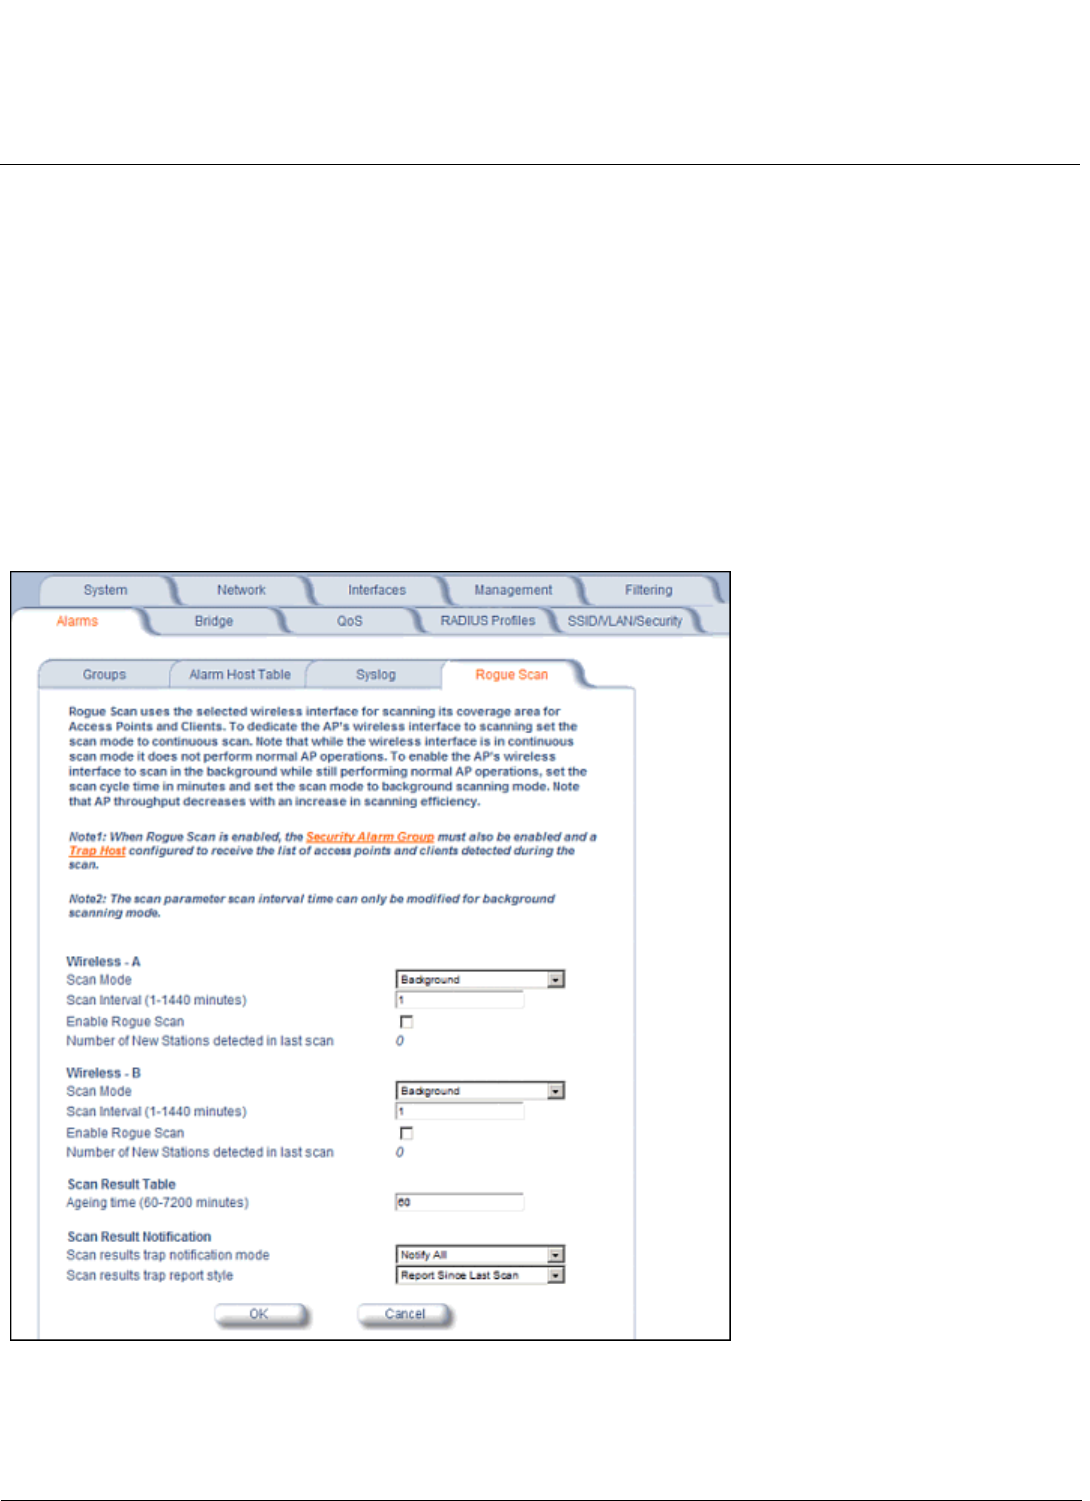
7. Configure the Scan Results Trap Notification Mode to control the notification behavior when APs or stations are
detected in a scan:
• No Notification
•Notify AP
• Notify Client
• Notify All (Notify both AP and Client detection)
8. Configure the Scan Results Trap Report Style to control the way detected stations are reported in the notification:
• Report all detected stations since last scan (default)
• Report all detected stations since start of scan
9. Configure the second wireless interface, if required.
10.Click OK.
The results of the Rogue Scan can be viewed in the Status page in the HTTP interface.
Figure 4-28 Rogue Scan Screen


