
Access Point User Guide
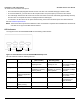
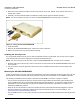
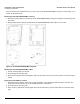
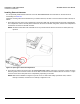
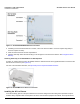

Table Of Contents
- Introduction
- Installation and Initialization
- System Status
- Advanced Configuration
- System
- Network
- Interfaces
- Management
- Filtering
- Alarms
- Bridge
- QoS
- Radius Profiles
- SSID/VLAN/Security
- Monitoring
- Commands
- Troubleshooting
- Command Line Interface (CLI)
- General Notes
- Command Line Interface (CLI) Variations
- CLI Command Types
- Using Tables and Strings
- Configuring the AP using CLI commands
- Set Basic Configuration Parameters using CLI Commands
- Set System Name, Location and Contact Information
- Set Static IP Address for the AP
- Change Passwords
- Set Network Names for the Wireless Interface
- Enable 802.11d Support and Set the Country Code
- Enable and Configure TX Power Control for the Wireless Interface(s)
- Configure SSIDs (Network Names), VLANs, and Profiles
- Download an AP Configuration File from your TFTP Server
- Backup your AP Configuration File
- Set up Auto Configuration
- Other Network Settings
- Configure the AP as a DHCP Server
- Configure the DNS Client
- Configure DHCP Relay
- Configure DHCP Relay Servers
- Maintain Client Connections using Link Integrity
- Change your Wireless Interface Settings
- Set Ethernet Speed and Transmission Mode
- Set Interface Management Services
- Configure Syslog
- Configure Intra BSS
- Configure Wireless Distribution System
- Configure MAC Access Control
- Set RADIUS Parameters
- Set Rogue Scan Parameters
- Set Hardware Configuration Reset Parameters
- Set VLAN/SSID Parameters
- Set Security Profile Parameters
- CLI Monitoring Parameters
- Parameter Tables
- CLI Batch File
- ASCII Character Chart
- Specifications
- Technical Support
- Statement of Warranty
- Regulatory Compliance
Installation and Initialization AP-4000 Series User Guide
Hardware Installation
26
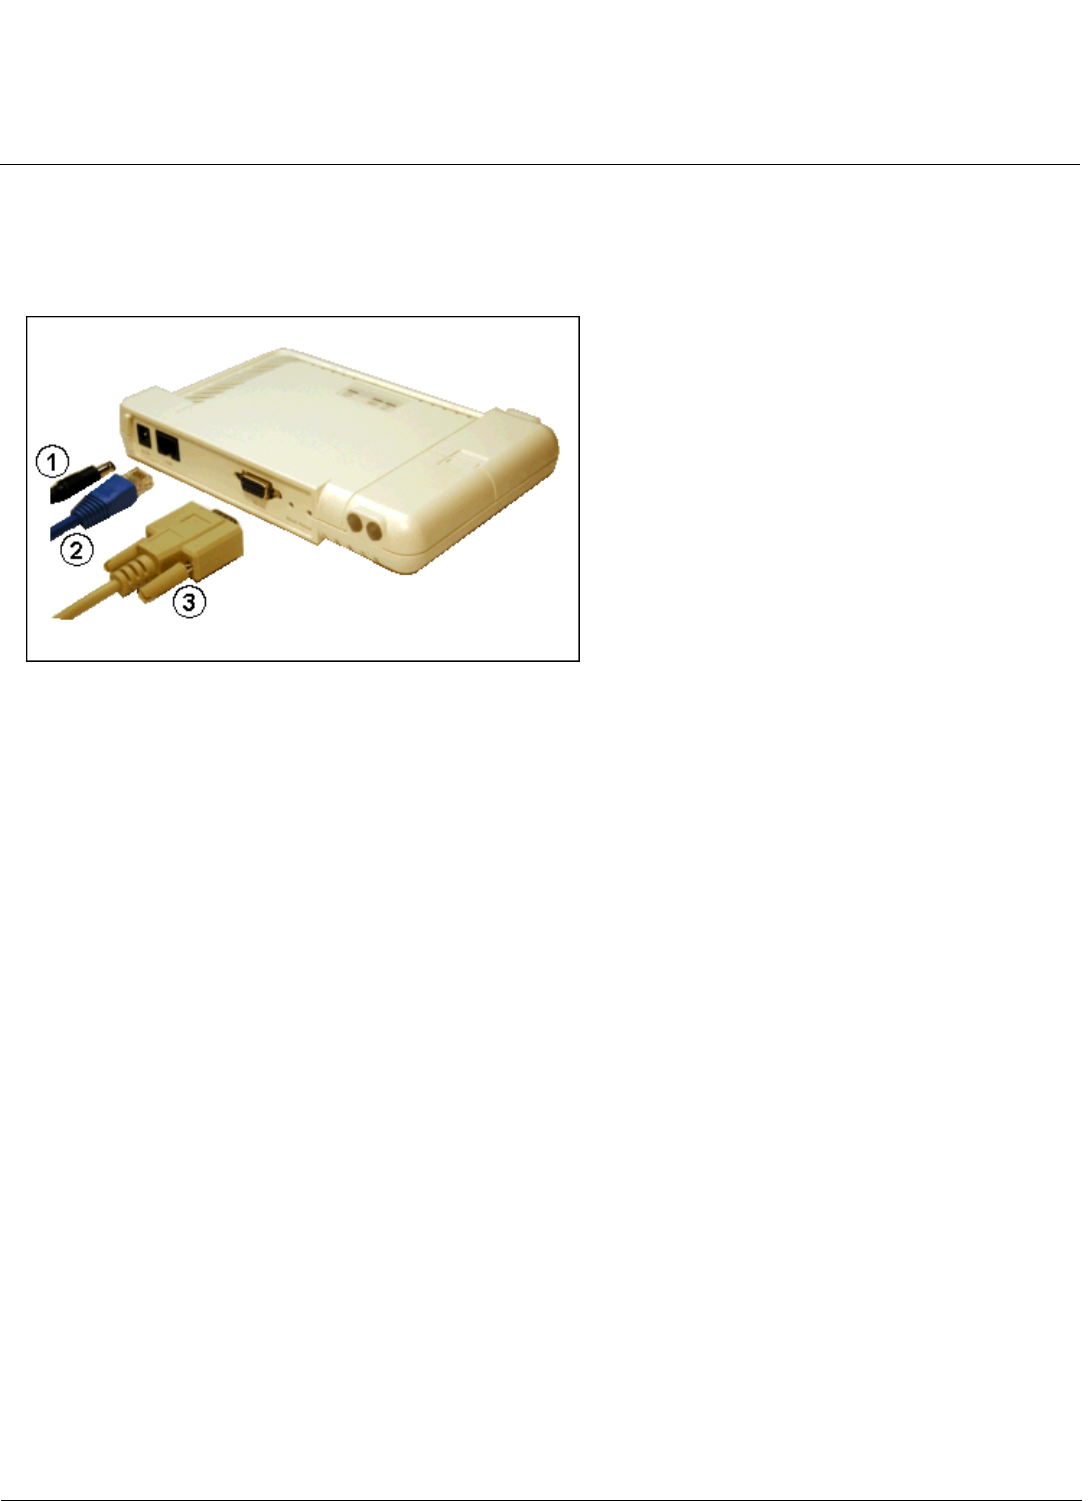
2. Attach one end of an Ethernet cable to the AP's LAN port (the center port, labeled “LAN”) and the other end to a
network hub or switch.
3. Optionally, connect an RS-232 cable to the RS-232 console port (the right port, labeled “RS-232”).
NOTE: You cannot install the security cover to the AP-4000/4000M/4900M if an RS-232 cable is connected.
Figure 2-4 Cabling the AP-4000/4000M/4900M
4. Verify LED Status
5. When the AP-4000/4000M/4900M boots, it performs a series of self-tests.
6. Wait for the power LED to turn green before proceeding.
Installing the Security Cover
You can optionally install a security cover to deter unauthorized access to the AP-4000. The security cover is a plastic
cover that prevents access to the cabling and to the Reset and Reload buttons.
NOTE: You cannot connect an RS-232 cable to the AP-4000/4000M/4900M when a security cover is installed.
1. Slide the hinging end of the security cover into the hole on the rear panel of the AP-4000/4000M/4900M to the left of
the connectors.
2. Use two screws to screw the right side of the security cover to the RS-232 screw holes on the rear panel of the
AP-4000.
Mounting the AP-4000/4000M/4900M
Proxim recommends that you have a site survey professionally conducted to determine the best location for the AP. For
professional site surveyors, Ekahau Site Survey software is included in the Xtras folder on the Installation CD-ROM.
The following considerations must be kept in mind when the AP-4900M is mounted in a vehicle or outdoors:
• The AP must be protected from exposure, and the environmental conditions must be within those specified in the
product datasheet that can be found at http://www.proxim.com/products/wifi/ap/. To most easily comply with these
specifications, Proxim recommends mounting the AP-4900M in the passenger compartment of a vehicle or in a
weatherproof NEMA box outdoors.
• When the AP is mounted within a vehicle, the metallic skin of the vehicle will retard the RF propagation of the AP.
• Proxim recommends the 1086-PGTL adapter with an external vehicular antenna. For more information,, see
http://www.proxim.com/products/wifi/accessories.
• The AP-4900M uses 5 V, not 12 V power. Therefore a 12V-to-5V transformer will be needed when mounting the AP in
a vehicle.