
Install guide

MP.11 and MP.11a Quick Install Guide
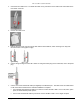
8. If you are not using Active Ethernet, or you want to connect the MP.11/MP.11a to Active Ethernet and AC
power simultaneously, attach the AC power cable to the unit’s power port.
To disconnect the power cable, slide back the black plastic fitting around the connector and gently pull the
connector from the MP.11/MP.11a unit.
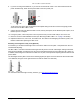
9. Connect the free end of the Ethernet cable to a hub, switch, patch panel, Active Ethernet power injector, or an
Ethernet port on a computer.
10. If using AC power, connect the power cord to a power source (such as a wall outlet) to turn on the unit.
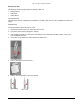
11. Place the unit in the final installation location (see “Mounting the MP.11/MP.11a” on page 7 for details).
12. Replace the back cover, front cover, and cable cover. Be careful to avoid trapping the antenna, power, and
Ethernet cables when replacing the cable cover.
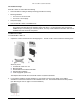
Attaching a Kensington Security Lock (Optional)
If so desired, you can attach a Kensington lock to secure the cable cover into place. This protects the unit from
unauthorized tampering.
The MP.11/MP.11a enclosure includes a Kensington Security Slot for use with a Kensington locking mechanism.
When properly installed, a Kensington lock can prevent unauthorized personnel from stealing the MP.11/MP.11a.
In addition, the Kensington lock secures the cable cover in place, which prevents tampering with the Ethernet and
power cables.
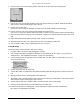
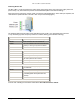
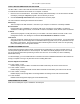
The Kensington Security Slot is shown in the following figures (the figure on the left shows the slot with the cable
cover attached; the figure on the right shows the slot with the cable cover removed).
For information about Kensington security solutions, go to
http://www.kensington.com .
Copyright © 2005 Proxim Corporation. All rights reserved. 6