
Installation Guide
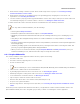
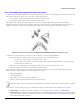

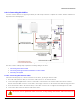
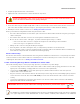
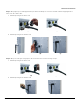
Table Of Contents
- Package Contents
- Getting Started
- Device Overview
- Device Installation
- Technical Specifications
- Device Models
- Accessories
- OFDM Modulation Rates
- Wireless Protocol
- Interfaces
- Transmit Power Specifications (5.150 to 5.850) GHz
- Transmit Power Specifications (2.400 to 2.484) GHz
- Receive Sensitivity (5.150 - 5.850) GHz
- Receive Sensitivity (2.400 to 2.484) GHz
- Power Supply
- Hardware Specifications
- Physical Specifications
- Environmental Specifications
- MTBF
- 6 Recommended Antennas
- Antenna Installation
- Measuring Signal Performance
- Lightning Protection
- Abbreviations
- Warranty and Technical Support
- Safety & Regulatory Information
Antenna Installation
ORiNOCO
®
AP-9200R - Hardware Installation Guide 47
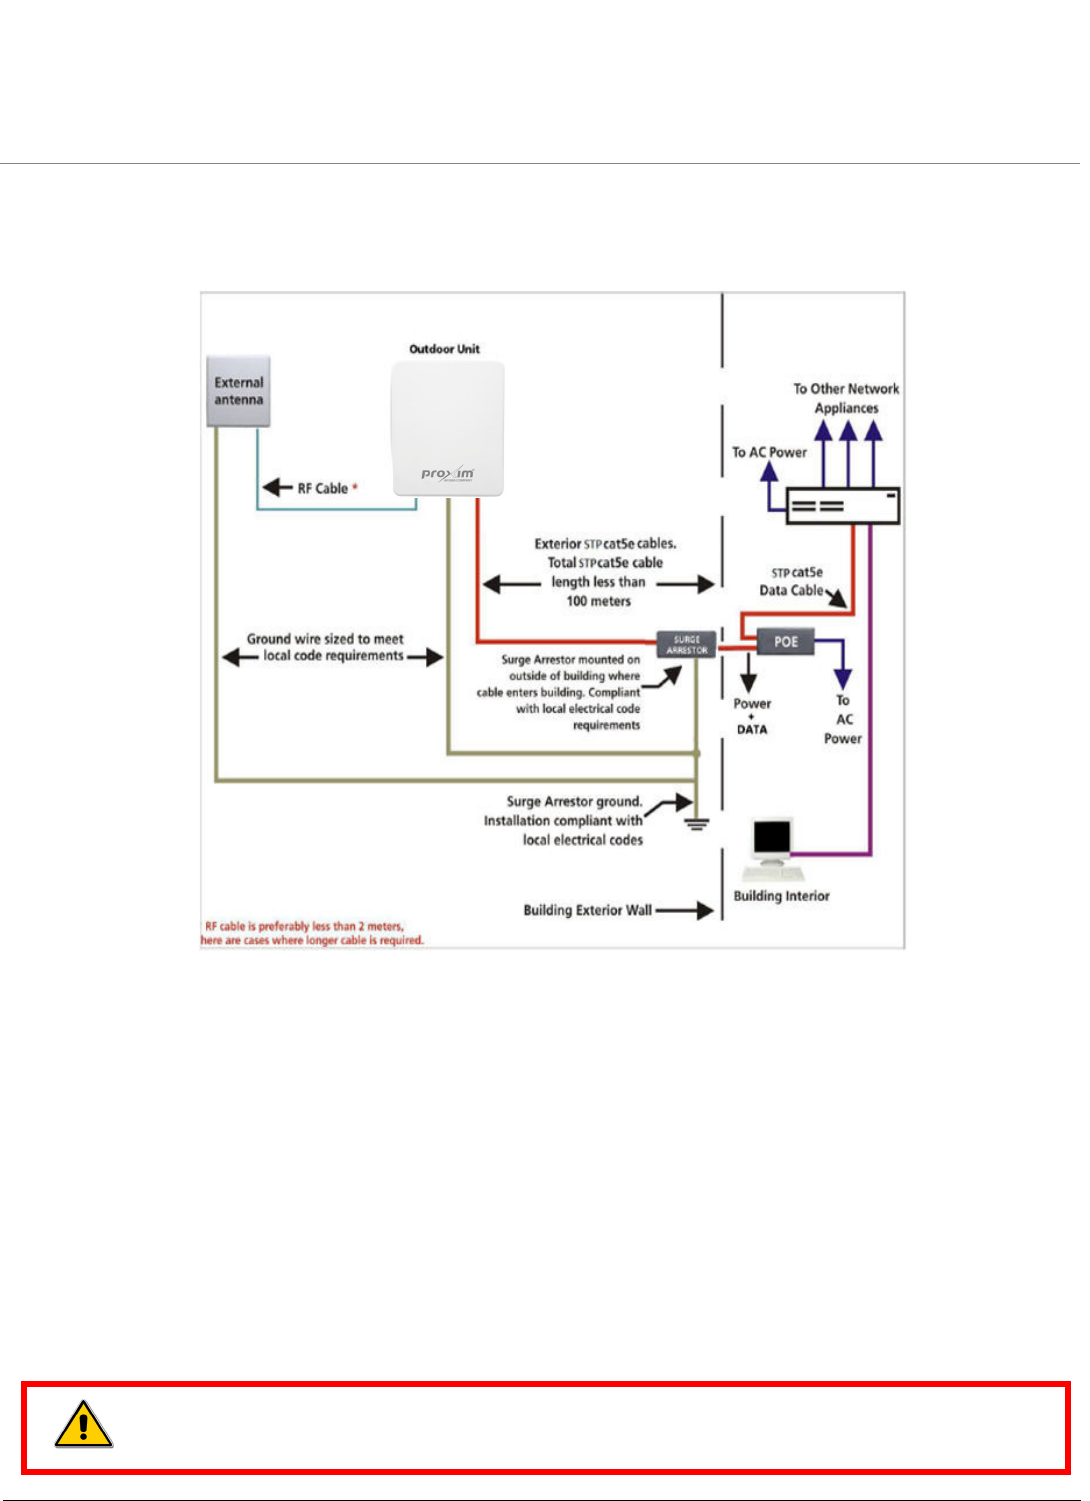
8.2.4 Connecting the Cables
Once the outdoor antennas are properly mounted, the cable setup essential to complete the outdoor antenna installation is
depicted in the following figure:
Figure 8-7 Cable Setup
The entire outdoor cabling setup requires the following cabling to be done:
1. Connecting the Antenna Cable
2. Connecting the Surge Arrestor and Ethernet / Power cables
3. Grounding the System
8.2.4.1 Connecting the Antenna Cable
Follow the following steps to connect an antenna to the device, by using an antenna cable.
1. Use an RF cable (antenna cable) to connect the outdoor device to an external antenna.
2. Connect the right-angled N-male connector of RF cable on the antenna. The antenna cables run from the external
antenna to the RP-SMA connectors on the device. The N-Type connectors on the antenna have built-in surge protection.
3. Secure the antenna cable to the antenna mast, as the cable connectors do not support the full weight of the cable.
4. Connect the other end of the antenna cable to the device.
: Do not use tools to tighten the cable connectors, as they damage the antenna cable and connectors.