
User's Manual


Tsunami MP.11 2454-R, 5054-R, and 5054-R-LR Installation and Management
Chapter 2. Installation 17
To install the documentation and software on a computer or network:
1. Place the CD in a CD-ROM drive. The installer normally starts automatically. (If the installation program
does not start automatically, click setup.exe at the following location to begin: \Docs\setup.exe .)
2. Click the Install Software and Documentation button and follow the instructions displayed on the installer
windows.
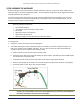
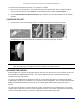
7) MOUNTING THE UNIT
1. To pole-mount, insert screws through bracket F and fasten around pole to bracket E and secure.
To wall-mount the unit, mount bracket (E) to wall using 4 screws (not provided), as shown:
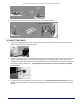
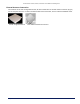
Note: At the end of the installation, the Ethernet and serial ports must be made waterproof by installing the
caps. Be careful not to over-tighten the caps as damage to the cable may occur.
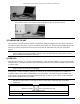
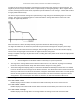
8) ALIGNING THE ANTENNA
Antenna alignment is a process to physically align the antenna of the radio receiver or the transmitter to have the
best possible link established between them. The antenna alignment process usually is performed during
installation and after major repairs.
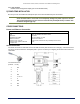
The unit has an audible antenna alignment tool that can be activated by plugging in the supplied serial dongle
(supplied with every BSU) or by issuing the CLI command for antenna alignment. The CLI command causes both
audible and numerical feedback as the CLI shows the running Signal-to-Noise Ratio (SNR) values twice a
second.
The output from the beeper for antenna alignment consists of short beeps with a variable interval. The interval
changes with the SNR level to assist in correctly aligning the antenna. An increase in signal level is indicated by
a shorter interval between beeps; a reduction in signal level results in beeps longer apart.