
User's Guide

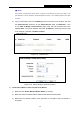
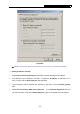
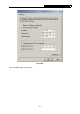
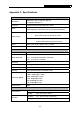
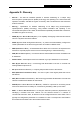
Table Of Contents
- Package Contents
- Chapter 1. Introduction
- Chapter 2. Connecting the Router
- Chapter 3. Quick Installation Guide
- Chapter 4. Configuring the Router
- Appendix A: FAQ
- Appendix B: Configuring the PC
- Appendix C: Specifications
- Appendix D: Glossary

PW-RN401/PW-RN401D 150Mbps Wireless Lite-N Router
)
Note:
If the above configuration takes effect, configure to the Router by typing 192.168.1.1:88
(the Router’s LAN IP address: Web Management Port) in the address field of the Web
browser.
3) Log in to the Router, click the “Forwarding” menu on the left of your browser, and click
the "Virtual Servers" submenu. On the "Virtual Servers" page, click Add New…, then
on the “Add or Modify a Virtual Server” page, enter “80” into the blank next to the
“Service Port”, and your IP address next to the “IP Address”, assuming 192.168.1.188
for an example, remember to Enable and Save.
Figure A-9 Virtual Servers
Figure A-10 Add or Modify a Virtual server Entry
5. The wireless stations cannot connect to the Router.
1) Make sure the "Enable Wireless Router Radio" is checked.
2) Make sure that the wireless stations' SSID accord with the Router's SSID.
3) Make sure the wireless stations have right KEY for encryption when the Router is
encrypted.
- 96 -