
User's Guide
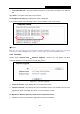
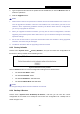

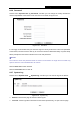
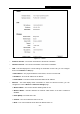
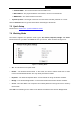
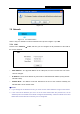
Table Of Contents
- Package Contents
- Chapter 1. Introduction
- Chapter 2. Connecting the Router
- Chapter 3. Quick Installation Guide
- Chapter 4. Configuration for AP Mode
- Chapter 5. Configuration for Router Mode
- Chapter 6. Configuration for Repeater Mode
- Chapter 7. Configuration for Bridge Mode
- Chapter 8. Configuration for Client Mode
- Appendix A: FAQ
- Appendix B: Configuring the PC
- Appendix C: Specifications
- Appendix D: Glossary

PW-RN401M
150Mbps Wireless N Nano Router
- 117 -
2. Type the path and file name of the update file into the File field, or click the Browse button to
locate the update file.
3. Click the Upgrade button.
Note:
1. New firmware versions are posted at our website and can be downloaded for free. There is no
need to upgrade the firmware unless the new firmware has a new feature you want to use.
However, when experiencing problems caused by the Router rather than the configuration,
you can try to upgrade the firmware.
2. When you upgrade the Router's firmware, you may lose its current configurations, so before
upgrading the firmware please write down some of your customized settings to avoid losing
important settings.
3. Do not turn off the Router or press the Reset button while the firmware is being upgraded,
otherwise, the Router may be damaged.
4. The Router will reboot after the upgrading has been finished.
6.8.3 Factory Defaults
Choose menu “System Tools
→
Factory Defaults”, and you can restore the configurations of
the Router to factory defaults on the following screen.
Figure 6-18 Restore Factory Default
Click the Restore button to reset all configuration settings to their default values.
• The default User Name: admin
• The default Password: admin
• The default IP Address: 192.168.1.254
• The default Subnet Mask: 255.255.255.0
Note:
All changed settings will be lost when defaults are restored.
6.8.4 Backup & Restore
Choose menu “System Tools
→
Backup & Restore”, and then you can save the current
configuration of the Router as a backup file and restore the configuration via a backup file as
shown in
Figure 6-19.