
User's Manual
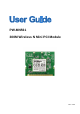

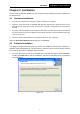
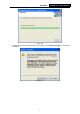
Table Of Contents
- Chapter 1 Product Overview
- Chapter 2 Installation
- Chapter 3 Connect to a Wireless Network
- Chapter 4 Management
- Chapter 5 AP Mode
- Chapter 6 Uninstall Software
- Appendix A: Specifications
- Appendix B: Glossary

PW-MN561 300M Wireless N PCI Adapter
3
Chapter 2 Installation
Please install the Mini PCI Module into your computer before installing the driver software from
the Resource CD.
2.1 Hardware Installation
1. Turn off your computer and unplug the power cord from the computer.
2. Open the case and locate an available Mini PCI slot. Remove the metal slot cover on the
back of the PC. Keep the screws. Turn to your computer manufacturer for instructions if
needed.
3. Insert the Mini PCI Module into the Mini PCI slot. Make sure that all of its pins have touched
the slot's contacts. Once the adapter has been firmly inserted, screw its fastening tab. Then,
close your PC case.
4. Insert the power cable back into the computer and turn on your computer.
When the Found New Hardware wizard appears, click Cancel.
2.2 Software Installation
The adapter’s Setup Wizard will guide you through the installation procedures for Windows 7,
Windows Vista, and Windows XP. The procedures in different systems are quite similar, therefore
here takes the procedures in Windows XP for example.
1. Insert the Resource CD into your CD-ROM drive, and open the folder named PW-MN561.
Double-click Setup.exe to start the installation, and then the following screen for preparing
setup will appear.
Figure 2-1