
User Manual
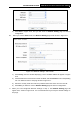
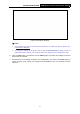
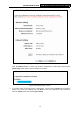
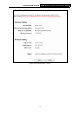
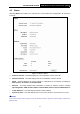
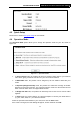
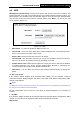
Table Of Contents
- Package Contents
- Chapter 1 Introduction
- Chapter 2 Hardware Installation
- Chapter 3 Quick Installation Guide
- Chapter 4 Configure the Device
- Appendix A: Application Example
- Appendix B: Factory Defaults
- Appendix C: Troubleshooting
- Appendix D: Specifications
- Appendix E: Glossary

PW-AN401/PW-AN401D 150M Wireless N Access Point User Guide
20
Chapter 4 Configure the Device
This Chapter describes how to configure your Access Point via the web-based management page.
The PW-AN401/PW-AN401D 150M Wireless N Access Point is easy to configure and manage
with the Web-based (Internet Explorer, Netscape
®
Navigator, Firefox, Safari, Opera or Chrome)
management page, which can be launched on any windows, Macintosh or UNIX OS with a web
browser.
4.1 Login
Open your web browser. Type in IP address http://192.168.0.254 in the address field of web
browser and press Enter.
Figure 4-1 Login to the AP
Enter admin for the User Name and Password (both in lower case letters) in Figure 4-2 below.
Then click OK or press Enter.
Figure 4-2 Login Windows
)
Note:
If the above screen does not prompt, it means that your web-browser has been set to a proxy. Go
to Tools menu>Internet Options>Connections>LAN Settings, in the screen that appears,
cancel the Using Proxy checkbox, and click OK to finish it.
After a successful login, you can configure and manage the device. There are six main menus on
the leftmost column of the web-based management page: Status, WPS, Network, Wireless,
DHCP and System Tools. Submenus will be available after clicking one of the main menus. On
the right of the web-based management page lies the detailed explanations and instructions for
the corresponding page.