
User's Manual


•Besurethetriggerisnotadjustedtothepointwhereitistoosensitive
and may cause accidental discharge of the marker.
•Removingthetriggerspringwillcauseprematurewearonthe
microswitch resulting in failure.
•Be sure you do not pinch the wires between the frame and body when
reattaching the frame to the body.
10
W W W . P R O T O P A I N T B A L L . C O M
11
TRIGGER
ADJUSTMENT
SLG™ BOARD
SETTINGS AND FUNCTIONS
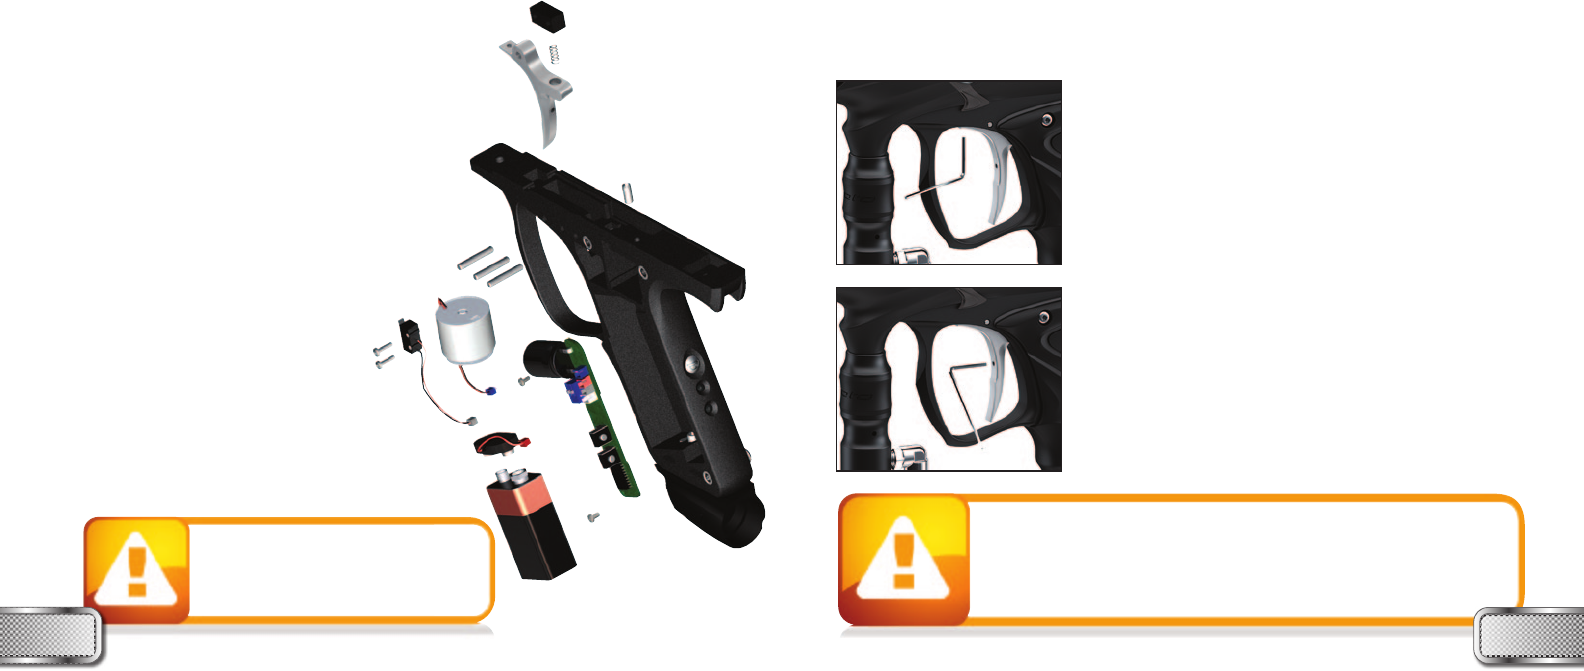
The Trigger’s forward travel and over travel are fully
adjustable so that the user can fine-tune the trigger to his/her
exactpreference.
To adjust the trigger an .050 Allen key is needed. There are
two adjustment screws located on the trigger.
The screw on the top front of the trigger controls the forward
travel. Screwing it in will shorten the trigger’s length of
pull. Note: If this screw is screwed too far in, the switch will
be depressed all the time causing the SLG™ to fire once
immediately after turning it on and not firing after that! (Fig. 1)
The screw on the back of the trigger controls the over travel.
By turning this screw you can adjust how far back the trigger
will travel. Note: If this screw is adjusted too far, the trigger
will not be allowed to travel far enough to depress the switch
and the marker will not fire. (Fig. 2)
The trigger spring used to return the trigger is located inside
the frame. It is not suggested to remove this spring as it
willcauseexcesswearonthemicroswitchandcausetrigger
bounce.
BATTERY
The 9V battery will last for about 20,000 shots. Please be aware
that there are substantial differences in performance between
different brands of batteries. Use of high quality alkaline or
lithiumionbatteriesisrecommendedformaximumbattery
life. If you plan not to use your marker for a long period
of time (a month), it is recommended that you remove the
battery from the marker. When the battery voltage starts
to go too low, the marker will not fire with every trigger
pull. For tournament use, it is recommended to change
the battery for each tournament. When changing your
battery, take special care to ensure the wiring harness
is not pinched under the battery.
CHANGING THE BATTERY
The battery is housed on the left side of
the grip frame. To access the battery, remove
the three screws holding the left side grip panel
down. Use a
3
⁄32” Allen key. Carefully lift the
battery out of the frame, taking care not to damage
the battery lead wires. Clip a new battery into the 9V
connector and carefully place it back into the frame making
sure that no wires are pinched underneath the battery.
Fig. 1
Fig. 2
•A low battery will not be able to
power both the ACE eye and the
trigger switch, causing ACE eye failure.
•Ifthebatteryislow,themarkerwill
not fire with every trigger pull.
W W W . P R O T O P A I N T B A L L . C O M