User Manual Important Information: This manual includes security measures and proper operating methods.
User Manual manual before using. Thank you! The machine adopts capacitive touch screen, you can just touch it by finger or click with capacitive pen for operation. (Never use the sharp objects to click the screen, or the touch screen may be damaged). Do not put the device at any high temperature, high humidity or dusty place. Do not drop or crash the device, avoid violent impacting between the display and the capacitive touch screen. Please choose the suitable volume and avoid turning it too loud.
User Manual Packing List: : Please check box for the following items 1,Device 2,User Manual 3,Product Warranty 4,Power Adaptor 5,USB Cable Other accessories can be purchased at local Proscan retailers The accessories may not be compatible with other devices Power Adaptor Specification: MODEL:HNC050200U INPUT:AC 100-240V 50/60Hz 0.35A MAX 2.0A OUTPUT: 5.
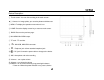
User Manual Device Description ① Touch screen: You can click and drag in the touch screen . ★② Camera: 2.0 mega pixels, you can take photos and videos etc ③ MENU: To display the operation menu when it is on. ④ HOME: Press the display screen key to return to main screen. ⑤ BACK: Return to the previous page. ⑥ Mini HDMI: Mini HDMI output. ⑦ TF card : TF card slot. ⑧ :Mini USB, MINI-5PIN connector. ⑨ :Earphone jack: 3.5mm standard earphone jack. ⑩ DC jack: Connect the power cable to charge to the device.
User Manual will turn on till the turning-on picture is over. -- Power off: Press it for 5 seconds. The system would indicate some options : Muting or Power off. Click “Power off” to shut it down. 【TIPS 】: 1.When the battery is low, it will power off automatically. 2.Shutdown illegally, when you restart, device would scan and repair the disk. The screen will stay at the progress bar for a long time. 3.Definition of “Press”: Short Press: Press the button less than 2 seconds.
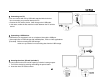
User Manual Connecting to a PC: • You can connect with PC by USB cable attached with the device. You can transfer your personal data to the PC. • Connect the PC and the device, it will change to the USB mode, in this state, realize the files transfer function between the PC and the device. Connecting a USB device: • USB devices are supported, such as a keyboard, through the USB port. • View media files on USB storage with installed photo, music or video applications.
User Manual 【Note】: Ensure that the micro SD card is inserted all the way into the card slot. 【Caution】: Before removing this card, make sure your device is not accessing data on the card. Connecting to a television with HDMI ( HDMI cable excluded): Connect a micro HDMI cable to your device then plug the other end of the HDMI connector into a TV or monitor with an HDMI port.
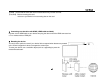
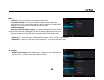
User Manual Connecting to the Network: 1. Wi-Fi wireless setup: Enter the setting interface, and turn on the Wi-Fi item. The device will automatically search any accessible nearby wireless networks. Commonly used settings Press the setup icon to enter the setting. Wi-Fi: Click ON or OFF to open or close Wi-Fi. When open Wi-Fi,the system will scan the wifi signal around automatically. Meanwhile, users could add network manually as well.
User Manual More…: 1.VPN:The user can preset the 3G operators information. 2. Portable hotspot: You must connect the cable to network (by RJ45 connector) then you can enter the option to open or close the “Portable Wi-Fi hotspot”, you can also take this device as a Wi-Fi Router. 3. Mobile networks: Connect a USB 3G Dongle setting:To insert a USB 3G dongle, the device will connect the Internet automatically. A 3G icon will be displayed on the screen.
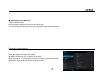
User Manual Language & input: 1. Language: Users can choose OSD Languages. 2. KEYBOARD & INPUT METHODS: select language input method. 【Remark】:In this state, users can switch the input method. Date & time: when the internet is connected , turn on “Automatic date & time”,the device can obtain the real date and time from the internet. Troubleshooting • Can not power on: --Connect the power cable to charge to the device, after a while and then check again.
User Manual --Check if it is connecting correctly between the device and PC. --Check the spare space of the memory. --Check the USB cable. • USB connect is failed. --Make sure that the USB device is properly connected to the USB jack. --Check if the USB device or a cable is damaged. --If the USB device is connected via a USB hub, connect the USB device directly to the device. • Cannot connect the device to the wireless LAN router --Check if the wireless LAN router is on.
User Manual Ethernet LAN 3G Gravity HDMI output Music format Video format Picture format Yes(USB dongle) 3G USB dongle 3D gravity sensor Mini HDMI can support 1080p content output to display MP3,WMA,FLAC,AAC,OGG,WAV,APE VP8,RMVB,RM,MOV,MPG,MP4,AVI,3GP,DAT, FLV,MKV,…etc. JPEG, BMP, GIF,PNG Specifications are for reference, to prevail in kind FCC Statement: This device complies with Part 15 of the FCC Rules.
Manuel de l'utilisateur 10
Manuel de l'utilisateur Information importante: Ce manuel comprend des mesures de sécurité et des méthodes d'exploitation appropriées. Pour votre sécurité personnelle, s'il vous plaît lisez ce manuel avant d'utiliser cet appareil. Je vous remercie! L’appareil a un écran tactile capacitif, il vous suffit de toucher avec le doigt ou cliquez avec le stylo capacitif pour faire les opérations. (Ne jamais utiliser les objets pointus pour cliquer sur l'écran, ou l'écran tactile peut être endommagé).
Manuel de l'utilisateur applications dans le Mini SD (Exclu). Si plusieurs programmes sont en cours d'exécution simultanément, le système devient lent, donc, s’il vous plaît fermer quelques unes des applications, dans les Paramètres Apps. Pour toute autre aide nécessaire pour le fonctionnement de cet appareil s’il vous plaît contacter la société ou le distributeur agréé. Tout démontage non autorisée de l’appareil annulera la garantie.
Manuel de l'utilisateur Description de l’appareil ① ①L'écran tactile: Vous pouvez cliquer et faire glisser sur l'écran tactile. ★② Appareil photo: 2,0 méga pixels, vous pouvez prendre des photos et des vidéos, etc ③ MENU: Pour afficher le menu des opérations quand il est activé. ④ ACCUEIL: Appuyez sur la touche Accueil pour revenir à l'écran principal . ⑤ RETOUR: Retour à la page précédente. ⑥ Mini HDMI: Mini sortie HDMI. ⑦ TF card : TF card slot. ⑧ ⑨ ⑩ :Mini USB, connecteur MINI-5PIN.
Manuel de l'utilisateur que la photo d’accueil disparait. -- Mise hors tension: Appuyez sur ce bouton pendant 5 secondes. Le système indiquera certaines options: inhibition ou hors tension. Cliquez sur "Power off "pour éteindre. • Appuyez sur la touche pendant une courte période pour fermer / allumer l'écran. 【CONSEILS 】: 1. Quand la batterie est faible, l’appareil s’éteind automatiquement. 2. Arrêter illégalement, lorsque vous redémarrez, l’appareil va scanner et réparer le disque.
Manuel de l'utilisateur Configuration pour la première fois Mise en charge de votre appareil: Pour la première fois de l'utilisation, vous devez charger l'appareil pendant dix heures. Après cela, vous pouvez recharger l'appareil en fonction des besoins. Reliez la prise DC-in à votre appareil et branchez l'adaptateur dans une prise secteur 【Conseils】: 1. Cet appareil utilise la batterie polymère intégrée. Seul le chargeur approprié doit être utilisé. 2.
Manuel de l'utilisateur Connexion à un PC: • Vous pouvez vous connecter au PC en utilisant le câble USB attaché à l'appareil. Vous pouvez transférer vos données personnelles sur le PC. • Connectez le PC et le périphérique, il va se mettre en mode USB, dans cet état, réaliser la fonction de transfert des fichiers entre le PC et le périphérique. Connexion d'un périphérique USB: • Les périphériques USB sont pris en charge, comme clavier, via le port USB.
Manuel de l'utilisateur Raccordement à un téléviseur HDMI (câble HDMI exclus): Branchez un câble micro HDMI à votre appareil, puis branchez l'autre extrémité du connecteur HDMI sur le téléviseur ou le moniteur doté d'un port HDMI. Réinitialisation de l’appareil: Vous devez faire une réinitialisation si votre appareil ne répond pas lorsque les touches sont pressées ou l'écran est touché ou ne répond pas aux entrées de l’écran.
Manuel de l'utilisateur Paramètres couramment utilisés Appuyez sur l'icône d'installation pour entrer le réglage. Wi-Fi: Cliquez sur ON ou OFF pour ouvrir ou fermer la connexion Wi-Fi. Lorsque Wi-Fi est ouvert, le système va scanner le signal wifi automatiquement. Pendant ce temps, les utilisateurs peuvent ajouter manuellement le réseau . En savoir plus ...: 1.VPN : L'utilisateur peut prérégler la 3G des opérateurs des informations. 2.
Manuel de l'utilisateur connecteur RJ45), vous pouvez accéder à l'option ouvrir ou fermer le "Portable Wi-Fi", vous pouvez aussi prendre cet appareil comme un routeur Wi-Fi. 3. Réseaux mobiles: Branchez une clé USB 3G: Pour insérer une clé USB 3G, l'appareil se connectera automatiquement à l’internet. Une icône 3G est affichée sur l'écran.
Manuel de l'utilisateur méthodes. Date & heure: quand l'internet est connecté, mettez sur " date &l'heure automatique", l'appareil peut obtenir la date et l'heure réelle de l'Internet Dépannage • Impossible de s'allumer: - Branchez le câble d' pour recharger l'appareil, vérifier encore après un certain temps. - Si l’alimentation échoués après la mise en charge, s’il vous plaît télécharger le firmware et améliorer le dispositif sur www.curtisint.com en utilisant un PC.
Manuel de l'utilisateur - Vérifiez si le périphérique USB ou le câble est endommagé. - Si le périphérique USB est connecté via un hub USB, connectez le périphérique USB directement sur le périphérique. • Impossible de se connecter au routeur LAN sans fil - Vérifiez si le routeur LAN sans fil est activée.
Manuel de l'utilisateur Format vidéo Format de l'image VP8,RMVB,RM,MOV,MPG,MP4,AVI,3GP,DAT, FLV,MKV,…etc. JPEG, BMP, GIF,PNG Les spécifications sont à titre de référence seulement FCC Statement: Cet appareil est conforme à la partie 15 des règles FCC. Opération est soumis à deux conditions suivantes : (1) Cet appareil peut causer pas de brouillage préjudiciable, et (2) Cet appareil doit accepter toute interférence reçue, y compris les interférences pouvant causer l'opération indésirable.