
11.3
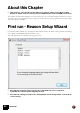
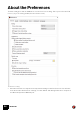
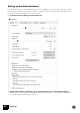
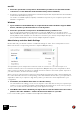
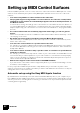
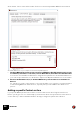
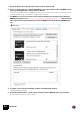
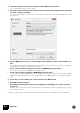
Table Of Contents
- Table of Contents
- Introduction
- Installation
- Requirements
- About the Audio Hardware
- About MIDI Interfaces
- Installing the Software
- Installing Reason
- The Authorization system
- Registering Reason
- Running Reason with Internet Verification
- Authorizing your Computer/Ignition Key (for off-line use)
- About deauthorizing the computer/Ignition Key
- Running Reason on an authorized computer - or with an authorized Ignition Key
- Running Reason in Demo Mode
- Setting Up

SETTING UP
23
D Clicking “Next” will take you through a series of dialogs, where the following happens:
• The Setup Wizard will first try to find a compatible audio driver.
It will automatically select the first compatible driver it finds. If this is the driver you wish to use, fine. If
it isn't, select your preferred driver from the Audio Card Driver pop-up. If you don't know which driver to
use, see “Setting up the Audio Hardware”.
• Next, Reason will try to auto-detect a Master Keyboard.
If one is found, click "Next" to proceed.
! For Reason to auto-detect a device you need two-way MIDI communication! Non-USB
keyboard devices without a MIDI input can of course still be added manually.
! Note that your keyboard model might not be auto-detected by Reason, even though it’s a
modern one and connects via USB. However, you can still use such a keyboard to control
Reason in the same way as with an auto-detected keyboard.
D Note that if you have additional remote control surface devices in your setup, these might
have to be added in the Preferences - see “Adding a specific Control surface”.
The Setup Wizard will only establish a connected Master Keyboard device.
Setup is now complete!
If all went well, you should now have established audio and MIDI communication - the basics needed to
record and play back audio and for controlling Reason via MIDI!
However, if for any reason the Setup Wizard failed to establish the necessary settings, or if you wish to add
other devices etc., you will have to make your settings in the Preferences dialog (see below).
• At the first program launch, you will also have the option to download additional
content from the Manage Content window.
The optional content consists of Rack Extensions and sound banks and is stored in the “Propellerhead
Content” folder in the “Music” folder on your computer. After the download you will have to restart
Reason for the optional content to become available.