
Instruction Manual

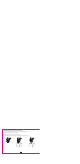


Button Name Operation
Power Switch (ON/OFF) Press and hold for 3 seconds to turn the unit on or off
Mode Switch Button (MODE) Press to switch between the FLASH, L and R mode
Output Power Adjustment Button Press (buttons with arrows) on either side of the SET button to:
Right/Increase or Left/Decrease
Continuous Light/Flash Selection Press to activate the continuous light feature. Press a second time
Button (LIGHT) to return to the flash mode.
Test button (PILOT) Press to test the light output while in one of the flash modes
Continuous Light Mode
After pressing the LIGHT button once to activate this mode, use the Output power adjustment buttons to
increase or decrease the intensity of the light. Continuous light is ideal for seeing the exact lighting of your
subject, including shadows and highlights. It is also a great way to light your subjects for video. When finished,
press the LIGHT button once more to return to the Flash mode.
Flash Mode
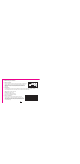
The RL100 will start in Flash mode each time you turn the unit on. Be sure the hot shoe contact, located on the
bottom of the mounting foot, lines up with the center contact of your camera’s hot shoe. Use the Output Power
Adjustment buttons to increase or decrease the intensity of the light. Press the MODE button to activate only the
Left or Right side of the Ring light for more dramatic lighting and shadow control.
Operating the Unit