
Operation Manual


Downloaded from www.vandenborre.be
EN -3-
INSTALLATION INSTRUCTIONS
3
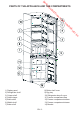
①
②
④
③
⑤
⑥
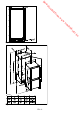
Figure.A
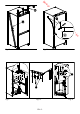
Figure.B
Figure.E
②
90°
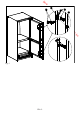
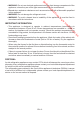
Figure.C
(
mm
)
Figure.D
⑥
①
②
Fig. A
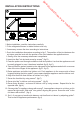
! Before installation, read the instructions carefully.
! Fit the refrigerator/freezer in stable kitchen units only.
! If necessary, reverse the door according to instructions.
! Check the installation dimensions according to g.C. The position of the joint between the
unit doors must be level with the position of the joint between the appliance doors.
1. See g.A for the necessary attachment components.
2. Insert trim ap
1
into slot and screw by screws
6
. (g.D)
3. Pass the power cord through ventilation shaft and position it so that the appliance could
be easily plugged in once it has been installed. (g.B - g.C)
4. Take out the trim gasket
2
located on the side panel of the appliance and stick it on reverse
side of the door hinges of the appliance. (g.D - g.E)
5. Raise appliance and slide into kitchen unit. Push appliance to the reverse side of door
hinges providing that trim gasket
2
covers space between appliance and the kitchen unit.
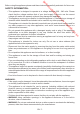
6. Align front feet with front surface of kitchen unit. (g.F)
7. Screw the front feet by using screws
5
. (g.F)
8. Screw trim ap
1
to kitchen unit using screws
5
. (g.G)
9. Screw xing bracket
11
, as leaned to kitchen unit by using screws
5
. Repeat this for the
opposite side. (g.H)
10. Screw guides
3
to appliance doors with screws
6
. Lean appliance doors to unit door as it is
opened at right angle. Slide rails
4
into guides
3
aligning the groove. Screw the rails
4
to the
unit doors with screws
5
. (g.J)
11. Set 1~2 mm gap on handle side between unit itself and unit doors by adjusting guides
3
.
That is vital for appliance performance. (g.J)