
Installation Guide


4
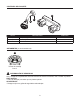
ASSEMBLY INSTRUCTIONS
3
3
1
2
AA
B
C
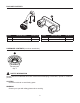
3. Install Shower Head Assembly (B)
Install shower ange (C) onto shower arm. Wrap both sides of
the shower arm threads with PTFE tape (not included) and attach
shower head assembly (B). Insert the shower arm into the shower
wall and connect the shower arm onto the wall pipe.
NOTE: If needed, an additional mounting nut (AA) is provided
for a secure mount to the shower wall from behind.
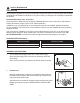
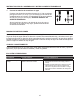
4. Connect Water Supply Lines
(4.1) Use 1/2 in. IPS faucet supply lines or (4.2) use coupling nuts
(not supplied) with (4.3) ball-nose risers (not included).
Turn water supply or shut-off valve back on and check for leaks. If
leaks occur, gently tighten the faucet connections.
4
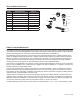
OPERATING INSTRUCTIONS
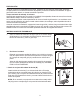
Each handle controls the ow of either hot or cold water to the shower head.
Rotating the hot side knob handle clockwise, and likewise rotating the cold side knob handle counterclockwise,
opens the cartridge and causes water to ow out the center shower outlet. The degree of handle opening deter-
mines the volume of water ow. Returning the handles to their original position stops the ow of water.
CARE AND MAINTENANCE
Clean periodically with a soft cloth. Avoid abrasive cleaners, steel wool, and harsh chemicals as these will dull
the nish and void your warranty.
4.1
4.3
4.2