
User`s guide


Auto Addressing the 3A Timers
.
As you press the Start/Stop buttons in each room, the Maximum Bed
Number on the T-Max® Mgr/Pro will automatically count up.
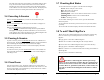
Note: Customers should not be in the tanning
beds while auto addressing.
11)
When you have finished with addressing the timers, press the Enter
button on the T-Max® Mgr/Pro.
12)
After a short pause, the T-Max® Manager/Pro will then scan. Lights
will illuminate for each bed found.
7) Apply power to the T-Max® Mgr/Pro. Wait until the T-Max® Mgr/Pro
is done scanning.
Installation is now complete!
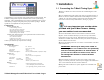
8) Press the Call/Menu button on the T-Max® Mgr/Pro.
9) Enter an 888 for the Security Code.
Each T-Max® 3A will show a 99 on their displays and beep
continuously.
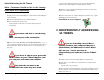
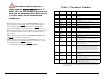
2 INDEPENDENTLY ADDRESSING
3A TIMERS
If you have a 3A that is not showing
99 – check your cable connection.
10)
Go to each room in the order you want them numbered (1, 2, 3, 4, 5,
6 etc.) pressing the Start/Stop button in each room until all displays show 0
and the alarms stop. Make sure the timer shows “0” before going to the
next room.
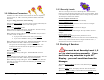
If you want to skip a room, press the
NEXT button on your T-Max® Mgr/Pro, and
you can pass over that room number.
The rooms do not need to be
numbered in the order they are wired.
T-Max® Manager/Pro and T-Max® 3A User’s Guide Page 4
If you are installing a new T-Max®
system and have just completed Section 1
(Installation), the addresses on the T-Max®
3A’s are set. You do not need to
independently set addresses on the T-Max®
3A’s.
1)
Unplug the power from the T-Max® Mgr/Pro (skinniest wire).
2) Apply power to the T-Max® 3A. It should show a 9.9 and an alarm
should sound.
If it just shows a 0, go to Step 4.
3) Press and release the Start/Stop button. The display will flash an 8.8 and
the alarm will stop. Press and release the Up button until the display stops
flashing and shows a 0.
T-Max® Manager/Pro and T-Max® 3A User’s Guide Page 3