
Quick Start Guide


4
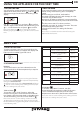
3. PREHEATING
Once the function starts, an audible signal and a
flashing icon
on the display indicate that the
preheating phase has been activated.
At the end of this phase, an audible signal and the
fixed icon
on the display will indicate that the oven
has reached the set temperature: at this point, place
the food inside and proceed with cooking.
Please note: Placing the food in the oven before preheating
has nished may have an adverse eect on the nal cooking
result.
. PROGRAMMING COOKING
You will need to select a function before you can start
programming cooking.
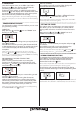
DURATION
Keep pressing
until the icon and “00:00” start
flashing on the display.
Use or to set the cooking time you require, then
press
to confirm.
Activate the function by turning the thermostat knob
to the temperature you require: an audible signal will
sound and the display will indicate that cooking is
complete.
Notes: To cancel the cooking time you have set, keep
pressing until the icon starts ashing on the display,
then use to reset the cooking time to “00:00”. This cooking
time includes a preheating phase.
PROGRAMMING THE END COOKING TIME/
DELAYED START
After a cooking time has been set, starting the
function can be delayed by programming its end
time: press
until the icon and the current time
start flashing on the display.
Use or to set the time you want cooking to end
and press
to confirm.
Activate the function by turning the thermostat
knob to the temperature you require: the function
will remain paused until it starts automatically after
the period of time that has been calculated in order
forcooking to finish at the time you have set.
Notes: To cancel the setting, switch the oven o by turning
the selection knob to the position.
END OF COOKING
An audible signal will sound and the display will
indicate that the function has finished.
Turn the selection knob to select a different function
or to position “
” to switch the oven off.
Please note: If the timer is active, the display will show “END”
alternately with the remaining time.
. SETTING THE TIMER
This option does not interrupt or program cooking
but allows you to use the display as a timer, either
during while a function is active or when the oven is
off.
Keep pressing
until the e “00:00” icon and
“00:00” start flashing on the display.
Use or to set the time you require and press
to confirm.
An audible signal will sound once the timer has
finished counting down the selected time.
Notes: To cancel the timer, keep pressing until the icon
starts ashing, then use to reset the time to “00:00”.
. HYDROCLEANING FUNCTION
To activate the “Hydrocleaning” cleaning function,
pour 200 ml of drinking water into the bottom of
the oven, then turn the selection knob and the
thermostat knob to the
icon.
Please note: The position of the icon does not correspond to
the temperature reached during the cleaning cycle.
The function will activate automatically: the display
shows the time remaining to the end, alternating with
“HYD”.
Please note: It is only possible to programme the end time of
this function. The duration is automatically set to 35 minutes.