R R R t R
R, R t R P/N 136462–001, Rev C R
Communication Notices Federal Communications Commission (FCC) Statement: This equipment has been tested and found to comply with the limits for a Class A digital device, pursuant to Part 15 of the FCC Rules. These limits are designed to provide reasonable protection against harmful interference when the equipment is operated in a commercial environment.
Trademark Acknowledgements Printronix, IGP, and LinePrinter Plus, are registered trademarks of Printronix, Inc. PGL and ThermaLine are trademarks of Printronix. HP is a registered trademark of Hewlett–Packard Company. PCL is a trademark of Hewlett–Packard Company. Code V is a trademark of QMS, Inc. QMS is a registered trademark of Quality Micro Systems, Inc. IBM is registered trademark of International Business Machines Corp. 17500 Cartwright Road, P.O.
IMPORTANT WARRANTY INFORMATION PRINTER WARRANTY Printronix warrants to purchaser that under normal use and service, this printer (excluding the thermal printhead) purchased hereunder shall be free from defects in material and workmanship for a period of ninety (90) days from the date of shipment from Printronix. Consumable items such as media and ribbons are not covered under this warranty.
Table of Contents 1 Introduction Chapter Contents . . . . . . . . . . . . . . . . . . . . . . . . . . . . . . . . . . . . . . . . . . . . . . . . . . . 1–1 About This Manual . . . . . . . . . . . . . . . . . . . . . . . . . . . . . . . . . . . . . . . . . . . . . . . . . . 1–2 How to Locate Information . . . . . . . . . . . . . . . . . . . . . . . . . . . . . . . . . . . . . . . . 1–2 Warnings and Special Information . . . . . . . . . . . . . . . . . . . . . . . . . . . . . . . . . 1–3 Conventions . . . .
Operator Panel Layout . . . . . . . . . . . . . . . . . . . . . . . . . . . . . . . . . . . . . . . . . . . 2–21 Status LEDs . . . . . . . . . . . . . . . . . . . . . . . . . . . . . . . . . . . . . . . . . . . . . . . . . . . . 2–21 Keys . . . . . . . . . . . . . . . . . . . . . . . . . . . . . . . . . . . . . . . . . . . . . . . . . . . . . . . . . . . 2–22 Media Width Adjustment . . . . . . . . . . . . . . . . . . . . . . . . . . . . . . . . . . . . . . . . . . . . . 2–23 Check for Interference . . . . .
Gap Sensor . . . . . . . . . . . . . . . . . . . . . . . . . . . . . . . . . . . . . . . . . . . . . . . . . . . . 3–28 Font Memory Menu Options . . . . . . . . . . . . . . . . . . . . . . . . . . . . . . . . . . . . . . . . . . 3–29 Paper Feed Shift . . . . . . . . . . . . . . . . . . . . . . . . . . . . . . . . . . . . . . . . . . . . . . . . 3–28 Emulation Menu Options . . . . . . . . . . . . . . . . . . . . . . . . . . . . . . . . . . . . . . . . . . . . . 3–30 Configuration Control Menu Options . . . .
Test Count . . . . . . . . . . . . . . . . . . . . . . . . . . . . . . . . . . . . . . . . . . . . . . . . . . 3–42 Printhead Test . . . . . . . . . . . . . . . . . . . . . . . . . . . . . . . . . . . . . . . . . . . . . . . . . . 3–42 Print Statistics . . . . . . . . . . . . . . . . . . . . . . . . . . . . . . . . . . . . . . . . . . . . . . . . . . 3–42 Printer Life . . . . . . . . . . . . . . . . . . . . . . . . . . . . . . . . . . . . . . . . . . . . . . . . . . 3–42 Head Life . . . . . . . . . . . . .
1 Introduction Chapter Contents About This Manual . . . . . . . . . . . . . . . . . . . . . . . . . . . . . . . . . . . . . . . . . . . . . . . . . . . . . 1–2 How to Locate Information . . . . . . . . . . . . . . . . . . . . . . . . . . . . . . . . . . . . . . . . . . 1–2 Printronix ThermaLine Help Desk . . . . . . . . . . . . . . . . . . . . . . . . . . . . . . . . . . . . 1–2 Warnings and Special Information . . . . . . . . . . . . . . . . . . . . . . . . . . . . . . . . . . . . 1–3 Conventions . . . .
About This Manual This manual is divided into chapters that contain all the information required to use the printer. Chapter 1: Introduction. General information about the manual and the printer, including safety precautions. Chapter 2: Setting Up the Printer. Procedures for installing the printer and associated components. Chapter 3: Configuring the Printer. Configuration menus, options and outlines, as well as factory default settings. Chapter 4: Diagnostics and Troubleshooting.
Warnings and Special Information For your safety and to protect valuable equipment, it is very important that you read and comply with all information highlighted under special headings: WARNING Conditions that could harm you as well as damage the equipment. CAUTION Conditions that could damage the printer or related equipment. IMPORTANT Information vital to proper operation of the printer. NOTE: Information and helpful tips about printer operation.
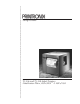
The T3306 and T3308 Label Printers The Printronix T3306 and T3308 are thermal printers designed for point-ofapplication label printing. Labels can be designed and printed using the standard Printronix LP+ or optional IGP/PGL and IGP/VGL emulation languages. In addition, the Label Matrix for Printronix label generation software package is available as an option. The T3306 and T3308 print at a maximum speed of 8 inches (203.2 mm) and 5 inches (127.0 mm) per second, respectively, with maximum print quality.
Thermal Printer Technology Quiet and fast, with excellent resolution output, the T3306 and T3308 are multifunction printers using an inline thermal printhead. The operation of a thermal printer is different from that of a line-matrix or laser printer. The thermal printer uses a printhead with heating elements and special paper or ribbon.
Media Selection Since there are two modes of operation, there are two kinds of thermal media: • Direct thermal media • Thermal transfer media Direct thermal media is paper coated with special chemicals that act as an accelerator, acceptor dye and binder. During direct thermal mode, the heat from the thermal printhead contacts the paper and causes a chemical reaction to take place.
Printer Standard Features Printer standard features include the following: • Direct thermal or thermal transfer printing • High-resolution 300 dpi printing • On-demand or batch printing • Continuous roll or fan-folded media • Wide media handling capability T3306 Maximum print width: Maximum label width: 6.4 inches 6.7 inches Maximum print width: Maximum label width: 8.5 inches 9.
Hardware Options Ask your Printronix representative about the following options, which can enhance the versatility of your printer. • Fonts A selection of fonts is available to extend the capabilities of the internal fonts. Optional fonts are installed via font modules. • Plug-In Application Memory Modules Provides additional memory for storage of custom fonts and graphics data. • Memory Expansion Provides additional memory to accommodate long label formats.
Fonts and Bar Codes The printer provides all popular bar codes, as well as a selection of alphanumeric, scaleable, outline and bit-mapped OCR-A and OCR-B fonts, in both portrait and landscape orientations. Additional fonts can be loaded from the host computer into printer memory. Once loaded, these fonts are accessed in the same way as the resident fonts.
1–10 Introduction
2 Setting Up the Printer Chapter Contents Safety Precautions . . . . . . . . . . . . . . . . . . . . . . . . . . . . . . . . . . . . . . . . . . . . . . . . . . . . . 2–2 Power Requirements . . . . . . . . . . . . . . . . . . . . . . . . . . . . . . . . . . . . . . . . . . . . . . . . . . . 2–3 Select a Site . . . . . . . . . . . . . . . . . . . . . . . . . . . . . . . . . . . . . . . . . . . . . . . . . . . . . . . . . . 2–4 Unpack the Printer . . . . . . . . . . . . . . . . . . . . . . . . . . . . . . .
Safety Precautions Your Printronix Label Printer has been designed to give you many years of safe, reliable service. As with all electrical equipment, there are a few basic precautions you should take to avoid getting hurt or damaging the printer: 2–2 • Read the installation and operating instructions in the documents provided with your printer carefully. Be sure to save them for future reference. • Read and follow all warning instruction labels on the printer itself.
Power Requirements WARNING Do not connect the printer to the power source until instructed to do so and until all shipping restraints have been removed. WARNUNG Den Drucker nur unter Anleitung an die Stromquelle anschließen, und erst dann, wenn alle Versandmaterialien entfernt worden sind. ATTENTION A moins d’en avoir recu l’ordre, ne pas brancher l’imprimante avant d’en avoir ôté tout le matériel d’emballage.
Select a Site When selecting the location for the printer, consider the following power requirements, interface requirements, and environmental factors: • A proper power source must be available. (Complete power requirements are specified in the “Power Requirements” section, on page 2–3.) • The location must be within the maximum cable length specifications for the host computer interface.
33 inches 25 inches 26 inches Figure 2–1. Clearance Requirements, T3306 39 inches 25 inches 28 inches Figure 2–2.
Unpack the Printer Examine the contents of the shipping carton(s) for indications of damage during transport. If any damage is evident, contact the carrier directly to specify the nature and extent of damage. The printer is packed in molded Styrofoam and is also enclosed in a plastic bag to reduce the chance of moisture damage during shipment. Refer to the unpacking instructions to remove the printer from the shipping carton.
Initial Setup To prepare the printer for operation, complete the procedures in the following sections. (Figure 2–4 shows the overall view and the rear view of the printer.) Media The printer accepts roll-fed, fan-folded or die-cut continuous media, either thermal transfer or direct thermal. Media width can range from 2 in (50.8 mm) to 6.7 in (170 mm) for the T3306 and from 3 in (76.2 mm) to 9.00 in (228.6 mm) for the T3308. The printer will accommodate media thicknesses ranging from 0.0046 in (0.
Media Loading The following procedures describe loading of the various media. NOTE: The optional internal rewinder and rewind bracket are shown on all media loading drawings. Roll-Fed To install roll-fed media, perform the following steps. 1. Open the media supply door. 2. Slide a roll of the chosen media onto the media hub assembly, as far as possible toward the inside of the printer as shown in Figure 2–5. 3.
6. Slide the media forward, until it extends beyond the printer front slot. 7. Slide the adjustable guide so that it is slightly touching the edge of the media. Do not turn the knurled nut on top of the guide. 8. Lower the printhead, and engage the printhead latch. Rotate the latch wing one half-turn clockwise, and snap the latch wing down to lock the printhead into position. NOTE: It may be necessary to feed several labels before proper alignment of the media occurs.
Using the Tear Bar The tear bar is already installed on the printer. If the rewind bracket, cutter or peel and present option were installed, that option must first be removed and then replaced by the tear bar. (See Figure 2–8.) Tear Bar Rewind Bracket Figure 2–8.
Optional Media Rewind Hub The printer can be equipped with a rewind hub that will automatically roll up the label media for convenient handling. The hub is used in the following cases: • When large quantities of labels must be printed as single batches for later use • When the automatic label peel-off dispenser option is used, to roll up the used media backing after labels have been peeled off To use the media rewind hub, perform the following steps. 1. Open the media supply door. 2.
5. Route the free end of the media around the rewind bracket (if in batch mode) or directly through the media take-up slot (if in peel-andpresent mode). In the peel-and-present mode, the rewind bracket is not installed; media feeds through the automatic label peel-off dispenser. 6. Place the leading edge of the media into the groove on the hub. Turn the hub by hand two or three full turns to secure the media.
Optional Peel and Present Perform the following steps to load media for peel and present operation. 1. Pull the peel roller bracket away from the peel and present mechanism using the two release tabs as shown in Figure 2–10. 2. Following Steps 1 through 4 under the Roll-Feed Media Lodging section above. 3. Thread the media over the top of the fixed bracket and under the peel roller of the roller bracket as shown in Figure 2–11. Figure 2–11.
Figure 2–12. Media Loading 4. Push the roller bracket forward to its closed position. 5. Route the free end of the media to the internal rewind hub and attach as described in the Optional Media Rewind Hub section above. NOTE: It is possible to use the present sensor only (without installing the peel and present mechanism) with the tear bar to provide on-demand printing in the tear-off mode.
Ribbon Installation A ribbon must be used when the printer is operated in the thermal transfer mode. To install a ribbon, perform the procedure below. As noted previously, when printing in direct thermal mode, the printer does not use a ribbon. There may, however, be occasions when the use of a direct thermal medium is required, but a previously-installed ribbon has not been completely used up.
6. Pull the ribbon over the ribbon idler rollers — it will completely cover the printhead mounting frame. 7. Wrap the free end of the ribbon around the ribbon take-up hub, and turn the hub two or three full turns. Replace the J-hook, and twist it clockwise until it snaps into place. 8. Lower the printhead and engage its latch. Rotate the printhead latch wing one half-turn clockwise to lock the printhead in place. 9. Close the media supply door. To remove a ribbon, use the following procedure. 1.
Connect the Cables Energized electrical equipment is dangerous. Never work on energized equipment unless authorized to do so. If emergency work on energized equipment is authorized, be sure it is accomplished in strict compliance with current safety regulations. Operate the printer using the power source indicated adjacent to the power switch. Failure to do so may cause injury to you and damage to the printer. Unplug the printer before performing any removal, replacement or cleaning procedure.
Refer to Figure 2–14 and perform the steps listed below. 1. Connect the interface cable to the appropriate printer interface connector and to the host computer. The printer supports a variety of standard and optional interfaces: } • Centronics-compatible parallel • RS–232 and RS–422 serial • Coax/Twinax (optional) Standard NOTE: The serial and parallel ports are both active. If data is received simultaneously on both ports, the output may be mixed.
NOTE: The printer must be properly configured for the appropriate interface. The RS–422 port is enabled or disabled via a DIP switch inside the printer. Make sure this selection is properly made for your application. If your application requires a change in switch setting, contact your authorized Printronix service person. 2. Verify that the site line voltage is the same as the voltage specified in the “Power Requirements” section, on page 2–3. 3. Make sure the printer power switch is set to O (OFF). 4.
Operator Panels The primary operator panel is used to perform routine, day-to-day operations. The panel contains three operator-accessible keys and three LED indicator lights, used to control and indicate printer status. There is also a secondary operator panel, consisting of an (LCD) message display and six keys. This is used to configure the printer and to run self-tests via the configuration menus.
Operator Panel Layout The primary and secondary operator panels are illustrated in Figure 2–15, below. Status LEDs The three primary operator panel status LEDs provide information about current printer operation, as described below.
Keys Three primary operator panel keys provide for the basic, day-to-day control of the printer, as described below.
Media Width Adjustment The printer can use a variety of media widths and thickness. To ensure even print quality across the media regardless of changes in media dimensions, the printhead has a leveling cam adjustment. The cam raises and lowers the right side of the printhead to keep the printhead level across the media. The printer is factory-set, using standard 4-mil thick, 6.5-inch wide print media for the T3306 and 4-mil thick, 9.0-inch wide media for the T3308 (cam knob position 9).
Check for Interference The printer should be used only with FCC or CE certified computing devices. If the printer is installed within 10 feet of audio or video equipment, interference may occur. Determine if there is interference by turning the printer on and off while checking the audio and video equipment for noise spikes. If interference occurs, perform the following: 1. Relocate the printer or the electronic device affected by the interference, including the antenna, if applicable. 2.
3 Configuring the Printer Chapter Contents Overview . . . . . . . . . . . . . . . . . . . . . . . . . . . . . . . . . . . . . . . . . . . . . . . . . . . . . . . . . . . . . 3–4 Using the Secondary Operator Panel . . . . . . . . . . . . . . . . . . . . . . . . . . . . . . . . . . . . . 3–6 Moving Within the Configuration Menu . . . . . . . . . . . . . . . . . . . . . . . . . . . . . . . . 3–6 Selecting a Menu Option . . . . . . . . . . . . . . . . . . . . . . . . . . . . . . . . . . . . . . . . . . . .
Configuration Control Menu Options . . . . . . . . . . . . . . . . . . . . . . . . . . . . . . . . . . . . 3–31 Load Configuration . . . . . . . . . . . . . . . . . . . . . . . . . . . . . . . . . . . . . . . . . . . . . . . . 3–31 Save Configuration . . . . . . . . . . . . . . . . . . . . . . . . . . . . . . . . . . . . . . . . . . . . . . . . 3–32 Print Configuration . . . . . . . . . . . . . . . . . . . . . . . . . . . . . . . . . . . . . . . . . . . . . . . . 3–32 Delete Configuration . . . . . . . . .
Configuring the IGP/PGL with the Control Panel . . . . . . . . . . . . . . . . . . . . . . 3–43 The IGP/PGL Emulation Submenu . . . . . . . . . . . . . . . . . . . . . . . . . . . . . . . . . . 3–44 PGL Mneumonic List . . . . . . . . . . . . . . . . . . . . . . . . . . . . . . . . . . . . . . . . . . . . . . . . . . 3–47 IGP Configurations VGL . . . . . . . . . . . . . . . . . . . . . . . . . . . . . . . . . . . . . . . . . . . . . . . 3–48 IGP VGL Emulation Submenu . . . . . . . . . . . . . . . . . . . . .
Overview The configuration process is directed by the secondary operator panel and includes the following: • Configuring the printer for different host interface options • Customizing label formats • Checking printer status • Running various maintenance tests NOTE: Control codes sent by the host system will override the operator panel settings. The secondary operator panel consists of a 32-character message display and six keys. Figure 3–1 is an illustration of the keypad section of the panel.
Table 3–1. Key Function Summary Key Function None. This key is used in combination with other keys. SHIFT If the menu selection is a value, pressing this key causes the value to be decremented. If the menu selection is an option, pressing the key allows selection among options on the current menu level. Holding the key down causes the key to repeat at about seven times a second. If the menu selection is a value, pressing this key causes the value to be incremented.
Using the Secondary Operator Panel Configuration parameters are set from the secondary operator panel or are retrieved from the nonvolatile memory, located in the printer. The parameters define how the printer will respond to command and interface signals from the host computer. The configuration menu structure consists of the main configuration menus and the corresponding submenus, where applicable.
To configure the printer, it must be off line. If the ON LINE/PAUSE indicator is lit, press and release the ON LINE key to place the printer off line. When the printer is placed off line, OFF LINE appears in the message display. Selecting a Menu Option By default, the ENTER key is “locked” when the printer is turned on. The purpose of this is to prevent accidental changes to the configuration values.
Paper Control Printer Control Page 3–23 Page 3–27 Font Memory Page 3–29 Emulation Module Control Page 3–30 Page 3–33 (1) Page Width Page Length Ver. Image Shift Hor. Image Shift Auto Label Map Print Mode Ribbon Selection Media Handling Print Intensity Print Speed Gap Sensor Ribbon Saver Ppr. Feed Shift IGP/PGL Impact Printer IGP/VGL Dir. Listing Delete File Format Module Print Directory Module Info Config.
Configuration Menu Diagram Key ON LINE/ PAUSE AND Paper Control Page Width Page Length Length in Inches Display OFFLINE PAPER CONTROL ENTER SWITCH UNLOCKED PAPER CONTROL Page Width Length in mm PAPER CONTROL Page Length 1.0 inches 1.5 inches 2.0 inches 2.5 inches . . . 4.0 inches . . . 24.0 inches 25 mm 26 mm 27 mm 28 mm . . . 102 mm . . .
Pressing the up and down arrow keys simultaneously, or holding the SHIFT key while pressing the ENTER key will toggle the enter lock function. If either of these functions are performed while the ENTER key is locked, the message ENTER SWITCH UNLOCKED will be displayed for one second, and the ENTER key will be unlocked. If either of these functions are performed while the ENTER key is unlocked, the message ENTER SWITCH LOCKED will be displayed for one second, and the ENTER key will be locked.
5. Press and hold 6. Press or to scroll through the values. to select a value. An asterisk (*) displays next to the selected value. 7. If there are more values you want to change, use the keys to access the value and the may press the 8. key to select it. At any time, you key to return to the options one level higher. At any time, you may also press the the ON LINE/ PAUSE key to save your changes, then to exit the configuration menu and place the printer on line.
Follow these steps to save a new configuration: 1. Press ON LINE/ PAUSE to take the printer off line. OFF LINE IMPACT PRINTER 2. Press for the following display: USER CONFIG. PAPER CONTROL 3. Press or until the following displays: OFF LINE CONFIG. CONTROL 4. Press 5. Press or until the following displays: CONFIG. CONTROL Save Config. 6. Press 7. Press or to cycle through the options (1–8). Note that “0” is the default configuration and cannot be altered. 8.
When processing is completed, the display shows: Save Config. X* It is recommended that you print your configuration and store it in a safe place for future reference. Refer to the “Printing a Configuration” section, on page 3–16, for details. Modifying a Saved Configuration You can change a saved configuration by rewriting over it. For example, you can modify Config. 1, shown below. Suppose you want to keep all the settings but you want to select the parallel interface instead of the serial interface.
d. Press e. Press or until the following displays: CONFIG. CONTROL Load Config. f. Press g. Press or to cycle through the options (1–8). Note that “0” is the default configuration and cannot be altered. h. When the desired number displays, press to select it. The following message is displayed while loading. STANDBY . . . Then, the following message displays when it is loaded: Load Config. X* 2. Move through the menu and change all the desired values.
b. Press for the following display: USER CONFIG. PAPER CONTROL c. Press or until the following displays: OFF LINE CONFIG. CONTROL d. Press e. Press or until the following displays: CONFIG. CONTROL Delete Config. f. Press g. Press or to cycle through the options (1–8). When the desired number displays, press to select it. The following message is displayed. STANDBY . . . Then, the following displays when it is deleted: Delete Config. X* 5.
Printing a Configuration It is recommended that you print and store your configurations for future reference. The printout provides a list of the parameters that were set when you configured the printer. A sample configuration printout is shown in Figure 3–5, on page 3–17. To print a configuration: 1. Press ON LINE/ PAUSE to take the printer off line. OFF LINE IMPACT PRINTER 2. Press for the following display: USER CONFIG. PAPER CONTROL 3. Press or until the following displays: OFF LINE CONFIG.
Figure 3–5.
Figure 3–5.
Figure 3–5.
Factory Settings Table 3–2, on page 3–21, lists the factory default settings. These values are available for loading at any time and are maintained until new configuration settings are saved as the default.
Table 3–2. Factory Settings Factory Settings Parameter Paper Control Page Width Page Length Vertical Image Shift Horizontal Image Shift Auto Label Mapping Print Mode Ribbon Selection 6.4 or 8.5 inches (T3306 or T3308, respectively) 4.0 inches (102 mm) 0.00 inches (0 mm) 0.00 inches (0 mm) Disable Thermal XFER Other Printer Control Media Handling Print Intensity Print Speed Gap Sensor Ribbon Saver Paper Feed Shift Continuous 0 8.0 or 5.0 IPS (T3306 or T3308, respectively) None Disable 0.
Table 3–2. Factory Settings (continued) Config.
Paper Control Menu Options Paper Control Page Width Ver. Image Shift Page Length Width in Inches Width in mm Length in Inches Length in mm 1.0 inches 1.1 inches 1.2 inches 25 mm 26 mm 27 mm 1.0 inches 1.5 inches 25 mm 26 mm . . . . . . . . . . . . 4.0 inches * 102 mm * . . . . . . 6.4/8.5 inches *163/216 mm * 24.0 inches 610 mm Shift in Inches Disable* Enable: Page=Narrow Web Enable: Page=Wide Web . . . . . . 1.0 inches 1.1 inches 1.2 inches Press Press to view options.
Page Width This option specifies the width of the image to be printed. When Auto Label Map is enabled, Page Width is not used for boundary checking; therefore, it is possible that the form is designed for a wider page than the Page Width settings. The values may be specified in inches or millimeters. The allowable range in inches is 1.0 to the maximum print width of the printer (6.4 and 8.5 inches for the T3306 and T3308, respectively), in 0.1-inch increments.
Auto Label Mapping This option specifies the maximum print width to be used by the application. The IGP/Auto Label Mapping feature allows backward compatibility of programs written for Printronix Wide Web line-matrix printers using Printronix IGP graphics languages. It allows the printer to print two-up (or other multi-up) labels. Instead of printing multiple labels across the printer, it prints the leftmost label and the rightmost label, so the printout will be twice as long but half as wide.
NOTE: When using IGP/PGL, determine the proper narrow web width with the HDUP command used to duplicate the label. Generally, it should be the same as the distance between duplications given in the HDUP command (or some multiple of the distance between duplications). Selection Selects whether to use the auto label mapping feature. If disabled, the auto label mapping parameters are not used.
Printer Control Menu Options Media Handling This option specifies how the printer will handle the paper. • Tear-Off – After each label is printed, the printer waits for you to tear off the label before printing the next one (on-demand printing). • Cutter – Cuts continuous roll paper or labels without assistance. • Self-Strip – Prints and strips die-cut labels from the liner without assistance. The printer waits for you to tear off the label before printing the next one (on-demand printing).
NOTE: The Cutter, Self-Strip and Ribbon Saver options require that the appropriate options be installed to operate correctly. Print Intensity This option specifies the level of thermal energy from the printhead to be used for the type of paper and ribbon being used. Larger numbers imply more heat (thermal energy) to be applied for each dot. This has a significant effect on print quality.
Font Memory Menu Options This option allows the user to set the amount of memory reserved for scalable font caching. The maximum amount of memory which can be selected is determined by the total amount of memory installed in the printer. Font Memory 50 K bytes* 75 K bytes . . . 125 K bytes 150 K bytes (1) 175 K bytes . . . 1975 K bytes 2000 K bytes (2) 2025 K bytes . . . 3975 K bytes 4000 K bytes (3) (1) Maximum for printer with 1 MByte total memory. (2) Maximum for printer with 5 MBytes total memory.
Emulation Menu Options The LinePrinter+ emulation is the standard emulation on the printer. IGP/PGL and IGP/VGL emulations are available as options. The contents of the emulation menu structure will be created by the printer at run-time, and, when powered up, the printer will automatically load the default configuration values. The default set of parameters is the factory setting until a new setting is saved to nonvolatile memory.
Configuration Control Menu Options Load Configuration The printer can store numerous configurations. This option allows you to select and load a specific configuration. The factory default for loading is configuration 0. Note that configuration 0 is a factory-preset configuration that cannot be changed and is always available for loading. Config.
Save Configuration You can save up to eight different configurations to meet different print job requirements. See the “Saving Your New Configuration” section on page 3–11 for details. Configuration 0 is a factory-preset configuration that cannot be changed or saved. NOTE: If the Protect Save CFG option is enabled, the new configuration will not be saved unless the existing configuration has been deleted. Print Configuration You can output a listing of various stored printer configuration parameters.
Module Control Menu Options The Module Control Menu provides the capability to view and print the directories of all files located in the printer non-volatile memories. These memories are identified as Internal (A:), Top Module (B:) and Bottom Module (C:). The Internal Memory is supplied as standard, while the Top Module and Bottom Module are available in either 1 or 4 MByte flash memory cards. Modules may be installed in both the top and bottom locations simultaneously.
Dir. Listing This menu selection allows you to view the file listing of both internal and external memory modules. Under each sub menu choice, file names are displayed on the LCD, one at a time, by pressing the RIGHT or LEFT arrow key. Delete File This menu selection allows you to delete a file from any of the memory modules. The file is deleted by selecting the desired file from the directory listing of the selected memory module and pressing the ENTER key.
Host Interface Menu Options The printer provides the following standard host interface options: • Parallel (Centronics compatible) • Serial (RS–232 or RS–422) The configurations for each interface type are described in the following pages. Set these options to meet the specific data communications requirements set by the host system and by the application program running on the host. Refer to Figure 3–12.
Data Bit 8 Values: Enable or Disable. Normally, this parameter is enabled. It allows access to the extended ASCII character set. Data Polarity Values: Normal or Inverted. This must be set to match the Data Polarity of your host system. There are normally seven or eight data bits that define each ASCII character sent from the host to the printer. The bits are usually high-true. Fault Polarity Values: Normal or Inverted. This must be set to match the host computer.
Serial Interface Host Protocol Values: NONE or XON/XOFF. This must be set to match your host computer. The factory default is NONE. XON means transmit on and XOFF means transmit off. In XON/XOFF protocol, the printer sends ASCII code DC1 (Device Code 1, hex 11, XON) to the host system when it is ready to receive more data (i.e., the printer is on line and the data buffer is empty). The printer sends ASCII code DC3 (Device Code 3, hex 13, XOFF) when it is not ready to receive data (i.e.
Baud Rate Values: 300 – 19,200. Must be set to match your host computer. The factory default is 9600. Baud rate is the number of bits, including control bits (start/stop and parity bits) transferred per second over the interface. Data Bits Values: 5 – 8. Must be set to match your host computer. The factory default is 8. Serial interfaces support 5-, 6-, 7- and 8-bit transfer of data words. Most use 8-bit data transfer, but this must match the host computer. Stop Bits Values: 1 or 2.
Maintenance/Miscellaneous Menu Options Power-Up State This option allows you to configure the printer to power-up in the off line or on line key and then state. From MAIN / MISC, press the POWER UP STATE. Press the ON LINE (default). Press until you reach key to display OFF LINE and to display to select. Hex Dump Mode This option allows the printer to be placed in the HEX-DUMP mode, in which the printer will output a hexadecimal data stream.
When enabled, the hex dump mode translates all host interface data to its hexadecimal equivalent, then prints the hex code and its printable symbol, if one exists. All characters printed after entering the hex dump mode (including any in the input buffer are printed in two forms: as a two-symbol hexadecimal code and as its printable symbol, if any. A nonprintable code is printed as a period (.) symbol. Up to 16 characters can be printed per line.
Diagnostics Menu Options Test Print This option is used to define and activate a test printout. You must specify the test pattern and the number of pages to be printed. NOTES: Diagnostics Press to start and stop diagnostic test printing. To clear old data when replacing the printhead, press “Rest Head Data” is selected.
Test Selection This menu item is used to select the type of pattern to be used for the test printout. Test Count This menu item is used to select the number of pages for the test printout. You may select 1, 2, 5 or 10 pages, or a continuous number of pages. The default is one page. Start Test Press the key to start and stop diagnostic test printing. Printhead Test This option is used to define and activate a printhead test. You must enable the test selection and specify the test period.
Configuring IGP/PGL with the Control Panel Matching certain printer operational settings to those of the host computer is known as “printer configuration.” The settings, or configuration parameters, such as selecting the host interface, are adjusted according to the printer function key descriptions in this manual. Configure IGP/PGL in the same way you would configure the printer for other features. You can select IGP/PGL default parameters directly from the control panel as explained in this chapter.
The IGP/PGL Emulation Submenu Emulation IGP/PGL Define CR Code CR = CR* CR = CR + LF Define LF Code LF = LF* LF = CR + LF Autowrap Select SFCC Disable* Enable 1–255 126* Select Font Autoeject Select LPI Auto Uppercase 0–10 0* Disble* Enable 1–10 6* Disable* Enable Ext Execute Copy Disable* Enable UPC Descenders Enable* Disable Host Form Length Disable* Enable Skip Cmd Prefix Power On IGP/PGL Enable* Skip All Spaces Disable IGP100 Compatibilty Disable* Enable Enable* Disable Sl
Table 3–3. IGP/PGL Configuration Mode Options NOTE: Parameters marked with an asterisk (*) indicate the factory default value. The printer must be off-line to enter the configuration structure.
Option Host Form Length Parameter Value DISABLE Comments ENABLE* DISABLE sets the form length to the value set from the front panel. ENABLE sets the printer page size equal to the form length defined in the CREATE FORM mode. IGP 100 Compatibility DISABLE* ENABLE DISABLE does not change the PGL behavior. ENABLE makes PGL behavior compatible to that of IGP 100. Power On IGP/PGL DISABLE DISABLE puts printer in QUIET mode at power-up, otherwise ENABLE or LISTEN mode is active at power-up.
PGL MNEMONIC LIST AFn;L Dynamic Alpha Field number; length BFn;L Dynamic Bar Code Field number; length CC Control Character CCW 90 degree Counterclockwise Rotation CD Check Digit Cn Compression Factor (text) CPI Characters Per Inch CW 90 degree Clockwise Rotation D Dark Field DIR Direction of Alpha Rotation DN Duplication Number (quantity) E Elongated Print EC Ending Column ER Ending Row FC Forms Counter FL Forms Length FONT Font Style (optional/normal) HE Horizontal Expan
Configuring IGP/VGL With The Control Panel Matching certain printer operational settings to the host computer is known as printer configuration. The settings, or configuration parameters, such as selecting the host interface and parallel/serial data input, are adjusted according to the printer function key descriptions in this manual. Configure IGP/VGL as you would configure the printer for other features.
The IGP/VGL Emulation Submenu OFFLINE IGP/VGL USER CONFIG EMULATION IGP/VGL SFCC POWERUP SFCC Power-up ^X Power-up ^F Power-up ^PY EMULATION IMPACT PRINTER Page Format LPI Btm Margin Ctl Text Length Copy Count Host Form Length Graphics Options Error Handling Slash 0 Ignore dots Append rotated Truncate alpha True vert 1/10 Absorb after ^PY UPC Descenders Rot.
Table 3–4. IGP/VGL Parameters Option ^Dnn Dot Slew Parameter Low Resolution* High Resolution Absorb after ^PY DISABLE ENABLE * Append Rotated DISABLE * Barcode Errors DISABLE Btm Margin Ctl VGL Text Length ENABLE ENABLE * LP+ Menu* Comments The ^Dnn Dot Slew option determines if the ^Dnn dot slew command dot values will be interpreted as 60 dpi P-Series dots (Low Resolution) or as print engine dots (High Resolution).
Option Data Bit 8 Parameter DISABLE * ENABLE Error Markers DISABLE ENABLE * Comments When data bit 8 is enabled, all 8 bits are used for data bits, and characters in the 80–FF hex range can be accessed. When data bit 8 is disabled, only characters from 0–7F hex may be accessed.
Option Font Set Host Form Length Parameter 0* 0 = US ASCII 1 1 = German 2 2 = Swedish 3 3 = Danish 4 4 = Norwegian 5 5 = Finnish 6 6 = English 7 7 = Dutch 8 8 = French 9 9 = Spanish 10 10 = Italian 11 11 = Turkish DISABLE DISABLE turns off the feature that uses the form length command ^L or ^H to set the page length for the printer. ENABLE sets the printer page size to equal the form length, which was set by ^L or ^H.
Option LPI Parameter 6* Comments Can also be set by using the ^@L command. 7 8 9 10 Midline PY DISABLE* ENABLE OffPage Errors DISABLE * Power-up ^F DISABLE * ENABLE ENABLE Power-up ^PY DISABLE * ENABLE Power-up ^X DISABLE * ENABLE Configuring the Printer When disabled, the Graphics mode Enabled command, ^PY, must be the first three characters of a line. When enabled, the ^PY can occur anywhere in a line.
Option Prop Line Length Parameter ENABLE * DISABLE Comments When enabled, the position of the next graphic element will be determined by the physical length of a text string (when using a proportional-spaced font). When disabled, the position will be determined as if the font was monospaced (as if all characters had the exact width specified). Rot.
Option Uniform Fonts Parameter DISABLE * ENABLE Var Ratio Barcd Low Resolution * High Resolution Comments When disabled, the typeface selected while in Extended Graphics mode will be cancelled when the graphics pass is complete. When enabled, a typeface selected while in Extended Graphics mode will also be used in Standard Graphics mode and Normal mode. The Variable Ratio Bar Code determines if standard Variable Ratio Barcode command dot values (e.g.
VGL MNEMONIC LIST 3–56 Amount Numeric Amount for Data Field Update CC Control Character CPI Characters Per Inch CR Carriage Return data Data Characters Dis Interrupt Position Distance Dist Horizontal Tab Distance Dt Dot Rows Slewed Expand M, U, V, or E Alphanumeric Command FF Form Feed Font Font selection G Universal Terminator H Horizontal Border Thickness (Box) Horz Horizontal Length of Box Ht Character Height Jus Vertical Justification Distance Len Dynamic Form Field Le
Table 3–6.
Configuring LP+ With The Control Panel The Printronix ThermaLine Series Label Printers LinePrinter Plus (line-matrix printer emulation) is a software application on a single PROM set capable of emulating four different line-matrix printer protocols: • P-Series P3000/6000/9000, hereafter called P-Series • Proprinter III XL, hereafter called Proprinter XL • Serial Matrix • P-Series XQ P300/600, hereafter called P-Series XQ The software is designed to be compatible with a variety of paper sizes as w
LP+ Configuration Menu OFFLINE MODE Impact Printer Printer Protocol Orientation CPI/LPI Select Font Attributes Plot Attributes Page Format Page 3–61 Page 3–60 Page 3–65 Page 3–66 Page 3–67 Page 3–68 Figure 3–19.
Printer Protocol Page 3–61 Orientation Portrait* Landscape Inv. Portrait Inv. Landscape CPI/LPI Select Font Attributes Plot Attributes Page Format Page 3–65 Page 3–66 Page 3–67 Page 3–68 Press Press to view options. to select an option. Press to exit the configuration menu. = Factory Default Figure 3–20.
Printer Protocol Orientation Page 3–60 CPI/LPI Select Page 3–65 P-Series P-Series XQ Page 3–62 Serial Matrix Page 3–63 Control Code 06 Control Code 08 Define CR Code Elongated * Backspace CR = CR * CR = CR + LF 6.0 LPI 8.0 LPI * 10.3 LPI Select SFCC 0 1* 2 3 4 EVFU Select Alt.
Printer Protocol P-Series Page 3–61 Control Code 06 Orientation Page 3–60 P-Series XQ Define CR Code 6.0 LPI 8.0 LPI * 10.3 LPI CR = CR * CR = CR + LF Elong/Alt.
Printer Protocol P-Series Page 3–61 Orientation Page 3–60 P-Series XQ Page 3–62 CPI/LPI Select Page 3–65 Serial Matrix Control Code 06 6.0 LPI 8.0 LPI * 10.3 LPI Define LF Code LF= LF * LF= CR+LF Font Attributes Page 3–66 Plot Attributes Page 3–67 Page Format Page 3–68 Proprinter XL Page 3–64 Define CR Code Auto LF Overstrike CR = CR * CR = CR + LF Disable Enable * Disable Enable * Printer Select Alt.
Page 3–60 CPI/LPI Select Page 3–65 P-Series P-Series XQ Serial Matrix Page 3–61 Page 3–62 Page 3–63 Printer Protocol Orientation Font Attributes Page 3–66 Plot Attributes Page 3–67 Page Format Page 3–68 Proprinter XL Define CR Code CR = CR * CR = CR + LF Define LF Code FF valid at TOF Character Set LF= LF * LF= CR+LF Disable Enable * Multinational* OCR–A OCR–B Disable Enable * 20 CPI Condensed Press Press Auto LF Disable Enable * to view options. to select an option.
Printer Protocol Page 3–61 Orientation CPI/LPI Select Font Attributes Page 3–66 Select CPI Select LPI Page 3–60 10.00 CPI * 12.00 CPI 13.04 CPI 15.00 CPI 17.65 CPI 20.00 CPI Plot Attributes Page 3–67 Page Format Page 3–68 6.0 LPI * 8.0 LPI 10.3 LPI Press Press to view options. to select an option. Press to exit the configuration menu. = Factory Default Figure 3–25.
Printer Protocol Page 3–61 Orientation Page 3–60 CPI/LPI Select Page 3–65 Plot Attributes Page 3–67 Font Attributes Prop. Spacing Typeface Std Typeface * OCR–A OCR–B Press Press Disable Enable * Page Format Page 3–68 Slashed Zero Disable* Enable to view options. to select an option. Press to exit the configuration menu. = Factory Default Figure 3–26.
Printer Protocol Page 3–61 Orientation Page 3–60 CPI/LPI CPI/LPI Select Select Page 3–65 Font Attributes Page 3–66 Plot Attributes Page Format Page 3–68 Horizontal DPI Vertical DPI 15 16 9 10 400 400 . . . 120* . . . Press Press . . . 72* . . . to view options. to select an option. Press to exit the configuration menu. = Factory Default Figure 3–27.
Printer Protocol Page 3–61 Page 3–60 Perforation Skip Margins Disable* 1/2 inch 2/3 inch 5/6 inch 1 inch Font Attributes CPI/LPI Select Page 3–65 Orientation Menu Form Size Disable* Enable Plot Attributes Page 3–67 Page 3–66 Form Length Form Width Absolute Length Function of LPI 00.0 inches 00.1 inches 00.2 inches . . 66 lines* . . . . . 11.0* inches . . Page Format Host Form Length Disable* Enable 0 lines Absolute Width Function of CPI 144 lines 00.0 inches 00.1 inches 00.
4 Diagnostics and Troubleshooting Chapter Contents Printer Self-Test . . . . . . . . . . . . . . . . . . . . . . . . . . . . . . . . . . . . . . . . . . . . . . . . . . . . . . . 4–2 Printing Test Labels . . . . . . . . . . . . . . . . . . . . . . . . . . . . . . . . . . . . . . . . . . . . . . . . 4–2 Troubleshooting Common Situations . . . . . . . . . . . . . . . . . . . . . . . . . . . . . . . . . . . . . 4–2 Improving Processing Time . . . . . . . . . . . . . . . . . . . . . . . . . . . . . . . . . .
Printer Self-Test A sequence of automatic tests is performed during printer power-up. If any faults are detected at that time, an error message will display (see Table 4–2). Printer operation should also be verified before setting the printer for on-line operation. This is is done by running the printer internal self-test diagnostic program, which will produce a selection of printed test labels. Refer to Chapter 3, “Configuring the Printer,” for instructions.
The time required varies, depending on the complexity of the label format and on the size of the area being printed. Once the data has been mapped into memory, the printer will start printing as many labels as requested by the quantity command. In most cases, there is no delay between labels; however, there are certain situations that may cause delays between label printing: • Using the cutter option The printer must stop and wait for the cutter to execute the cutting cycle.
If the printer appears to have communication problems, the self-test configuration test labels and character hex dump modes should be checked. The tests can help identify printer configuration errors that can cause problems. Both of these test procedures are covered in this chapter. Configuration items to check include the following: • Check that the data string being sent to the printer contains the correct information.
Controlling Print Quality The following two factors have the greatest effect on print quality: • The amount of heat applied by the printhead • The location of the printhead in relation to the label For example, low-cost direct thermal media often have very high reaction temperatures, which means that it takes a great deal of heat to make a clear image. Resin ribbons and film media may require higher print intensity for a quality image.
Other Printer Problems Smears or voids in printed image Possible causes include the following: • Dirty printhead. Clean the printhead, as described in the previous section. • Printhead temperature too high. Use software control to adjust the heat setting. Change the setting through the main menu PRINTER CONTROL function, which is accessed through the secondary control panel. (Refer to Chapter 3, “Configuring the Printer,” page 3–28, for complete instructions.
Printer advances media, but ribbon does not advance Possible causes include the following: • Ribbon installed incorrectly. Make sure the dull side (inked side) of the ribbon is facing the media. • Bad ribbon/media combination, resulting in insufficient friction between media and ribbon. Verify that the correct ribbon is being used. Print quality is good but printer skips every other label A possible cause is that the label is formatted too close to the top edge of the form.
Table 4–2. Printer Alarm LCD Messages LCD ALARM ALARM DESCRIPTION PROM FAULT Power up initialization test detected a PROM failure. Call your authorized service representative. RAM FAULT Power up initialization test detected a RAM failure. Call your authorized service representative. PRINTHEAD CONTROL FAIL Thermal printhead control circuit failed. Call your authorized service representative. A-D CONVERTER FAIL Analog-to-digital converter failed. Call your authorized service representative.
A Specifications Printing Type: Direct thermal or thermal transfer Resolution: 300 dots per inch (11.8 dots/mm) Print Speed: T3306 – 2.0 in (50.8 mm) to 8.0 in (203.2 mm) per second T3308 – 2.0 in (50.8 mm) to 5.0 in (127.0 mm) per second Bar Code Modulus: 3.3 mil to 110 mil “X” dimension in picket or ladder orientation Maximum Print Width: T3306 – 6.4 in (162.6 mm) T3308 – 8.5 in (215.9 mm) Maximum Print Length: T3306 – 7.
Fonts Resident Fonts: Courier and Letter Gothic scaleable outline fonts and bit-mapped OCR-A, OCR-B. Optional Fonts: A wide selection of scaleable outline proportional and monospace fonts is available Font Expansion All fonts expandable vertically and horizontally.
Label/Tag Media Specifications Front of Printer Direction of Media Motion DESCRIPTION Specifications T3306 T3308 Max(in.) Min(in.) Max(in.) Min(in.) A Label width 6.700 2.000 9.000 3.000 B Backing width 6.700 2.000 9.000 3.000 C Gap between labels 99.99 0.100 99.99 0.100 D Label length 24.00 0.500 24.00 0.500 E+F Media thickness 0.010 0.0046 0.010 0.0046 G Width of sensor opening 0.500 0.200 0.500 0.200 H Edge of media to edge of sensor opening distance 3.
Lists of Approved Media For a current list of approved standard media for use in Printronix thermal and thermal transfer label printers, please call Printronix at (800) 733–1900 or FAX (714) 476–2135. Further information can be obtained by calling the Printronix Thermaline Help Desk at (714) 221–2488 or from the Printronix Web Page at http://www.printronix.com.
Environmental Operating: 40° F to 100° F (4° C to 38° C) Storage Temperature: –40° F to 150° F (–40° C to 60° C) Humidity: 10% to 95%, non-condensing Ventilation: Forced air movement Dust: Non-conducting, non-corrosive Physical Dimensions: T3306 – 14.4 in H x 12.3 in W x 18.9 in D (365 mmH x 312 mmW x 480 mmD) T3308 – 15.0 in H x 15.0 in W x 18.9 in D (381 mmH x 381 mmW x 480 mmD) Weight: T3306 – Approximately 55 lbs. (24.8 kg) T3308 – Approximately 65 lb (29.
A–6 Specifications
B Printer Options A comprehensive series of options is offered with the printer to enhance its capabilities and to provide a large degree of application flexibility. A description of the option complement is given below. For field-installable options, installation instructions are provided with each option. Memory Options Available memory options include internal and external expansions. Both are described in the following paragraphs.
To install a module, turn the printer off, and raise the printer stock door. With the module label facing up, carefully seat the module firmly into one of the module slots, taking care not to bend the pins in the connector (see Figure B–1). The upper module slot is B and the lower is C. The printer will sense the presence of a module in slot B, in C, or in both.
Hardware Options Media Rewind Hub When large quantities of labels must be printed as single batches for later use, the printer may be equipped with a rewind hub that will automatically roll up the label media for convenient handling. The rewind hub is also used in conjunction with the peel-and-present option to roll up the used media backing after labels have been peeled off. Location of the media rewind hub is shown in Figure B–2. The media rewind hub is a factory-installed option only.
Automatic Label Peel-Off Dispenser The printer can be ordered with an optional automatic label peel-off dispenser kit, or the option can be purchased and installed at a later date. The dispenser mechanism attaches to the printer using the same method as with the tear-off assembly and allows the printer to be configured for “one up” printing. In this mode, the printer will not print the next label in the internal buffer until the last label printed has been removed from the printer.
C Setting the Page Length The following considerations should be observed when you set the page length. • In the default case any form or page length sent from an emulation (the ^L or ^H command in VGL and the length defined within the ~CREATE statement in PGL) will be used to force the page length. • The label gap sensor does not measure the label length and, instead, continues to use the page length from the secondary control panel or a HOST FORM LENGTH value.
Table C–1 shows the maximum label lengths for the T3306 and T3308 printers, given different memory configurations. Note that these are worst-case measurements. Depending upon the complexity of the label, you may be able to get longer label lengths than those listed in the table. In addition, the table figures assume you are using full width pages.
D ASCII Control Codes Chart ,3* 1-& 126 #62 > ? \ @ ! A #-2 #,/ " B # C !) $ D #* ] % E 1 & F &2
Dec Ç 128 80 á 160 A0 192 C0 Ó 224 E0 ü 129 81 í 161 A1 193 C1 ß 225 E1 é 130 82 ó 162 A2 194 C2 Ô 226 E2 â 131 83 ú 163 A3 195 C3 Ò 227 E3 ä 132 84 ñ 164 A4 196 C4 õ 228 E4 à 133 85 Ñ 165 A5 197 C5 Õ 229 E5 å 134 86 ª 166 A6 ã 198 C6 230 E6 ç 135 87 ° 167 A7 Ã 199 C7 þ 231 E7 ê 136 88 ¿ 168 A8 200 C8 Þ 232 E8 ë 137 89 ® 169 A9 201 C9 Ú 233 E9
Glossary Baud (rate) Baud Rate is the number of information bits that can be transmitted between the printer and the computer in one second. For example, one baud equals one bit per second in a series of binary signals. Both the printer and the computer must be configured to the same baud rate. BIT Binary digIT. A digit in the binary number system, represented by a 0 or a 1. A bit is the smallest unit of storage in a digital computer.
EPROM Eraseable Programmable Read Only Memory. Programs, instructions, and routines permanently stored in the printer that cannot be written to. Files in EPROM are not lost when power is turned off. (Resident fonts are fonts permanently stored in EPROM and available at any time, via software commands.) Host Computer The computer that stores, processes, and sends data to be printed, which communicates directly with the printer.
Index A Absorb After ^PY, configuration, 3–50 Adjustments, media width, 2–23 Alarms, printer, 4–7 Append Rotated, configuration, 3–50 Application memory modules, 1–8 ASCII Table, 3–57 Auto Eject, 3–45 Auto label mapping, 3–25 Auto Wrap, 3–45 Automatic label peel-off dispenser, 1–8 B Bar codes, 1–9 Baud rate, 3–38 Bottom Margin Control, 3–50 C Cable connections, 2–17 Characters, strange, 4–6 Checking for interference, 2–24 Clearance requirements, 2–5–2–7 Command Resolution, 3–50 Configuration delete, 3–32
power–up ^X, 3–53 resolution, 3–50 rotated character size, 3–54 SFCC, 3–54 slashed zeros, 3–54 text length, 3–54 truncate alpha, 3–54 UPC descenders, 3–54 variable ratio bar code, 3–55 Configuring IGP/VGL with the control panel, 3–48 Connecting cables, 2–17 Error Msgs, configuration, 3–51 Exchange, data, 4–3 F Factory settings, 3–20 Fan–folded media, 2–9 Font Memory Menu Options, 3–29 Font Set, configuration, 3–52 Font, Select, 3–46 Fonts, 1–8, 1–9 Controlling print quality, 4–5 Conversion Table, ASCII,
installing, 2–15 roll–fed, 2–8 Installing ribbon, 2–15 Media rewind hub, 2–11 Interface parallel, 3–35 serial, 3–37 Media selection, 1–6 Media width adjustment, 2–23 Interfacing, 4–4 Interference, checking for, 2–24 Internal media rewinder, 1–8 K Keys cancel, 2–22 feed, 2–22 on line/pause, 2–22 operator panel, 2–22 L Label Present Sensor, 1–8 Labels, printing test, 4–2 LED, status, 2–21 LF Code, define, 3–45 Memory application memory modules, 1–8 expansion, 1–8 Menu emulation options, 3–30 host int
twinax/coax host interface, 1–8 P Page length, 3–24 width, 3–24 not turning on, 4–7 problems, 4–6 self–test, 4–2 skips labels, 4–7 the printing process, 1–5 transporting, 2–24 unpacking, 2–6 Page length, setting, C–1 Printer control menu, 3–27 Pages, Multiple Identical Copies, 3–50 Printer life, 3–42 Panels, operator, 2–20 Printhead test, 3–42 Paper, control, 3–23 Printing test labels, 4–2 Paper Control Menu, 3–23 Problems, printer, 4–6 Parallel interface, 3–35 Processing time, improving, 4–2
Self–test, printer, 4–2 Text Length, 3–54 Sensor, gap, 3–28 Time, processing, improving, 4–2 Serial interface, 3–37 Transporting the printer, 2–24 long–distance, 2–24 short–distance, 2–24 Setup, initial, 2–7 SFCC Select, 3–46 SFCC, configuration select, 3–54 Troubleshooting, 4–2 Short–distance transporting, 2–24 True Vert 1/10, Configuration, 3–54 Site selection, 2–4 Truncate Alpha, Configuration, 3–54 Skip Cmd Prefix, 3–46 Twinax/coax host interface, 1–8 Slash 0 (zero), configuration, 3–54 U
Index–6
"% " & $ & $ & #% % % " " ! & ! #" !" " ! #" #!" !" " ! & $ ! " # % ! " " 136462–001C