
Manual
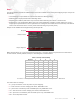
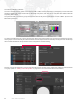
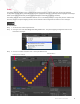
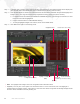
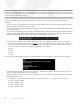
Table Of Contents
- Table of Contents
- Revision History
- Introduction
- General Operation
- Content Management
- Setting Server Preferences
- Projection Mapping
- Pixel Mapping
- Appendix A. Networking For Mbox
98 MBOX
®
REMOTE USER MANUAL
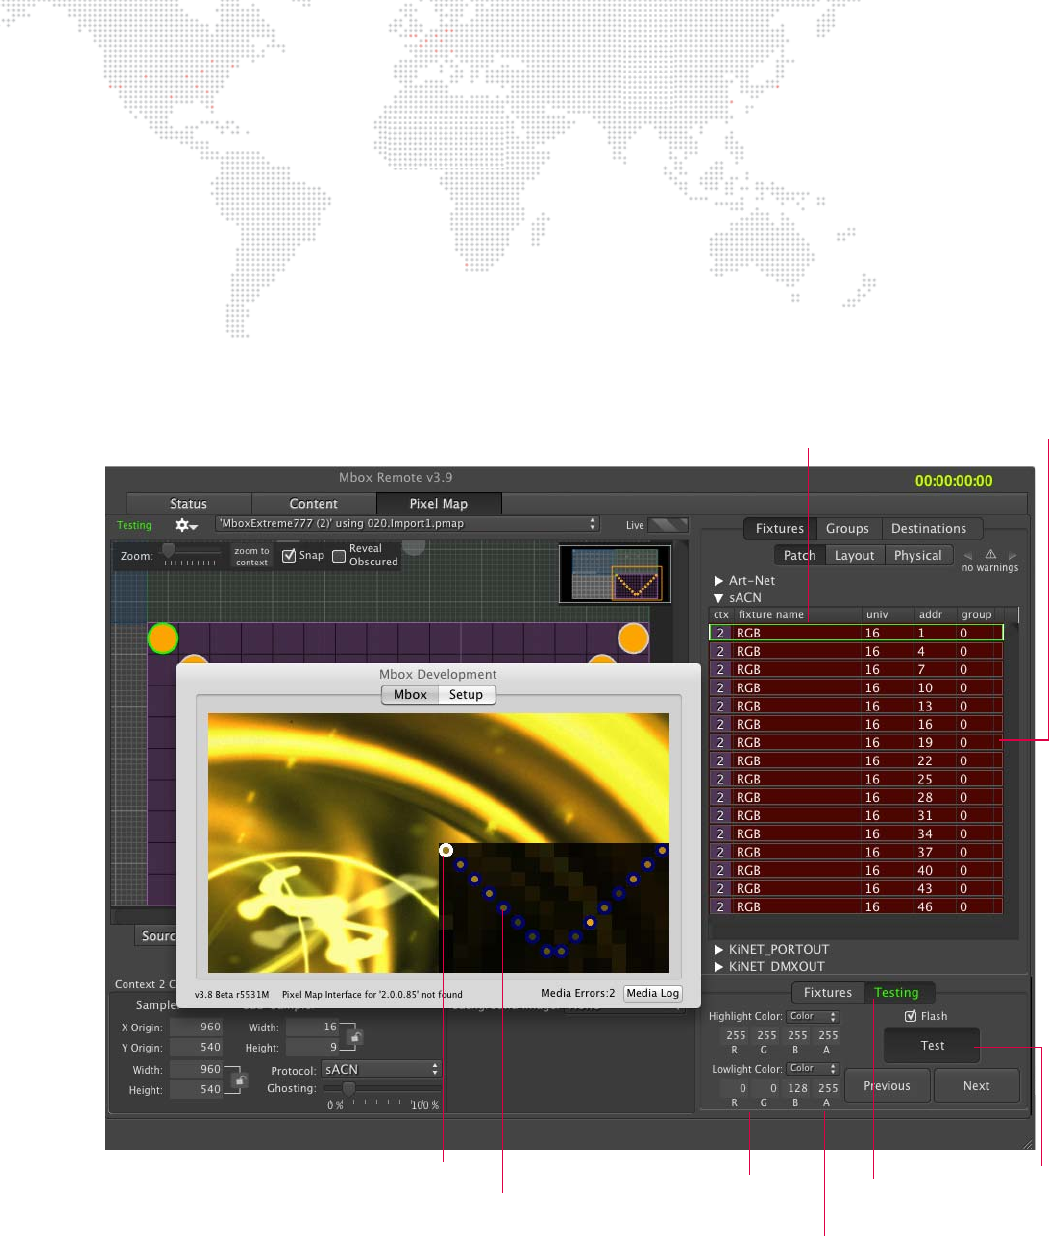
Step 4. At bottom right of window, select Testing tab then click Te st button. (The Testing tab text will be displayed in
green and the Test button will be dark gray to indicate that the Testing mode is active.)
Step 5. Once the Te x t button is clicked, the selected fixtures will start flashing between the specified highlight and
lowlight colors. (The rings around the fixtures represent the actual values sent to the fixtures.)
a. If multiple fixtures are selected, click Previous and Next buttons to cycle through the selection set. One
fixture at a time will be highlighted.
b. Use the Flash checkbox to enable/disable flashing.
c. To change highlight/lowlight color scheme, enter custom RGB values.
Step 6. Click Te st button again to exit Testing mode.
+ RGB - The highlight and lowlight colors are configurable with 8-bit RGB values.
+ A (Alpha) - The only two correct options for the field are 255 or 0. If the value is 255, the color (highlight or
lowlight) will be completely opaque. If the value is 0, then the color values are ignored and the high/lowlight will be
the color values that Mbox is actually sending out.
Testing Tab
(text will be green if Test is active)
Highlight / Lowlight Colors
(RGB)
Highlighted Fixture
Full selection set for testing
Test Mode Enabled
Highlighted Fixture (white)
Lowlighted Fixtures (blue)
Alpha (A)