
User Guide


41
PrestaShop version 1.3 UserGuide – OCTOBER 2010
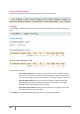
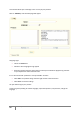
You will then arrive at the page below
List of attachments 1
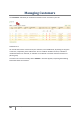
This page sums up all of your store’s documents. This rubric is also accessible by clicking on the sub-
tab “Attachments” under “Catalog.”
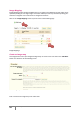
Return to the tab “7. Attachments” on the product page of your Back Office, and the last saved
document should appear. Select the document that you would like to associate with your product and
click on the button “Add.” The document will then move from the right column to the left column.
Click on “update attachments” to save your changes.
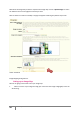
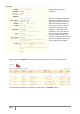
Now the tab “Download” will appear in your online store, and you can look at the file that you just
saved. See the screenshot below.
Added documents 1
Now we have finished configuring a product, let us move on to the tabs found under the “Catalog”
section.