
User Guide


28
PrestaShop version 1.3 UserGuide – OCTOBER 2010
Configuring the Product Image
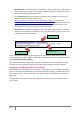
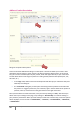
Tab 2, Images, is for including photos on your product page.
Product Images 1
To add one or more images to your product, click the “Browse” button, then select a photo
from your computer to upload.
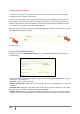
Write a file name in the “Caption” field once you have uploaded the image. This is the name
that search engines will use to reference your product. You must thus give it a name that
corresponds to the product description. This way, your product will appear with ease in
search engine results.
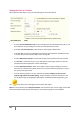
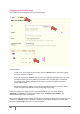
Check the box that says “Cover” if you want this uploaded image to be used as the default
image, and appear automatically on the product page of your shop.
Finally, to compress your images and turn them into thumbnails, you can choose between
“Automatic” or “Manual” in the drop-down menu next to “Thumbnail resize method.” We
recommend that you leave it as automatic.
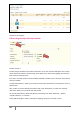
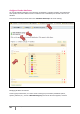
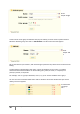
Once you have uploaded several images, you can choose to modify the image order by clicking on the
arrows in the “position” column, and define a different cover image by clicking on the icons under
the column “cover image” (see insert 1 in the screenshot).