
User Guide


159
PrestaShop version 1.3 UserGuide – OCTOBER 2010
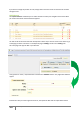
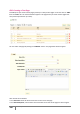
For this example we will create the profile "Preparer of Orders" by completing the "Name" field. Once
entered click "Save." It will then appear in the list of profiles.
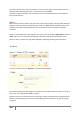
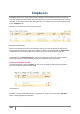
We will now assign permissions to this new profile. To do this click the sub tab "Permissions". A list of
66 criteria will appear. For each of these criteria you have 4 options.
•View: allows employee to only view information.
•Add: allows employee the possibility to add new information
•Edit: allows employee the possibility to change information
• Delete: allows the employee to delete information.
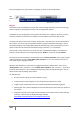
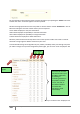
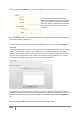
Select the profile to edit from the drop-down menu at the top of the table. Then check or uncheck
the boxes to assign rights to different functions of your store.
To avoid mistakes during the configuration of your profiles, PrestaShop saves your settings every time
you make a change. Once you have assigned the profile rights, you can return to the "Employees" tab.
Once you are back on the “Employee” tab
Here is the list of all the
tabs and sub tabs in your
Back Office. Determine,
by checking or
unchecking the boxes, if
the profile in question
can see, add, edit, or
even delete elements
from these tabs.
Everything is saved
automatically
Access rights
Select a
profile