Reading suggestion | Symbol description &h Precautions | Usage recommendations Power Vision S1 provides users the following information: 1." Tutorial Video" 2." Disclaimer and Safety Guidelines” Start Guide" Manual" We recommend that users watch the tutorial video for this product on the official Power Vision website or Vision App before using this product. To learn more about how to use this product, read the "Disclaimer and Safety Guidelines " and "Quick Start Guide".
Product description Power Vision S1 combines a three-axis stabilized handheld gimbals, smart stand, and wired and wireless charging in a single device. Its clever and compact folding design is elegant and easy to carry, making it the perfect companion for smartphones. Power Vision S1 integrates three-axis gimbals with high precision, which features physical stabilization that helps phones capture smoother and less-shaky motion pictures.
11.Pan Motor 14.Main Arm 17.Magnetic Mounting Plate 12.Tilt Motor 15.Tilt Joint 13.Roll Motor 16.Roll Joint ® Magnetic Phone Clamp ® Magnetic Phone Case (sold separately) 1.Magnetic Intimation Plate 2 Slide St « Magnet 1.Magnetic Universal Phone Mount (sold separately) 2.
| Buttons and port functions By default, Power Vision S1 is in Follow mode when it is powered on.In Follow mode, the gimbals will keep the phone level at all times during shooting. When the gimbals is moved up, down, left, or right, the shooting direction will be adjusted smoothly. Use the following buttons and ports to access Power Vision S's functions: ¢ Power Button OFF mode ® Press once: View battery level and activate charger mode. ® Press and hold: Turn on.
indicates the current system status Solid yellow light Bluetooth h not connected Solid green light B eyetooth h connected Yellow and green pulses blink Stan by mode Solid orange light Phone charger mode Blinking blue light Gimbals is updating Blinking red light Gimbals exception {too high or too low temperature, excessive battery discharge etc.
+ 5-Way Button Camera mode: Up, down, left, and right buttons: move the gimbals in four directions Middle button: ® Press once to enable Tracking mode. Press once again to disable Tracking mode. ® Press twice to re-center the gimbals. * Press three times to switch between front and rear cameras. Press and hold firmly to enter Lock mode. ® Press once and then hold firmly to enter Sport mode. Release to turn off Sport mode. Standby mode: ® Press once to wake up device.
¢ Built-in Tripod Power Vision S1 features a built-in tripod. Extend and unfold the tripod to place it on a stable table. ¢ UNC Port Use the UNC Port located at the base to connect the gimbals to an external tripod. | Unfolding and storage Power Vision S1 was designed to be extremely portable. The device can be folded into a small size, making it easy to store and transport, and can also be used to charge phones. ¢ Unfolding &H Do not turn on S1 when it is in storage.
Rotate the [Roll joint] to the illustrated position. Hold the main arm and rotate the [Tilt joint] counterclockwise to the illustrated position. Use a Magnetic phone clamp, @magnetic phone case, or magnetic universal phone mount to install your phone into the gimbals and start using it.
+ Storage Please remove your phone and power off S1 before storing it Hold the main arm and rotate the [Tilt joint] clockwise to the illustrated position. Rotate the [Roll joint] to the illustrated position.
Open the [Motor cover], and rotate the [Main arm] 180 degrees vertically into the device. Close the [Motor cover] to finish storage. ¢ Unfolding and storing built-in tripod of S1 Completely extend S's built-in metal feet at the base of the device.
"A Fold the metal feet into the illustrated position. Open the Card Foot at the base. Place the device on a level surface.
| Charging Use the USB charging cable (provided) and a compatible power adapter (sold separately) to connect to Power Vision S's USB-C port and charge the device. When the device is fully charged while in OFF mode, the battery level indicator will automatically turn off. This product supports fast charging, and is recommended to be paired with third party adapters that have a power output of at least 18 W. Charging time: about 2 hrs (*tested charger) Max operating time: 15 hrs.
¢ Magnetic phone case 1.Select a magnetic phone case that matches your phone model, align the area with a circle logo with the gimbals magnetic mounting plate to complete the attachment process. Note: For a list of phone models that are compatible with the magnetic phone case, check details in our official website, www.powervision.me.
(1)Clean the back of the phone. (2)Align the center positioning card with the back of your phone, and the magnetic universal phone mount's circular magnetic area with the center of the back of the phone. (3)Apply pressure to the attached magnetic universal phone mount for 30 minutes and ensure that it is flat. (4)Remove the center positioning card and wait for 4 hours before using the gimbals. Align the circular logo area with the gimbals magnetic mounting plate to complete the attachment process.
Preparing for use Power Vision S1 can be used with its dedicated App. Use Power Vision S1 buttons to activate Camera, Gimbals, Panorama, Motion lapse, and Tracking modes. Follow these steps to access Vision App's main functions: OQ) Home: View device connection status and the gimbals remaining battery level. (0) Camera: After connecting with Power Vision S1, enter the camera shooting screen. Co Power Follow: After connecting with Power Vision S1, use the Power Follow fun Ca son.
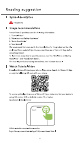
| Connecting Power Vision S1 Power on Power Vision S1. Turn on Bluetooth on your phone.Using Power Vision S1 App, select S1 as the name of the device to connect to. Visitant RE | Activating Power Vision S1 The first time you connect to Power Vision S1 you will need to activate your device or you will be unable to use Vision App functions. Activating Power Vision S1 requires registering and logging in to a Power Vision account. Completing these steps requires an internet connection.
Using the gimbals | Operating modes S1 has three operating modes, which can be used in both portrait and landscape shooting modes. The figures below show a phone being used in landscape mode. ¢ Upright Mode After you unfold S1 and install your phone, hold the device and the device should be positioned beneath the gimbals. Then it is in the upright mode.Press the 5-Way button twice to re-center the gimbals. ¢ Under slung Mode Under slung mode is an inversion of upright mode.
| Shoot with Vision App 1. Home 0 : Press to return to the home page. 2. Camera Status Bar Shooting Mode Configurable Parameters Time wrap Flash, resolution. frame rate Tim elapse Flash, resolution and frame rate Slow motion Flash, frame rate Video Flash, gesture control, beautify Photo Flash, gesture control, beautify Panorama Flash, gesture control, timer, Panorama mode oir . Gesture control switch There are three types of gesture controls when this switch is enabled.
the follow speed increases. c.Zoom Speed: Controls the zoom speed of the zoom slider. d.Handle Speed: Adjust the control speed of 5-Way button e.Horizontal Reverse Switch: When this switch is enabled, if you push the handle left or right, the gimbals yaw axis will move in the opposite direction of your actual movements. f.Vertical Reverse Switch: When this switch is enabled, if you push the handle up or down, the gimbals tilt axis will move in the opposite direction of your actual movements. g.
frame while photographing or recording. Tracking mode can be enabled using three methods: a. Short press the 5-Way button and Power Vision S1 will automatically start tracking the object in the center of the frame. Press the 5-Way button again to deactivate object tracking. b. Manually draw a box on the screen to choose an object to be tracked. Press the tracking icon to deactivate object tracking. c. Enable gesture recognition in the status bar of the shooting page.
Procedure: 1.Set Power Vision S1 on a level surface, turn on the device, and connect to the App. 2.Enable the Power Follow function in the App. 3.0pen the third party live streaming platform and activate tracking with a gesture or by pressing the camera button on the gimbal. Activate subject tracking using gestures . Activate/Stop subject tracking by pressing the camera button £3 on the gimbals. To stop tracking, adjust the directional buttons or press the 5-Way button twice during the tracking process.
Charging Smartphone with S1 Power Vision S's built-in 4120 mAh battery can charge phones using a cable or tirelessly. When S1 is powered off, it can tirelessly charge at a charging power with a wired charger. When S1 is powered on, 51 supports a maximum charging power of 5 W. Note that only wired charger mode is supported when S1 is powered on.
| Charging your phone with a wired charger Procedure 1. Connect your phone to S1 using a USB cable. 2. Press S1 Power button to start charging. f) 1. When the S1 is powered on, it only supports charging with a wired charger, at a maximum power When both wireless and wired charging are activated at the same time, only wired charging will be used.
Firmware Upgrade S1 can be updated on the App.Updating takes about 3 minutes. Before updating, check that the S1 battery level indicator has at least 2 illuminated bars. Connect S1 to the App. If the App notifies you that there is a new firmware version available for download, you can tap to start the firmware update. Do not exit the App screen or start other background operations while upgrading the firmware. Please follow the prompts to complete the process.
Power Vision 3% This content is subject to change without prior notice. Download the latest version from Power Vision is the trademark owned by Power vision Tech Inc. Copyright © 2021 Power vision Tech Inc. All rights reserved.