
Product Manual A

Page 20 of 28
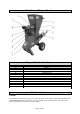
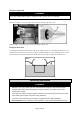
Visual Inspection
Before and after using the Chipper Shredder, closely inspect the machine for loose parts and
damage.
Check the hopper, hopper guard, and funnel for cracks, holes, and loose bolts.
Check the box frame for cracks or damage.
Check the entire machine for loose bolts or screws.
Check the blades and hammers for cracks and dings.
Check the engine oil level.
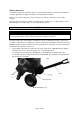
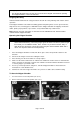
Cleaning
Clean the machine after each use. Allow the motor to cool and remove the spark plug wire. Brush off
or vacuum wood chips and wipe off the remaining dust from the exterior of the machine with a dry
cloth. DO NOT rinse off the chipper/ shredder with water. Remove any chips or debris from the
hopper and the discharge chute.
It is much harder to clean the machine if you allow it to sit for a while after use. You may need to use
an engine cleaner to remove the built up resins from the motor. Engine cleaners are available at most
auto parts stores.
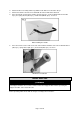
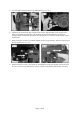
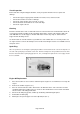
Spark Plug
After every 50 hours of running the spark plug should be removed. Check the color of the deposits on
the end of the spark plug it should be a tan color. Remove all deposits using a stiff brush a brass wire
brush is ideal. Check the spark plug gap (Pic.18, 18.1) and adjust if required. The correct gap should
be 0.7 to 0.8mm.
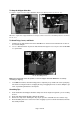
Engine Oil Replacement
1. Place the machine on a level surface and warm up the engine for several minutes. Then stop the
engine.
2. Remove the oil filler cap (Pic.5, 5.1).
3. Place an oil pan under the engine. Remove the oil drain plug (Pic.5, 5.2) so that the oil can be
completely drained. You will need to use a tube or other similar device to prevent the oil leaking
onto the frame of the Chipper Shredder.
4. Check the oil drain plug, gasket, oil filler cap and O-ring and if damaged replace.
5. Reinstall the oil drain plug.
6. Add engine oil up to the upper level of the dipstick (Pic.6, 6.1).