
Product Manual A

Page 13 of 28
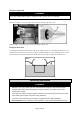
Working Clearances
Consider the length of the material to be processed through the machine and make sure that there is
enough height above the Chipper Shredder to accommodate the material.
Make sure the unit is located close to the area where the chips are going to be used to reduce
carrying.
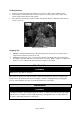
Stay clear of the discharge area. Make sure all bystanders, children, pets, or objects that you do not
want damaged or covered in chips, are clear of the discharge area.
Assembly Instructions
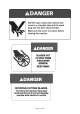
⚠WARNING
This machine presents serious injury hazards to untrained users. Read through this entire manual to
become familiar with the controls and operations before starting the machine!
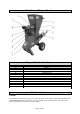
The major components of this Chipper Shredder have been assembled at the factory. Some minor
assembly is required. The assembly process will use all the parts and hardware listed in the inventory.
DO NOT attempt to start this machine until all assembly has been completed. Serious personal injury
and damage to the machine could occur.
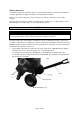
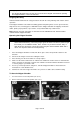
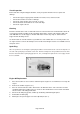
1. Tip the Chipper Shredder over and remove the bolts shown in Pic.2. DO NOT turn the Chipper
Shredder over once it is full of oil and gas. The oil and gas will spill out.
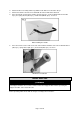
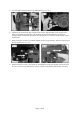
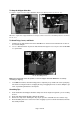
For fixing the leg you’ll need: 2pcs Bolt M8x20, 1pc Bolt M8x200, 1pc Support Tube, 4pcs
For fixing the wheel assembly you’ll need: 2pcs Bolt M8x200, 2pcs Support Tube, 4pcs Washer
Ø8, and 2pcs Lock nut M8.
Pic.2 Attaching the Leg