Getting Started with Newpoint ™ Compass 4.0 also includes the Technical Support Guide Newpoint Technologies, Inc. 13 Red Roof Lane Newpoint Technology Park Salem, NH 03079-2929 USA telephone +1 603 898-1110 fax +1 603 898-1113 http://www.newpointtech.com support@newpointtech.
January, 2001 Newpoint ™ Compass software provides monitoring and control functions and information management for satellite earth stations. Software Version: Operating System: Doc. Number: Doc. Revision Compass v. 4.0 Windows NT 4.0+ COMP-USER-006 Rev. 3.2 Newpoint Technologies, Inc.
A Welcome from the President Welcome to the Newpoint family. This Guide contains information you will need to ensure success with Newpoint Compass. Each section contains practical information. Use this Guide to install the program, find answers to your questions, and find out about technical support services, plans, and options. We put a great deal of thought, with you in mind, into the support plans and options detailed in this Guide.
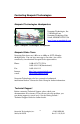
Contacting Newpoint Technologies Newpoint Technologies Headquarters Newpoint Technologies, Inc. 13 Red Roof Lane Newpoint Technology Park Salem, NH 03079-2929 USA http://www.newpointtech.com Figure 1 Newpoint Technologies Headquarters Newpoint Sales Team Newpoint Sales hours are 8:00 a.m. to 6:00 p.m. (EST), Monday through Friday. You can leave messages at any time; you will be contacted by an authorized Newpoint Sales representative.
Contents A WELCOME FROM THE PRESIDENT ..................................................................3 CONTACTING NEWPOINT TECHNOLOGIES ........................................................4 Newpoint Technologies Headquarters....................................... 4 Newpoint Sales Team ............................................................... 4 Technical Support .................................................................... 4 ABOUT THIS GUIDE ..............................................
MAINTENANCE PLANS - COMPASS LICENSED SOFTWARE ...............................65 APPENDICES................................................................................. 68 WINDOWS NAVIGATION CONVENTIONS ...........................................................69 Windowing and Window Elements ............................................ 69 Navigating in Newpoint Compass ............................................. 71 MAINTENANCE & TROUBLESHOOTING ......................................................
About this Guide This Guide provides information and procedures required to install and configure Newpoint Compass software. Objectives With the assistance of this manual, you will be able to: q install all components of Newpoint Compass version 3.
Document Conventions The following conventions are used throughout this guide. Convention Indicates courier This typeface is used in examples of command sequences and ASCII file contents. Italic Text Italics identify new terms and variable expressions, such as parameters. <> Angle brackets specify keyboard keys, such as the or keys. Note that your keyboard may not be labeled as shown in the text.
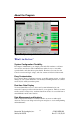
About the Program Figure 2 Sample Compass Console What’s in the box? System Configuration Flexibility In Compass Administrator, use simple point-and-click routines to add new sites (nodes) and devices. The Administrator makes it easy to customize system alarms, and other driver point details. From here you can also edit Console screens and logic scripts, and view current or historical data trends.
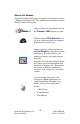
New in this Release Newpoint Compass builds on the strengths of its predecessor, Satnet ™ Manager for Windows NT. This section briefly introduces features recently added to the program. Compass 4.0 can be installed and used on the Windows 2000 operating system. With the optional Web Interface, you can view system data from any computer installed with a web browser. Compass now has a built-in interface to Crystal Reports, a powerful and timetested reports generator.
The Compass Device Wizard asks you simple questions, and then configures driver buses and the devices attached to them, based on your responses. The Wizard also generates device icons for each new device, to help you create system screens. It’s that simple. The updated Device Library contains new tested drivers that are compatible with Compass and with dozens of devices.
Upgrade Information Important Information for Upgrading Compass From previous versions of Newpoint Compass Figure 3 To Upgrade, select Repair Compass clients distributed with older Compass releases (and custom clients compiled with toolkits from older releases) can not connect to the Compass 4.0 server. Before you decide to upgrade to the newest version of Compass, consider the following: • If you upgrade, you will have to recompile all drivers and custom clients with the Compass 4.0 Toolkit.
• The following files are protected during an upgrade or reinstallation to the same target directory (\COMPASS). Any other file is subject to replacement. Therefore, we strongly recommend that you avoid edits to files not included in the list. Ø Ø Ø Ø etc\system.pnt etc\feprpl.cfg etc\system.mnu iml\ipe.
Important Notes There is very little reason to upgrade a driver that is working properly in your system. If you do upgrade a working driver, be prepared to re-apply any customization you added to the previous point file and supporting screens. You will not be able to connect to a Compass node that is using an older version of Compass than is installed at the local node. The reverse, however, is possible; older nodes can connect to nodes using newer Compass software.
The utility configures the visibility and sensitivity attributes for all submodels that do not already have them configured. It sets them to True (1); the submodels will be visible and detectable. Command Description SCRPATCH Enter this command to update all system screens under \COMPASS. SCRPATCH Enter the command with a directory name argument to update only screens in the designated directory.
Installing Newpoint Compass Directory Structure During installation, Newpoint Compass creates several directories for program configuration and executable files. Directory COMPASS (root directory) \apache \bin \demo \Dev_Shell \docs \drv \etc Contents The readme file (in .doc or .txt format) describes program improvements and includes information that may not be documented elsewhere. Use Microsoft’s WordPad or NotePad to read these files.
Directory \gms Contents • \iml • • \irdrv • \lib • \remote • \screen • \gmsdong Newpoint Compass Draw optional graphics package Sentinel (protection key) installation files Standalone Scripting (IM&L and RRIML) configuration and executable files files developed using the Interpreted Rule Driver language device driver function libraries, optional Client Toolkit files empty until you begin to implement data replication.
Hardware Requirements & Recommended Settings Processor Pentium II 233 MHz (see note below) Memory (RAM) at least 96 MB Hard Drive at least 300MB free space available for a complete installation Medium CD-ROM drive Mouse Use a three-button mouse to take advantage of all navigation features in Newpoint Compass. (A two-button mouse is acceptable) Display SVGA monitor, that can support 65536 Colors, Small Fonts Enabled, and 1024 x 768 resolution.
Note The minimum processor speed and installed RAM required to support your system is directly related to the number of devices, clients, and graphical user interfaces (GUIs) you plan to incorporate into the system. The requirements above will adequately support a small system. However, a more realistic approach is to plan for future system expansion, and to purchase as much processor power and RAM as you can afford.
Installing Newpoint Compass Installing from the Newpoint Compass CD-ROM is a simple process. To install, you should have Windows NT Administrator privileges, which allow you to perform NT system maintenance, such as setting up user accounts. Note These installation procedures are for the Windows NT version of Newpoint Compass only. Windows NT 4.0 Server must be installed on your system prior to installing Newpoint Compass. Insert the CD in the CD-ROM drive (usually drive D: ).
After the Compass installation files are unpacked by the installation utility, the first screen welcomes you to Installation, and offers the option to cancel. Figure 5 Welcome to Installation It is especially important to close all other programs before you begin to install Compass. Click on Next to continue. Carefully review the license agreement. This document is also included as an Appendix to this User Guide.
User Name: Enter your name or the machine name. Company Name: Enter the name of your company. Serial Number: Enter the serial number(s) of the hardware key(s) assigned to the software. Use a comma to separate multiple numbers. Figure 7 Enter User Information If you are installing the program for evaluation, enter Demo. Click on Next to continue. Important Notes If Compass is in demo mode, the node shuts down after four hours. You will not be able to connect to this node from any other node.
Both keys are 25-pin standard IBM PC serial / parallel port adapters with male and female connectors. Plug the female end of the blue Newpoint Compass key into a serial (COM) port on the back of the computer. Plug the female end of the gray Rainbow Draw key into a parallel (LPT) port. CAUTION: Never attach the Draw key to a RocketPort or you will destroy it. The blue FEP key can be connected to a RocketPort, but you will need a 25-pin female-to-female gender changer.
On the Select Type window, choose an installation method: Black Box FEP: Select this option to install non-graphical components of the program to the local node. This option does not install any application that requires a monitor and keyboard to operate. Figure 9 Select Installation Type Complete: Select the default to install all program files – for a typical configuration. Custom: Select this option to review individual program components to install. See below for details. Click on Next to continue.
Installation Components These components are installed from the standard Compass 3.0 CDROM. Optional modules are only accessible if you have purchased them, and if your Compass key (dongle) is properly configured. Contact Newpoint Customer Service for assistance or to purchase desired options if you can not access installed components.
Enter the login (User Name) for the person who will have the most access and privileges in the system. Only this super-user, and users who are members of the Compass Admin User Group in the Windows NT User Manager, can start and stop the program and change node states. Figure 11 Enter System Super-User Newpoint Compass provides additional security features to control point access. See the Newpoint Compass User Guide for details. Click on Next to continue.
Figure 12 The Windows Registry Editor Click on Next to accept the default Program Folder, or type an alternate name. This Windows Program folder will contain icons to access program functions. Figure 13 Select Program Folder Newpoint Technologies, Inc. Salem, NH 03079 27 COMP-USER-006 Rev. 3.
For easiest access to the program, the installation process also places two icons on your desktop. Click on the Compass Administrator icon to access the program’s administrative and configuration windows. Click on the Compass Runtime icon to open the Compass Console. Compass is also added to the list of programs available from the Start / Programs menu. The Program Folder name is the last piece of information that you must confirm before the program files are installed on your system.
Figure 15 Important Information! IMPORTANT! Reboot your computer to complete a first-time installation. Click on Finish to close the window. If the option to reboot is selected, your system will shut down all open applications and reboot. Newpoint Technologies, Inc. Salem, NH 03079 29 COMP-USER-006 Rev. 3.
Installing the Apache Web Server (optional) Figure 16 Apache Web Server Installation Option After Compass installation, you are asked if you want to install Apache Web Server, which is required to support the new Compass Web Interface. If you do not already have Apache Web Server installed on your hard drive and you plan to use the Web Interface, click on Yes. The files are immediately installed to \COMPASS\apache, and you are returned to the installation process.
Figure 17 DNS Settings for Windows NT Newpoint Technologies, Inc. Salem, NH 03079 31 COMP-USER-006 Rev. 3.
Figure 18 DNS Settings for Windows 2000 Newpoint Technologies, Inc. Salem, NH 03079 32 COMP-USER-006 Rev. 3.
Installing Adobe Acrobat 4 (optional) Figure 19 Adobe Installation Option At the end of the installation, you are asked if you would like to install Adobe Acrobat. Acrobat is a cross-platform document viewer. All Compass User Guides and other documents loaded into the \COMPASS\docs directory are in a format readable by Acrobat. If you do not already have the Acrobat Reader installed on your hard drive, click on Yes in the window displayed above, and follow the steps below.
Figure 21 Select Installation Location Click on Next to accept the suggested installation location for the Adobe Acrobat files, or click on Browse to select an alternate location. Figure 22 Installation Confirmation If the installation is successful, a pop-up information window appears; click on OK to exit the Acrobat installation program. The installation places an icon on your Windows Desktop to access Adobe Acrobat. Newpoint Technologies, Inc. Salem, NH 03079 34 COMP-USER-006 Rev. 3.
Note Adobe Acrobat Reader is distributed free of charge on this CD. For additional technical support, related document management products, and updates to the Reader, please go to http://www.adobe.com on the Internet. Newpoint Technologies can not be held responsible for use of this Reader or any other Adobe product. If you have any problems accessing Newpoint documents (in .pdf format) with the Reader, the full extent of our ability to help you will be to forward another copy of the .pdf file to you.
Reinstalling Newpoint Compass In rare instances, you may need to reinstall Newpoint Compass to replace corrupt or lost files. (These problems are usually caused by hardware failures.) If you must reinstall the program, insert your Newpoint Compass CD ROM and proceed as if you were installing the program for the first time.
WARNING!! The files below are protected during upgrade or reinstallation to the same target directory (\COMPASS). Any other file is subject to replacement. Therefore, we strongly recommend that you avoid edits to files not included in the list. Ø etc\system.pnt Ø etc\init.ctl Ø etc\feprpl.cfg Ø etc\custlink.cfg Ø etc\system.mnu Ø etc\default.dy Ø etc\system.cfg Ø iml\ipe.cfg Ø etc\admin.txt Ø screen\overview.m1 Ø etc\pointdb.cfg Newpoint Technologies, Inc.
Installing Your Rainbow Key Newpoint Compass uses a security key to prevent unauthorized access to program functions and components. To activate your key, follow the simple steps below. If you do not activate the key, the program runs in demo mode, and only for a four hour period. Notes Hardware Keys (or dongles) are assigned serial numbers that identify and enable the software modules you have purchased. This prevents unauthorized software access or duplication.
Note This path to the dglsetup executable file is only applicable if you installed the program to the default location suggested during the installation process. If you chose to install Newpoint Compass to another location on your hard drive, use the Browse button to search for and select the file in the alternate location. The Sentinel Driver Setup Program screen displays a single Functions Menu. On the menu, select Install Sentinel Driver.
Modifying Port Settings During installation, the Sentinel Driver locates all ports known to Windows NT and configures these ports automatically. You can also define ports and edit settings; select Configure Sentinel Driver from the Functions menu. Most systems do not require customization. If you edit settings, remember to reboot the system for changes to take effect. To access the Configuration window: On the Windows Desktop, click on the Start button. Select Run.
The Newpoint Device Library Newpoint Technologies includes a collection of Compass compatible device drivers and supporting Console screens with each Compass software distribution. Because there are so many drivers in this Device Library, we have also developed a utility to help you install only those you need. Note All driver files and supporting screens are stored on the distribution CD-ROM in non-compressed formats – you can easily copy files from the disk to your hard drive to install device drivers.
Installing Library Drivers Figure 26 Device Library Installation Welcome Screen To install drivers from the Device Library, click on the Start button on the Windows NT desktop. Select Programs / Newpoint Compass / Driver Installation. (Or, you can double click on the GDRVINST.BAT file in the \COMPASS\bin directory.) Click on Next to continue. Newpoint Technologies, Inc. Salem, NH 03079 42 COMP-USER-006 Rev. 3.
Figure 27 Identify Install Source In some cases, you may want to install device drivers from a directory created on your hard drive, a virtual drive, or on a network drive. To access those drivers, they must be stored in \COMPASS\drv on the drive, or the installation utility will not be able to detect the files. Enter the drive letter (no colon required) for the disk drive or CDROM drive that contains the Device Library distribution. Click on Next to continue. Newpoint Technologies, Inc.
Figure 28 Select Device Drivers Click on each driver you want to install. You can install each driver individually, or hold down the key on your keyboard as you select all the drivers you wish to install. Click on Select All or De-Select All to include or exclude all drivers from the installation. Click on Finish to begin the installation: • Selected drivers are installed in \drv under $FEPHOME (\COMPASS). • Screens are stored in the \screen directory, directly below FEPHOME.
Driver Upgrades The installation program determines if there is a driver directory with the same name already installed. If there is a previous installation, you are notified, and asked if you still wish to install the driver. Upgraded drivers, when installed, are renamed by adding an underscore character and a number (single consecutive digit) to the name of the driver directory. The number appended to the name increments with each upgrade.
Errors Occasionally, you may encounter the following issues as you attempt to install from the Device Library. Use the explanation beside each issue to try to resolve the problem. If you still experience problems, contact Newpoint Technical Support. Error Description / Explanation Incorrect or Corrupt Driver Disk The physical drive indicated by the user does not contain a \COMPASS\drv directory. Access Violation The \COMPASS directory does not have read privileges.
Device Library Contents and File Structure The Device Library contains all code, documentation, and supporting materials for device drivers that integrate with the Newpoint Compass™ satellite earth station management system. Each driver you select as you install the Library is installed into the Compass file structure.
Current Device Library, by Module ID The following devices are included in the Newpoint Compass 4.0 distribution.
ID Driver 1036 Scientific Atlanta Switch 1037 Locus SSPA 1038 Locus Switches 1039 1040 1057 1059 IDB HPA Switch Radyne Modems Fairchild Modems & Switches Xicom HPAs and Switches Satellite Systems Corporation Beacon Tracking Receiver Comstream Modem & Switch Schneider Modicon PLC Koyo PLC Miteq UPC 1064 Newtec Modulators 1069 IPM 1041 1047 1050 1053 1056 1071 1074 1078 1079 1099 EFData Up/Down Converters Noisecom Seatel ACUs Electralert General Instruments Newpoint Technologies, Inc.
Logging Into and Exiting the System This section details how to start the Newpoint Compass computer, and to launch Newpoint Compass. IMPORTANT! Before you can use the program to monitor your system, you must configure System Parameters. The Compass User Guide contains these important procedures. Starting Up and Shutting Down the Computer To start your computer, 1. 2. Turn the PC and monitor on. Enter a login name and password at the NT Login window.
Stopping and Starting Compass Administrator Open Newpoint Compass using one of the following methods: • RECOMMENDED: Click on the Compass Administrator icon placed on your Desktop during installation or • Select Programs/Compass from the Windows NT Start menu, or • Click on the Start menu button, select Programs/Command Prompt to access the command prompt. Enter fepadm. Before you exit the Newpoint Compass Administrator, close all open windows, and bring the current node to Stop state.
Notes We recommend that you close all Compass clients before restarting the program. The Compass node is placed in Unavailable state if you initiate the Newpoint Compass Administrator, but the Compass service is not yet active in the Windows NT Services Administrator. To access any Compass application, open the Newpoint Compass programs menu from the Windows NT Desktop. Click on the Start button at the bottom of the desktop, then select Programs / Newpoint Compass. Newpoint Technologies, Inc.
IMPORTANT NOTES Windows NT maintains its own Event Log, that records events as they occur on the PC. To access the Event Log, click on the Start button on the Windows NT Desktop. Select Programs, then Administrative Tools (Common). On the Tools list, select the Event Viewer, and from the Log menu, select the Application Log.
As you initiate Compass, you may see the following message: Current configuration exceeds actual license. You must reduce your configuration to match your license. Terminating Newpoint Compass core processes... Failed to enter IDLE state. Newpoint Compass state changed to STOP. This message appears because there are too many devices configured on the Compass node as licensed from Newpoint. You must reduce the number of devices in the system.
Changing Node States from the Administrator Figure 30 Change Compass Node State A Compass node must be in either Run or Idle state before you can perform most administrative or configuration tasks. To change the state of a Compass node, click on the node once. On the pop-up menu, select Change Newpoint Compass State to display the Compass State window. Click on the appropriate button: Run Idle Close Stop opens the entire Newpoint Compass program, including drivers, databases, etc.
The State Change Log details each step of the process. If the change state request is successful, the log also displays a line that compares configured device count to the system / license device limit. Figure 31 The Node State Change Log If there are any problems opening point files for system drivers as you attempt to go to Idle or Run state from Stop, the log displays an error message.
Notes The Edit and Runtime-Config menu options on the Administrator are only enabled when the current (selected) node is in Run or Idle state.
Configuring the System There are several tasks you must complete in Compass before you begin to add and configure any devices to the system. Unless otherwise indicated, all of these tasks are performed from the Runtime-Config / System Configuration menu on the Newpoint Compass Administrator. Remember that the currently selected node must be in Run or Idle state to access this menu. The tasks listed below are all discussed in detail in the Newpoint Compass User Guide. 1.
Newpoint Technical Support This section details Newpoint policies and procedures for technical support. Contact your sales representative for further information. What do we Support? Supported Software Versions The Technical Support Group supports the current version of Newpoint Compass for Windows NT. Previous versions are also supported to a limited extent. In many cases, a solution to your issue may be to upgrade to the current version.
System Support vs. Consulting Services and Tutorials • System Support is the resolution of problems that impede use of your system, such as missing or defective functionality, system crashes and error messages. System Support services are included in warranty agreements and support plan contracts. For example, contact us for technical support if you receive error messages when you attempt to add a new driver bus to the system, using documented procedures.
How do we provide support? This section describes how we provide technical support, and how you contribute to the process. The Problem Resolution Process Every call or contact you make to our Support Group follows the process below. Process Objective Welcome and Introductions You will always know who you are speaking to from the beginning of the call, and we will verify that you are an authorized user.
Problem Prioritization and Resolution Goals We will attempt to resolve every issue as quickly as possible, but sometimes you may find that your situation is not handled as quickly as expected. Newpoint Technical Support Engineers prioritize (and assign resources to) technical issues according to the criteria below, to ensure that all clients receive support for their most critical issues as soon as possible. 1. 2. 3. Priority One technical issues receive highest priority attention.
Support is a Collaborative Process Technical Support can be a difficult process over distance. We believe that as the owner or operator of your system, you are motivated to make sure that the system is up and running; therefore, you must become involved in the successful operations and support of the system. What does this mean? Back up your system regularly. Perhaps one of the most important and useful things you can do is to set up a schedule of regular system backups.
Before you call for support, review the checklist below to further diagnose the problem, or even to solve the problem without further assistance.
Maintenance Plans - Compass Licensed Software Software Maintenance Plans Cost Services Point Release Upgrades Device Library Upgrades Toll Free (Technical) Support Response Time Web Support and Fax on Demand Applications (Tutorial) Support Consulting Services – at NTI Response Time for Consulting Services Consulting Services – at Customer Site Discounts Advance Notice and Special Rates for Upgrades Standard Compass Training at Newpoint Add-On Services 24 Hour Phone Support for Priority Calls Warranty (90 d
Terms and Conditions 1. The table above represents options for Compass Product Licensed sales only. 2. Maintenance, if purchased, commences upon shipment of the software from Newpoint Technologies, Inc., and is valid for 12 months thereafter. 3. Software List Price is the list price of all Newpoint software products and licenses. 4. Point Release Upgrades are interim releases and do not include major upgrades. Newpoint Technologies, Inc.
13. Training discounts apply to a maximum of five classes within the maintenance year and can be applied to one student for five classes or one class for five students. Discount is provided against cost of training excluding travel and expenses. Expenses for training at Newpoint are the responsibility of the attendee(s). 14. Travel and Expenses are charged as follows; mileage is billed at a rate of $0.
Newpoint Technologies, Inc. Salem, NH 03079 68 COMP-USER-006 Rev. 3.
Windows Navigation Conventions Windowing and Window Elements A window is a framed rectangular area of the screen. Some windows, such as the system overview window, occupy the entire screen, while others are smaller, and appear on top of larger windows. Title Bar The title bar is a strip across the top of the window, and contains the window name. To drag (move) the window, click on the title bar and move the mouse while you hold the left button down. Buttons Buttons perform functions.
Execute buttons perform control functions. When an Execute button is selected, a small pop-up window appears, asking for confirmation of the request before performing the action. This pop-up window has three buttons from which to choose. If the function is a state change, two of the buttons are labeled with the states (e.g., Auto and Manual) and the third button is labeled Cancel. Select the appropriate button, or select Cancel to abort the function.
Navigating in Newpoint Compass Newpoint Compass uses Windows NT compliant navigation conventions. If you’ve never used Windows NT compliant programs, we strongly suggest that you read this section to become familiar with terms and conventions used in the program. This sample window contains many typical navigation components. Menu Bar: For submenus, click on a menu title or press Alt and the underlined letter on the Menu Bar. Application Toolbar: Major program functions are shown as icons or pictures.
Pop-up List Button: Click on the button to display a pop-up list of items to select. Pull-down List Box: Click on the arrow to display a drop-down list of items to select. Mouse Pointer: Use this pointer to indicate items or areas to select or open. Text Entry Fields: Type requested information in these fields. Scroll Bar (List Box): Click on the arrows at either end of the scroll bar, move the scroll box, or click in the scroll bar to navigate through records or items.
Maintenance & Troubleshooting Computer Failure If a computer fails to boot up, it could be that the monitor or keyboard is not plugged into the computer. Check these connections and reboot the computer. The first display will show what hardware is connected to the IDE bus, such as hard drive, tape drive and CD-ROM. If the hard drive does not appear on this list, its IDE connection should be checked and it may require a replacement.
Using the DataScope to Detect Problems The Newpoint Compass DataScope utility detects data transfer problems between your serial devices and the Newpoint Compass server (the FEP). You can also monitor communications on a remote FEP. Your system device drivers must be running in order to view their processes in the DataScope. Bring the node that runs these devices to Run state before you open DataScope.
Click on Stop to freeze the current page of data on the screen. The Stop button toggles to display Start – click on Start when you are ready to view more information. (Note that when you click on Stop, you also freeze the DataScope – new information is collected only when you click on Start to restart the Viewer display.) Click on Clear to remove all records from the Viewer, or on Close to close down the Viewer.
Tips & FAQ's Check out the Newpoint website! Figure 34 Newpoint Technologies Customer Support Page (top) On your Internet browser, go to http://www.newpointtech.com. The Newpoint Customer Support Section contains • • • • downloadable manuals, presentations, and whitepapers FAQs and tips for using Newpoint Compass contact information for additional Technical Support forms to report apparent defects and to request enhancements Newpoint Technologies, Inc. Salem, NH 03079 76 COMP-USER-006 Rev. 3.
Software Issues This section addresses open software issues that you may encounter as you install, configure, and use Newpoint Compass software products. None of these issues are catastrophic, and are slated for correction in a future release, if possible. TCL / TK Error Messages As you perform certain functions in Newpoint Compass, excessive CPU usage may cause TCL/TK error messages to appear.
If Norton Utilities is loaded on the same PC, and the Global DB Size (kb) parameter is set too high, the message Commit Memory Utilization is high appears as you change the node state from Stop to Idle or Run. The key thing to remember is to configure 1000 (KB) per driver as a starting point and adjust settings from there. Uninstalling Newpoint Compass The Uninstall Program available in the Windows NT Control Panel does not remove directories or files that are added to Compass after installation.
Frequently Asked Questions Question: How do I change my Newpoint Compass super-user from what I picked when I installed the software? Answer: Change the super-user in the Windows NT Registry. Log in to Windows-NT with administrator rights, and start the Registry Editor (Start / Run / regedit.exe). Descend into the Registry through the following path: HKEY_LOCAL_MACHINE/SYSTEM/CurrentControlSet/Se rvices/Compass/Parameters/FEPUSER Edit the FEPUSER entry to change the super-user id to any Windows-NT user.
Question: How can I confirm which version of the Newpoint Console is installed? Answer: At the Windows command prompt, type the following command to confirm the software version. (This command works with any Satnet Manager or Newpoint Compass version.) fepcon -v This command opens a pop-up window to display the current version of the Console.
Question: Where are the Alarm and Event Log files stored? Answer: Alarm and Event tables, as well as Trend Historian tables, are stored in the \etc\data directory under the FEPHOME directory, as specified by the system environment settings (this is typically C:\COMPASS\etc\data). Question: How can I view Alarm and Event information from other nodes with the Alarm & Event Viewer? Answer: There are several ways to do this.
Question: For some reason, system drivers seem to be stuck in a loop, and performance is suffering. What can I do? Answer: At a command prompt, type the command fepkill –9 (The pidnumber is the PID of the driver process as shown in the Windows NT Task Manager.) This command kills the driver, and you don’t have to reboot the system to regain control. Newpoint Technologies, Inc. Salem, NH 03079 82 COMP-USER-006 Rev. 3.
FAX - Technical Support Checklist To expedite the resolution of your question and to help you track it, please complete this checklist before you contact the Newpoint Technical Support Group. This form also serves as a faxed Technical Support Request; fill in all information you can provide and fax to Technical Support. (Shaded information will be provided by the Support Engineer who works with you to resolve reported issues.
Installation Parameters As you install and configure Newpoint Compass, make notes using the following table. The more information you can provide as you request Technical Support, the more effectively and successfully we can help you address your issues. This information is also crucial if you need to re-install the software.
System Hardware (Machine Name _______________________ ) Minimum Requirements Processor Memory (RAM) Hard Drive Media Tape Backup Monitor Your Hardware Specifications Pentium II –233 HZ at least 96 MB at least 300 MB available CD-ROM drive 1 GB 14 “ SVGA System Hardware (Machine Name _______________________ ) Minimum Requirements Processor Memory (RAM) Hard Drive Media Tape Backup Monitor Your Hardware Specifications Pentium II –233 HZ at least 96 MB at least 300 MB available CD-ROM drive 1 GB 14 “ SV
Installation Newpoint Compass Version Serial Numbers Parallel Port Printer Port Installation Path q 3.