
User Guide

Part 6
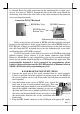
layout appearance when required. The content of the programmable keys
should have been organized by the system integrator and requires no
installation by end users. Please use a flattop (minus sign) screw driver (Do
not use the attached key clip for this operation.) to help getting the key top
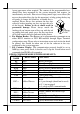
off gently if change for blank key or double key is
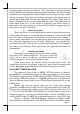
required. Please always first orientate the key tops
correctly before inserting any key top into the case
of the keypad. Failure to do so could result in
permanent damage. Please always match the
latching tab on bottom stem of key top with the tab
in guiding hole and gently press the key top down
till a click sound is heard as indicated in the picture.
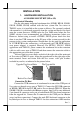
6. For iButton Reader: The iButton can be programmed to communicate on
either RS232 interface or PS/2 KB interface through Hyper Terminal
configuration setup. Please refer to instruction on our web site for the detail.
In general, this should be taken care of for the software in the way
organized by the system integrator.
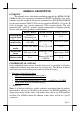
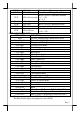
7. For Customer Display: The communication protocol should be set to
9600 bps, none parity check, 8 data bits and 1 stop bit. Listed below are all
commands that PD302 will respond to.
EPSON COMMAND MODE (POWER ON DEFAULT):
COMMAND
NAME
HEX CODES FUNCTION
BS <08> Move Cursor Left
HT <09> Move Cursor Right
LF <0A> Move Cursor Down
HOM <0B> Move Cursor To Home Position
CLR <0C> Clear Display Screen
CR <0D> Move Cursor To Left Most Position
CAN <18> Clear Cursor Line
ESC = <1B><3D><n>
Select Peripheral Device / Command
Mode
n=1 pass through (should not be used)
n=2, 3 (not required)
n=4 switch to PST command mode
ESC @ <1B><40> Initialize Display
ESC t <1B><74><n>
Disable / Enable Euro Dollar Sign
n = 0, 19
US MD1 <1F><01> Specify Overwrite Mode
US MD2 <1F><02> Specify Vertical Scroll Mode
US MD3 <1F><03> Specify Horizontal Scroll Mode
Springy
wall
Tab