
Installation Instructions


042-14 CFS Engineered Hardwood Flooring Installation Instructions Page | 6
Remove existing base and shoe molding on wall as well as doorway thresholds. Trim may be reapplied after the installation
is complete.
PREPARING THE INSTALLATION:
Before starting, measure the width of the room, and divide the room’s width by the width of the plank. If this means that the last row of
planks will be narrower than 2”, you will need to cut the first and last row of planks to be installed in such a way that both rows of planks
will have the same approximate width for an overall continuous look. To cut the boards, always saw with the saw teeth rotating or
cutting down into the face or top of the board. Cutting from the top down helps protect the surface from excess chipping . Use a
carbide tip blade to ensure smooth cuts.
Always install CFS Engineered Hardwood Flooring with the groove side of the plank facing the wall, and with the installer positioned
off the floor when possible.
Begin the installation at the corner of the room so that the groove side can be placed against the starting wall. Be sure to leave an
expansion gap of approximately 1/2” using 1/2” spacers. If the starting wall is not straight, it may be necessary to scribe the first row to
match the wall, allowing the opposite side of the row to present a true square base for the rest of the floor. Once the installation of the first
row is complete, there will be an extra piece from the last plank which, if long enough, may be used to begin the next row. To locate
the best starting point, an exterior wall is usually the straightest and best reference line to start the installation from. If possible, the
direction of the flooring being installed should be at right angles to the floor joists. Establish a starting line by leaving a minimum ½”
expansion gap around all vertical obstructions. In at LEAST 2 places, measure out equal distances from the starting wall equal to the
width of the starting plank calculated earlier in this section regarding the room width and plank width. Allow for all doors and
openings as well as the 1/2" expansion space needed at all fixed vertical structures. Mark these points and snap a working chalk line
parallel to the starting wall allowing the required expansion space between the starting wall and the edge of the first row of flooring.
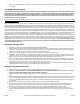
Plan the floor layout (width-wise) so you don’t have to rip (which is cutting the board lengthwise to make it narrower) the last row
NARROWER than 2”. You may have to rip the FIRST row to ensure that the LAST row is at LEAST 2” wide. When installing a floor that
is more than 40 feet in length, an expansion joint is required. The most effective way of providing the required expansion joint is
to install T·Molding in that area.
INSTALLING THE FIRST ROWS:
Establish your starting row (SEE ESTABLISH A STARTING POINT ABOVE).
Install a temporary starter boards along the edge of the working line (using straight 2 by 4's or scrap wood flooring ,and
temporarily secure them to the sub-floor), and begin installation. This will hold the first several rows in place as you begin
installation to prevent the first rows from shifting as you add adjacent rows.
Make sure to use the straightest, longest boards available when installing the first two rows.
REMINDER: Take boards from 5 to 7 boxes while installing. Do not install 2 pieces from the same box side by side or in the
same row – rack or mix the colors and shades while installing to achieve the proper visual effect. Stagger the end-joints of
adjacent rows at least 10” to add structural stability and create a more appealing look for the floor.
Line up the edge of the first row against the temporary starter board. Install CFS Engineered
Hardwood Flooring with the
groove side of the plank facing the wall with the installer positioned off the floor when possible. The tongue of the boards
should always be facing the installer except where special circumstances exist.
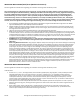
Make sure the end-joints of adjacent rows are staggered at least 10” across 4 to 6 rows to establish a random visual and
avoid identifiable patterns forming in the installation, (stair-step appearance).
INSTALLING THE REST OF THE FLOOR:
Make sure to use the straightest, longest boards available when installing the first two rows.
Continue to take boards from 5 to 7 boxes while installing. Do not install 2 pieces from the same box in a row – mix the
colors and shades while installing to get a more favorable overall look.
Stagger the end-joints of adjacent rows at least 10” to add structural stability and create a more appealing look for the
floor.
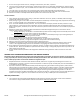
When installing individual pieces, connect the end-joints first as close to the long tongue and groove as possible. Then slide
(push) the long tongue and groove together as tightly as possible. You may need to use a scrap piece of the same flooring
product as a tapping block to help align the product, use caution and tap only into the tongue, never the finished edge of
the flooring.
Double check the edges and ends of your installed planks – all joints should fit tightly together.
Continue with this method while installing the rest of the floor. In some cases, it may be necessary to cut the flooring
lengthwise in the last row. In order to do so, place the last board over the next-to-last row (Refer to Preparing the
Installation), marking the exact cut and taking into account the 1/2“ gap with regard to the expansion space.
Once the flooring installation is complete, proceed to install the baseboards and trim profiles, which will cover the
expansion gap without obstructing it. Fasten all trim into wall base. Do not nail or staple trim into or through the flooring
surface.