
Installation Instructions


042-14 CFS Engineered Hardwood Flooring Installation Instructions Page | 5
Existing solid wood floors over wood substrates must be capped with and approved Plywood or APA E1 PS 2 rated NWFA
approved OSB panel. Do not install Engineered Hardwood Flooring over Solid Hardwood Flooring on concrete.
Acoustic Concrete -must be sound, and with an approved PSI rating (2000 psi or higher)
Cork (acoustic) -must use URETHANE WOOD FLOORING ADHESIVE: Designed for use over properly prepped surfaces
Ceramic, Terrazzo, Marble, or Slate must be fully adhered, level, flat, and prepped to accept adhesive
Resilient Vinyl or Tile- must be fully adhered, over NWFA approved substrates, and prepared to accept adhesives.
Do not Sand existing resilient tiles, sheet vinyl, attached felt, or asphalt cutback adhesive as they may contain asbestos
fibers that are not easily identifiable and are known to cause cancer.
Metal -must be level, flat, and prepped to use only URETHANE ADHESIVES that are designed for use over METAL
SUBSTRATES.
STEP 4: Preparing the Sub-floor
For wood panel subfloors:
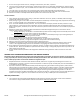
Ensure that there is proper expansion space (1/8”) between the panels. If the panels are not tongue and grooved, and if
there is not sufficient expansion space, use a circular saw to create the necessary space. Do not saw through tongue and
groove joints on T&G subfloors.
Ensure they are structurally sound: Replace any water-damaged, swollen or delaminated sub-flooring or underlayment that
is unable to properly hold fasteners. When possible, plywood sheets should be laid with grained outer plies at right angles
to joists; adjacent rows staggered four feet and nailed every 6" along each joist with 7d or larger nails. When installing
directly over old wood or strip floor, sand any high spots, re-nail old floor to eliminate squeaks or loose boards, and install
new planks at right angle (perpendicular) to the old floor, or overlay old floor with 1/4" plywood underlayment. Leave a
1/8" gap at the edges and nail with 7d or larger nails every 6" at the edges and every 12" in both directions and through the
interior of each sheet of plywood. It is normal for mechanically (staple/nail/cleat) fastened floors to make minor occasional
noises such as popping, squeaking, or crackling which can change as environmental changes occur. Noise from subfloors is
not considered a manufacturing related issue and is not warranted by CFS. You can help reduce popping, squeaking, or
crackling by being sure that the subfloor is secured properly (as explained above) and is structurally sound, that there is no
loose joists or decking, and is swept very thoroughly prior to installation.
All Sub-floors must be:
CLEAN: scraped, sanded, or swept; free of wax, grease, paint, oil, and other debris.
SMOOTH/FLAT: within 3/16” over 10’ and/or 1/8” over 6’. Sand high areas or joints. Fill low areas (no more than 1/8”) with
a cement type filler.
DRY: Moisture content of sub-floor must not exceed 12% prior to installation of wood flooring. All moisture testing must be
done before wood has been acclimated for a minimum of 72 hours and job-site requirements met.
CAUTION: WOOD DUST
The International Agency for Research on Cancer has classified wood dust as a nasal carcinogen as well as an eye and
skin irritant. In case of irritation, flush eyes or skin with water for at least 15 minutes. In case of severe irritation; seek
immediate medical attention.
ATTENTION CALIFORNIA INSTALLERS AND CONSUMER’S WARNING !
Installation of this product may create wood dust, which is known to the State of California to cause Cancer. Sawing,
sanding, and/or machining of wood products can produce wood dust that can cause respiratory, eye, and skin irritations.
Equipment should be equipped with a dust collector to reduce airborne wood dust. Wear an appropriate NIOSH
designated dust mask to reduce exposure to airborne wood dust. Avoid wood dust contact with eyes.
STEP 5: Installing the Floor
Open several different cartons and mix the pieces to maximize the color and shade variations.
Install the product parallel to the longest wall to provide the most appealing visual effect.
Stagger the ends of the boards at least 10” in adjacent rows to insure a random visual effect.
Allow for a ½” minimum expansion gap around all fixed vertical objects that reach the substrate. Engineered Wood as well
as the housing structure expands and contracts with changes in humidity. Wood will buckle and break loose if an adequate
expansion space is not provided. ALWAYS provide for expansion space when fitting flooring adjacent to vertical objects (i.e.
walls, baseboards, door frames and facings, pipes, etc.).
DOORWAY/WALL PREPARATION:
Undercut all door casings, including all door frames, and all fixed vertical structures, 1/16” higher than the thickness of the
floor being installed where quarter round or surface trim cannot be used.