
Installation Guide


Outlet
Box
ASSEMBLY INSTRUCTIONS
Fixture
Screw
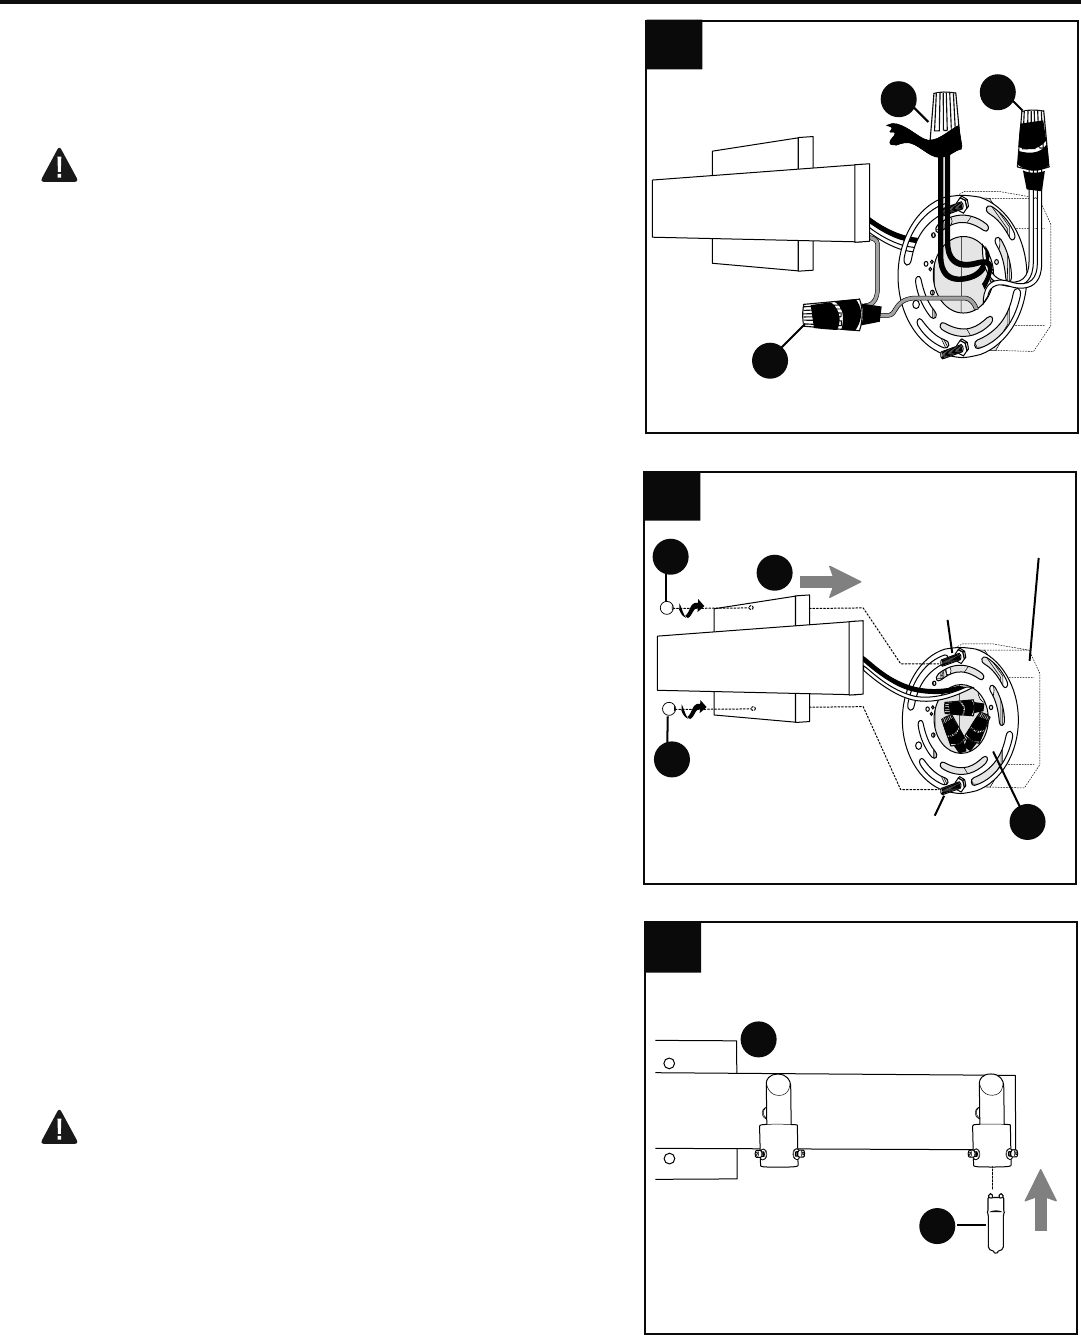
Fixture
Screw
7.
Align holes in fixture (A) with fixture screws on
mounting plate (D) and push fixture (A) toward
wall. Attach fixture (A) to mounting plate (D)
using the decorative nuts (E) previously
removed (Step 4, page 5).
NOTE: Before tightening decorative nuts (E)
completely, use level to check fixture (A) and
adjust if necessary.
6.
Wrap electrical tape (not included) around each
individual wire connector (AA) down to the wire.
Push wire connectors (AA) gently back into outlet
box. Carefully push excess wiring into outlet box.
WARNING: Make sure no bare wire or wire
strands are visible after making connections.
Outlet
Box
6
AA
AA
AA
7
A
E
E
A
F
8
8.
Install bulbs (F).
IMPORTANT: Do not touch the bulbs (F) with
bare fingers. Oil from skin will shorten the life of
the bulbs (F). Wrap the bulbs (F) in paper or
bubble wrap in order to install the bulbs (F).
WARNING: When replacing bulbs, please
allow bulbs, glass shades and fixture to cool
down before touching.
7
D