
Installation Guide
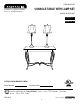
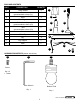
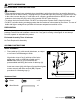
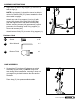
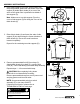
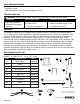

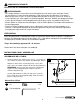
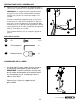
Table Of Contents

G
3
PREPARATION
G
Lowes.com/
p
ortfolio
Before beginning installation of product, make sure all parts are present. Compare parts with
package contents list and hardware contents list. If any part is missing or damaged, do not attempt
to install, operate or assemble the product.
Estimated Assembly Time: 30 minutes
No Tools Required for Assembly
ASSEMBLY INSTRUCTIONS
READ AND SAVE THESE INSTRUCTIONS.
WARNING
• These portable lamps have polarized plugs (one blade is wider than the other) as a safety feature to
reduce the risk of electric shock. The plug will fit in a polarized outlet only one way. If it does not fit fully
in the outlet, reverse the plug. If it still does not fit, contact a qualified electrician. NEVER use with an
extension cord unless the plug can be fully inserted. DO NOT alter the plug.
• To reduce the risk of electric shock, DO NOT use the product if power cord is frayed or broken.
• DO NOT use bulbs having a wattage greater than the maximum value stated on the fixture. The use of
bulbs with higher wattage than specified will increase temperatures and risk of fire.
SAFETY INFORMATION
TABLE ASSEMBLY:
1.
1
Place table top (H), with smooth side down, on carpet
or on foam to avoid damage to finish.
Align holes at top of leg (I) with two of the holes
along outer edge on underside of table top (H).
NOTE: Make sure leg (I) is turned with the
preassembled tab facing the interior of table top (H).
Insert two screws (AA) with fingers first and then tighten
screws securely with Allen wrench (BB). Repeat
procedure for remaining legs (I).
H
I
Screw x 12
Hardware Used
AA
Allen Wrench x 1
BB
AA
BB
AA
Tab