
User's Manual
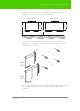
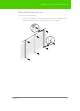
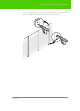
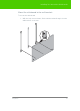
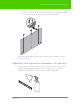
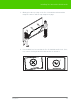
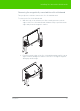
Table Of Contents
- Welcome
- Installing ēno interactive whiteboards
- Preparing to use ēno
- Using ēno interactive whiteboards
- Get started using ēno interactive whiteboards
- ēno interactive whiteboard control icons
- Projector control icons (for the PolyVision projector)
- Cursor control using the ēno stylus
- Using the on-screen keyboard
- Writing and erasing with the ēno stylus
- Printing and saving
- Spotlight and reveal options
- Opening a blank window for writing
- The PolyVision driver
- Configuring PolyVision driver options
- Configuring PolyVision projectors
- Choosing alignment accuracy
- Using on-screen tools
- Getting help
- Checking for updates
- Exiting the PolyVision driver
- To uninstall the PolyVision driver in Windows
- To uninstall the PolyVision driver on a Macintosh
- To uninstall the PolyVision driver using Linux
- Care and maintenance
- Technical support
- Warranty
- Appendix 1: ēno Bluetooth pairing options
- Index

PolyVision 17
Installing ēno interactive whiteboards
What comes in the box
• ēno click (2650 or 2850) interactive whiteboard
• magnetic control icon strip
• ēno stylus kit containing the stylus, battery, two extra stylus tips, and
PolyVision ēno receiver
• PolyVision driver installation DVD
Preparing to magnetically mount ēno click
ēno click interactive whiteboards fasten to any metal surface, including
most blackboards and whiteboards, using strong, secure magnets that
cause no damage to the surface.
To prepare for magnetically-mounting the ēno click whiteboard:
1. Test the surface where you want to mount ēno click whiteboard to
assure it is a metal surface.
2. Thoroughly clean the surface.
5
8
0
-
0
2
0
2
-
0
3