Polycom® SoundPoint® IP 32x/33x User Guide UC Software 4.0.0B |August 2011| 1725-11241-001 Rev.
SoundPoint IP 32x/33x User Guide Trademark Information POLYCOM®, the Polycom “Triangles” logo and the names and marks associated with Polycom’s products are trademarks and/or service marks of Polycom, Inc. and are registered and/or common law marks in the United States and various other countries. All other trademarks are property of their respective owners.
Contents Introduction ........................................................................................................................ vii About This Guide ..................................................................................................................................... vii Who Should Read This Guide? ................................................................................................................ vii How This Guide is Organized .....................................
SoundPoint IP 32x/33x User Guide While Your Phone Rings .......................................................................................................................... 18 Ignoring Incoming Calls....................................................................................................................... 19 Rejecting Incoming Calls ..................................................................................................................... 19 During Calls ........................
Contents Assigning Speed Dial Indexes .............................................................................................................. 40 Accessing Voicemail ................................................................................................................................ 41 Working with Multiple and Shared Lines ................................................................................................ 42 Supporting Multiple Lines ..........................................
SoundPoint IP 32x/33x User Guide Receiving Pages ........................................................................................................................... 64 Receiving Pages When You’re Not in an Active Call ................................................................... 64 Receiving Pages During Active Calls ............................................................................................ 65 Adjusting the Volume of Pages ....................................................
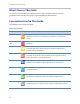
Introduction About This Guide The Polycom® SoundPoint® IP 32x/33x User Guide provides instructions for using your SoundPoint IP 32x/33x phone. It will help you understand the phone’s features and help you perform the following tasks: • Basic tasks like placing and answering calls. • Advanced tasks like using buddy lists and locking your phone. • Troubleshoot common phone issues. Who Should Read This Guide? Phone users should read this guide to learn how to their SoundPoint IP 32x/33x phone.
SoundPoint IP 32x/33x User Guide What’s New in This Guide The content in this guide has been reworked to make it more accessible and to provide more information to end users who are new to using the SoundPoint IP 32x/33x phone.
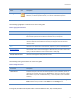
Introduction Name Icon Settings Description The Settings icon highlights settings you may need to choose for a specific behavior, to enable a specific feature, or to access customization options. The following typographic conventions are used in this guide: Table 2: Typographic Conventions Convention Description Bold Highlights interface items such as menus, soft keys, file names, and directories. Also used to represent menu selections and text entry to the phone.
SoundPoint IP 32x/33x User Guide Recommended References You can find all referenced Technical Notifications on the Polycom Support Web site at http://support.polycom.com/PolycomService/support/us/support/voice/soundpoint_ip/VoIP_Technical_Bulletins_pub.html You can find all Polycom phone documentation on the Polycom Support Web site at http://support.polycom.
Chapter 1: Getting Started with Your Phone This chapter includes overview information that you may find helpful when you’re just starting to learn about your Polycom ® SoundPoint® IP 32x/33x desktop phone, or when you have experience, but you need a quick refresher. Note: Phone Features Not Available Certain phone settings are configurable by your system administrator and may not be available on your phone.
SoundPoint IP 32x/33x User Guide Introducing Phone Components The following figure shows the phone’s primary hardware features. 1 Handset—Provides audio output for calls that use the handset 2 Deskmount—Holds the phone at the appropriate level for use of the desk 3 Speakerphone (under Handset)—Provides ringer and handsfree audio output 4 LED Indicator—The LED flashes red to indicate the following: ○ The software is booting. ○ A message is waiting.
Chapter 1: Getting Started with Your Phone 1 Line Key 1—Activate a line that can be assigned to your phone. 2 Line Key —Activate a line that can be assigned to your phone. This key cap can be switched with a Message key cap (included in shipping package). Individual multi-color LEDs display the dynamic call state and remote user status (busy lamp field (BLF) and presence). 3 Display Control Keys—Use arrow keys to scroll through the displayed information.
SoundPoint IP 32x/33x User Guide What Displays on the Screen? Your phone displays information about calls, messages, soft keys, time, date, and other relevant data. Important messages appear on the idle screen through an animated scrolling list, which has precedence over the idle screen. The following figures show a phone with four messages. The messages continuously scroll over the screen. Phone Icons The following list describes the icons that display on the screen.
Chapter 1: Getting Started with Your Phone Navigating Menus, Lists, and Fields To navigate through menus and to enter data, you can: • Press the Menu key to enter or exit any menu. • Press the left arrow key repeatedly to exit any menu. • Press the arrow keys to scroll through the lists. Timesaver: Page Up and Page Down Shortcuts Press the * key to page up. Press the # key to page down. These shortcuts can be used when lists appear on more than one page.
SoundPoint IP 32x/33x User Guide Entering Data and Editing Fields To enter text using the dial pad, press the number keys one or more times. For example, for ‘A’ press ‘2’ and for ‘C’ press ‘222’. The text that can be entered by a key is shown beneath the entry line. This is true for all languages that the phone can display. When in text entry mode, the title will show whether keys will generate numbers (1) or characters (a or A).
Chapter 1: Getting Started with Your Phone Note: All Capitals Not Supported ABC mode is not supported on the SoundPoint IP 32x/33x phone. However, it is possible to enter an uppercase character by following these steps: 1 Select the abc or Abc soft key. 2 Enter the value in lower case. 3 While the letter is highlighted, press the arrow up key. It will convert to uppercase. Registering the Phone Generally, your phone will be deployed with multiple other phones.
SoundPoint IP 32x/33x User Guide Using the Polycom Web Configuration Utility You can update the phone’s settings using the Polycom Web Configuration Utility. The Web Configuration Utility enables you to view and configure phone behavior from a computer using any compatible Web browser. The utility provides a browser-friendly view of your phone’s current settings. Using the utility, you can perform the same updates from your computer that you can perform using your phone’s menu system.
Chapter 2: Using Your Phone Your Polycom® SoundPoint® IP 32x/33x phone is designed to be used like a regular phone on a public switched telephone network (PSTN). You can place calls, transfer a call to someone else, or conduct a conference call. This chapter shows you how to use the basic features on your SoundPoint IP 32x/33x phone.
SoundPoint IP 32x/33x User Guide Your phone displays the active incoming call on the screen. You can access inactive calls (calls on hold, or incoming calls that you don’t immediately answer) by pressing the right arrow key. The following figure shows one active call and one on hold for Line 1. Your phone distributes incoming calls for lines that have multiple Line Keys evenly across the two Line Keys. To display and access the calls on another Line Key, press the appropriate Line Key.
Chapter 2: Using Your Phone • Using the handset • Using the speakerphone • Using the headset In all cases, the active call displays on the screen showing call duration and destination. If your phone is configured with multiple call appearances, see Answering Calls When the Phone has Multiple Call Appearances. To answer a call using the handset: • Pick up the handset. To answer a call using Handsfree Speakerphone mode: • With the handset on-hook, do one of the following steps: ○ Press the Speakerphone Key.
SoundPoint IP 32x/33x User Guide • If your phone is configured for multiple Line Keys per line: ○ The second call will cause a call waiting tone to be played, the second Line Key indicator to fast flash green, and an incoming call icon displays. The call waiting prompt identifying the incoming caller appears for 10 seconds only. You can ignore, answer, or reject the call. (The Reject soft key on private lines only.
Chapter 2: Using Your Phone Answering Calls When the Phone has Multiple Call Appearances Each line on the phone can be configured to have one or more call appearances. More than one call appearances is useful if there is an active call and an incoming call arrives. For example, the first figure shows Line 2 in a held call with Dean at extension 1703 and Line 1 has a call on hold. The second figure shows Line 1 holding a call from Bob at extension 1701.
SoundPoint IP 32x/33x User Guide • Using the Dial key • Using one of the Line Keys You can also dial the number first, and then choose the method you will use to speak to the other party. To call a speed dial number, use the dial pad to enter the speed dial index followed by the # key, and then press the Dial key or pick up the handset to place a call. You can search the local contact directory or the corporate directory and dial from the search results page.
Chapter 2: Using Your Phone Note: URL or IP Dialing URL or IP dialing is not supported on registered phones. If your phone is intentionally unregistered, the default dialing mode is by URL. Calling Using the Speakerphone To place a call using Handsfree Speakerphone mode: • With the handset on-hook, do one of the following: ○ Press the Dial key, one of the Line Keys, the Speakerphone key, or the NewCall soft key. Dial the desired number using the dial pad. ○ Dial the desired number using the dial pad.
SoundPoint IP 32x/33x User Guide Calling Using the Dial Key To place a call using the Dial key: 1 Do one of the following steps: ○ Press the Callers soft key to view the Received Call list. You may need to press the More soft key first. ○ Press the Dial key to view the Placed Call list. 2 Use the up and down arrow keys to scroll through the list to find the contact you want to call. 3 Press the Dial key to complete the call.
Chapter 2: Using Your Phone ○ If you’re in handsfree speakerphone mode, press the Speakerphone key. ○ If you’re in headset mode, press the Headset key. See Using a Headset. Timesaver: Quickly Ending a Call Your phone may be set up so that you can end calls by tapping the Line Key. If your system administrator has enabled this feature, you can end an active call by tapping the Line Key associated with the call.
SoundPoint IP 32x/33x User Guide Web Info: Supported Headsets For a list of supported headsets, see Technical Bulletin 37477: Polycom SoundPoint IP and VVX 1500 Headset Compatibility List. To use Headset Memory Mode, enable, and then activate, Headset Memory Mode. To enable Headset Memory Mode: 1 Press the Menu key. 2 Select Settings > Basic > Preferences > Headset > Headset Memory. 3 Select Enabled and press the Select key to enable Headset Memory mode.
Chapter 2: Using Your Phone • Terminate the call so you can’t answer it. See Rejecting Incoming Calls. Ignoring Incoming Calls Ignore a call to do the following: • Minimize the incoming call window so it doesn’t display on the screen. • Stop your phone from ringing. When you ignore a call, you stop your phone from ringing, but you can still answer the call (the call appearance still appears on the screen).
SoundPoint IP 32x/33x User Guide During Calls When you’re in a call, you can do the following: • Change the way you listen to calls. See Alternating Between Handset, Headset, and Speakerphone. • Place the call on hold. See Holding and Resuming Calls. • Transfer the call to another party. See Transferring Calls. • Set up a conference call with the call you’re in and another party. See Setting Up Conferences.
Chapter 2: Using Your Phone Handling Multiple Calls on Hold If multiple calls are on hold, use the up and down arrow keys to switch between the calls, then press the Resume soft key to resume the desired call. If two or more calls are on hold, an indication appears on the graphic display, for example ‘3/4’, indicating that this is the third call out of four calls. If calls are on hold on more than one Line Key, all calls are combined into a single call list.
SoundPoint IP 32x/33x User Guide To perform a consultative transfer: 1 During a call, press Trans soft key. The active call is placed on hold. 2 Do one of the following steps: ○ Enter the number to which you want to transfer the call. A normal (or consultative) transfer is assumed. ○ Press the Normal soft key to access the local contact directory, corporate directory, or received callers list. Then choose either the Dir or Callers soft key. Choose the number to which you want to transfer the call.
Chapter 2: Using Your Phone Setting Up Conferences You can create a conference with other parties using the phone’s local conference feature. This section contains the following instructions: • Hosting Conference Calls • Splitting Conference Calls • Holding and Resuming Conference Calls • Ending Conference Calls Hosting Conference Calls You can set up a conference in one of two ways: • Using the Conf soft key.
SoundPoint IP 32x/33x User Guide 4 When the second party answers, press the Conf soft key again to join all parties in the conference. To set up a conference call using the Join soft key: • When you are in an active call: ○ If you have one call on hold (on the same line or other line), use the down arrow key to go to the call on hold, then press the Join soft key. A conference is created with the active call, the call on hold and yourself.
Chapter 2: Using Your Phone Timesaver: Quickly Ending a Conference Call Your system administrator may have set up your phone so that you can end active calls by tapping the Line Key. If your phone is set up to do this, you can end an active conference call by pressing the Line Key associated with the conference call. Your system administrator may have set up your phone so that when you press the EndCall soft key, all connections end. To end a conference call: • Press the EndCall soft key or hang up.
SoundPoint IP 32x/33x User Guide 2 (Optional) If multiple lines are configured on your phone, select the line to forward from the list using the up and down arrow keys. 3 Using the Up and Down arrow keys, select the forwarding type you want to change and then press the Select key.
Chapter 2: Using Your Phone Troubleshooting: I Can’t Reject Calls on a Shared Line You can’t reject calls on shared lines. You can only ignore them. For more information, see Supporting Shared Lines. To send incoming calls from a contact to your voicemail system: 1 Follow the instructions in Updating Your Contact Directory. 2 Using the up and down arrow keys, scroll through the fields to find the Auto Reject field. 3 Press the Edit soft key.
SoundPoint IP 32x/33x User Guide Calls received while Do Not Disturb is enabled are logged in the Missed Calls list unless configured to be forwarded to another party by your system administrator. To disable Do Not Disturb, press the Menu key and then select Features > Do Not Disturb again. Note: Enabling Do Not Disturb This feature is local to the phone, and may be overridden by call server settings. For more information, contact your system administrator.
Chapter 2: Using Your Phone User Tip: Shortcuts to Call Lists Press the right arrow key from the idle screen to access the Placed Calls list. Press the left arrow key from the idle screen to access the Received Calls list. Press the down arrow from the idle screen to access the Missed Calls list. You can use these shortcuts while placing calls or performing transferring and conferencing functions. Managing Call Lists From the Call Lists screen, you can choose the type of list to display.
SoundPoint IP 32x/33x User Guide Working with Your Contact Directory You can enter 99 contacts in your phone’s local contact directory. You can dial or search for a contact in this directory, or add, edit, and delete contacts. You may have access to portions of your corporate directory through your phone. The contacts that you can see are determined by your system administrator. You can place calls to contacts in your corporate directory.
Chapter 2: Using Your Phone • From a Corporate Directory (if enabled). See Adding Contacts to Your Contact Directory. Adding Contacts Manually You can add new entries to your contact directory manually. To add a contact manually: 1 Press the Dir soft key. 2 Select your contact directory if it does not appear automatically by pressing the Select key. 3 Press the Up arrow key. The Directory screen displays at the top of the list.
SoundPoint IP 32x/33x User Guide 7 Press the Ok soft key to accept. 8 Press the Down arrow key to display the next field in the contact’s entry. 9 Repeat steps 4 to 8 to enter the last name of the contact. 10 Repeat steps 4 to 8 to enter a contact number. This is a required field and it must be unique (not already in the directory). Entry to this field is number as denoted by 123. 11 Repeat steps 4 to 8 to change the Speed Dial Index if desired.
Chapter 2: Using Your Phone 4 (Optional) Press the Info soft key. The name is displayed. The number, time and date when the call started, and call duration are accessible using the Down arrow key. 5 (Optional) Press the Down arrow key repeatedly to select the phone number. 6 Press the Save soft key to save the contact in the local contact directory. User Tip: Verifying Contacts or Adding More Information At this point, you may want to go to the contact directory and add missing fields.
SoundPoint IP 32x/33x User Guide 6 Use the Up and Down arrow keys to scroll through the fields, then press the Select key to select the appropriate field. 7 Make the desired changes. The Ok soft key is not displayed until a change has been made. The Cancel soft key in this context will cancel the edit session for the entry and return to the screen before the Edit soft key was selected (see step 3).
Chapter 2: Using Your Phone 5 Press the Delete soft key. The contact is deleted from the directory. The next entry in the directory displays. Working with Your Corporate Directory If your system administrator sets up your corporate directory on your phone, you may have read-only access to portions of your organization’s Corporate Directory. You cannot update the contacts in your organization’s Corporate Directory. Your system administrator determines which contacts you can see.
SoundPoint IP 32x/33x User Guide ○ Press the Submit soft key. In this example, James Woller appears in the search results. ○ Press the AdvFind soft key, enter search values in the displayed fields. For example, enter Smith as the last name. ○ Press the Submit soft key. In this example, Bob Smith appears in the search results. You can dial any successful matches from the resulting information on the phone’s screen.
Chapter 2: Using Your Phone The ‘Entry saved’ message displays on the screen. Only the first name, last name, and phone number are saved. If the contact already exists in the contact directory, the ‘Entry already exists’ message displays.
SoundPoint IP 32x/33x User Guide Press the Play soft key to hear the selected ring type. 5 Press the Select soft key to change to the selected ring type. Setting Ring Tones for Contacts You can set a distinctive ring tone for each contact in your contact directory so you can distinguish callers. To change the ring type field for a contact, see Updating Your Contact Directory. Changing the Speaker Volume During a call, you can adjust the speaker volume by pressing the Volume Up or Volume Down keys.
Chapter 2: Using Your Phone To choose where you hear sound effects: 1 Press the Menu key, then select Settings > Basic > Preferences > Audible Ringer. 2 Press the Select key. 3 From the Audible Ringer screen, select where you want to hear sound effects: ○ To hear sound effects only from the phone’s loudspeaker, select Speaker. ○ To hear sound effects only from the handset, select Handset. ○ To hear sound effects only from the headset, select Headset.
SoundPoint IP 32x/33x User Guide Assigning Speed Dial Indexes To add or edit a speed dial index for an existing contact: 1 Press the Dir soft key. 2 Use the Up and Down arrow keys to scroll through the list to find the contact. 3 Press the Select key to select the entry. 4 Press the Edit soft key. 5 Press the Down arrow key repeatedly until the speed dial index displays. 6 Press the Select key to select the speed dial index for edit.
Chapter 2: Using Your Phone User Tip: Assigning Speed Dial Index Values Polycom recommends that you assign speed dial index values consecutively. For example, the second Line Key is assigned to the speed dial index value “2”. 9 Press the Yes soft key to accept changes. Accessing Voicemail Your voicemail is saved in a centralized location and may be accessed from your phone.
SoundPoint IP 32x/33x User Guide Working with Multiple and Shared Lines Your system administrator can customize your phone so that you have more than one Line Key or that your one line appears on two Line Keys. Your phone can also share a line with another phone. Supporting Multiple Lines Your SoundPoint IP 32x/33x phone can support up to 2 lines. Typically, the top-most Line Key is reserved for the principal directory number (DN) of the phone.
Chapter 2: Using Your Phone For example, the first figure shows Line 2 in a held call with Dean at extension 1703 and Line 1 has a call on hold. The second figure shows Line 1 holding a call from Bob at extension 1701. To answer an incoming call when configured for multiple call appearances: • Do one of the following steps: ○ Press the Hold key to put the original call on hold and then answer the incoming call. ○ Answer the incoming call during the Call Waiting prompt (first 10 seconds).
SoundPoint IP 32x/33x User Guide If two phones share a line, an incoming call to that number will cause both phones to ring. The call can be answered on either phone but not both. You can transfer, hold, or conference calls on shared lines. Note: Using Shared Lines Shared lines are an optional feature and may not be supported on your particular system. For more information, contact your system administrator. Call Forwarding is not available on shared lines.
Chapter 2: Using Your Phone About Your User Password You are assigned a user password so you can answer calls from your locked phone and unlock the phone. By default, your user password is 123. You can change your user password at any time. Note: Changing Your User Password To change your user password, you need to enter the administrator password, so contact your system administrator. To change your user password: 1 Press the Menu key, then select Settings > Advanced.
SoundPoint IP 32x/33x User Guide ○ DND when locked—Select this option if you don’t want your phone to ring. You won’t have the option to answer incoming calls. All incoming calls will go to your mail system (if enabled) and display in your Missed Calls list. The default setting is Allow ringing when locked. Note: Using DND When Locked Enabling DND when locked on shared lines disables ringing only. You will still see a call appearance and have the option to answer it.
Chapter 2: Using Your Phone The following figure shows an example of the Place an Authorized Call screen. ○ Place a call to an authorized number by using the handset, headset, or speakerphone. For information on using the handset, headset, or speakerphone to place a call, see Placing Calls. If you try to place a call to an unauthorized number, the ‘Unauthorized number’ message displays.
SoundPoint IP 32x/33x User Guide If the User Login feature is set up on your organization’s phones, you’ll need to know how to: • Log in to a phone to access your personal phone settings. • Log out of a phone after you finish using it. • Place a call to an authorized number from a phone that is in the logged out state and requires a user login. • Change your user password.
Chapter 2: Using Your Phone The User Password screen displays, as shown next. 4 Press the Select key, enter your password, and then press the Ok soft key. 5 Press the left arrow key. The Login Confirmation screen displays, as shown next. 6 Press the Yes soft key. If your login credentials are accepted, the phone updates to display your personal phone profile, and the idle screen displays, as shown next. If you don’t know what your user ID and password are, ask your system administrator.
SoundPoint IP 32x/33x User Guide Your personal profile is no longer accessible, and the phone displays either the User Login screen for the next user login, or the default phone profile for anonymous users. Placing Calls from Phones that are in the Logged Out State If a phone doesn’t require a user login, you can use the phone to place calls to any number, even though the phone may be in the logged out state.
Chapter 2: Using Your Phone The Change User Login Password Old Password screen displays, as shown next. 3 Press the Select key, enter your old password, and then press the Ok soft key. 4 Press the Down arrow key. The Change User Login Password New Password screen displays, as shown next. 5 Press the Select key, enter your new password, and then press the Ok soft key. 6 Press the Down arrow key. The Change User Login Password Confirm New Password screen displays, as shown next. Your password is changed.
Chapter 3: Using the Advanced Features of Your Phone This chapter shows you how to use the advanced features on your Polycom® SoundPoint® IP 32x/33x phone. The topics include: • SIP-B Automatic Call Distribution • Using Buddy Lists • Broadcasting Messages Using Push-to-Talk and Group Paging • Updating Your Phone’s Configuration • Restarting Your Phone To read about the phone’s basic features, see Using Your Phone. To customize your phone, see Customizing Your Phone.
SoundPoint IP 32x/33x User Guide After you end a call, the line icon alternates between and showing you are now unavailable. You must set yourself to available for calls to be directed to you again. Logging Into and Out of ACD Calls may be directed to you, as an ACD agent, if you are logged in. Once you log out, calls cannot be directed to you. To log into the ACD: 1 Press the Menu key. 2 Select Features > ACD Login/Logout > Login.
Chapter 3: Using the Advanced Features of Your Phone Using Buddy Lists Your phone combines interactive message services and status monitoring to complement messaging applications such as email. Live interaction within a pool of phones is possible by monitoring the presence of the parties involved. Your phone can watch the status of up to eight other phones or buddies. These other phones form your buddy list. Your phone displays the status of your buddies in real time.
SoundPoint IP 32x/33x User Guide To add or delete a contact from your buddy status list: 1 Press the Dir soft key. 2 Use the Up or Down arrow keys to scroll through the list to find the contact. 3 Press the Select key. 4 Press the Down arrow key repeatedly until the Watch Buddy field displays. 5 Press the Select key. 6 Use the Left or Right arrow key to switch between Enabled. When Watch Buddy is enabled, the contact is added to your buddy list.
Chapter 3: Using the Advanced Features of Your Phone Any contacts added through your buddy status list will appear as a contact in Microsoft Office Communicator and Windows Messenger. Any contacts added as a contact in Microsoft Office Communicator and Windows Messenger will appear in your buddy status list. To view and change your presence, see Updating Your Presence Settings. For more information on integrating with Microsoft Live Communications Server 2005, contact your system administrator.
SoundPoint IP 32x/33x User Guide Broadcasting Messages Using Push-to-Talk and Group Paging The Group Paging feature enables you to make pages —one-way audio announcements — to users subscribed to a page group. The Push-to-Talk (PTT) feature is a collaborative tool that enables you to exchange broadcasts to users subscribed to a PTT channel, much like a walkie-talkie. Your system administrator can set up both features on your phone. Your system administrator can define up to 25 Paging Groups or Channels.
Chapter 3: Using the Advanced Features of Your Phone Sending PTT Broadcasts Before you can send a PTT broadcast, you need to choose a channel to broadcast on. Or, you can hold the Talk soft key to immediately begin broadcasting on Channel 1, the default channel. You can change your default channel to any channel you want (see Updating the Default Channel).
SoundPoint IP 32x/33x User Guide Note: Using the Talk Soft Key” If you release the Talk soft key while you’re sending a broadcast, the broadcast temporarily stops and enters a 10 second ‘Waiting’ period. During this period, the channel remains open to give people a chance to reply. At any time during the waiting period, you can resume your broadcast by pressing and holding the Talk soft key. If no one broadcasts during the waiting period, the channel closes and the broadcast ends.
Chapter 3: Using the Advanced Features of Your Phone • If your phone isn’t allowed to receive broadcasts during active calls, the broadcast displays in the inactive call group as a held broadcast, as shown next. To listen to the broadcast, hold or end the call. If the broadcast is a Priority or Emergency broadcast, the broadcast displays in the inactive call group as an active broadcast and immediately plays. You’ll hear both the original call and the broadcast.
SoundPoint IP 32x/33x User Guide When you listen to a broadcast, you can pick up the handset or press Speakerphone or the Headset key and continue listening to the broadcast. Updating the Default Channel If you press and hold the Talk soft key, your broadcast will automatically transmit on the default channel, Channel 1. If you want, you can change the default channel.
Chapter 3: Using the Advanced Features of Your Phone To allow or disallow PTT broadcasts to play during an active call: 1 Press the Menu key, then select Settings > Basic > Preferences > Paging/PTT Configuration > PTT Push to Talk. 2 From the PTT Channel Configuration screen, use the down arrow key to locate Accept While Busy, then press the Select key. 3 From the Accept While Busy screen, use the Left or Right arrow key to select Enabled or Disabled, then press the Ok soft key.
SoundPoint IP 32x/33x User Guide Timesaver: Sending a Group Page to the Default Paging Group To automatically send a page to the default paging group, press and hold the Paging soft key. 2 From the Paging Groups List screen, select the paging group to send the page to as shown next. The list displays the default paging group, the most recent group you paged, and other paging groups that you can page. In the above example, the default paging group is Group 1. 3 To begin a page, press the Page soft key.
Chapter 3: Using the Advanced Features of Your Phone • End the page. This ends the page at your phone only. • Place a new call. Receiving Pages During Active Calls How you handle a page when you’re in an active call depends on the page priority and if you’re allowed to receive a page when you’re in an active call. If the page is a Normal: • If your phone is allowed to receive pages during active calls, the page displays in the inactive call group as an active page and immediately plays.
SoundPoint IP 32x/33x User Guide The default paging group is 1. 3 Enter the number of the new default paging group, then press the Ok soft key. Updating Paging Group Subscriptions By default, you’re subscribed to Paging Groups 1, 24, and 25. This means that you can send pages to and receive pages sent to these groups. You can change which groups you are subscribed to. However, you can’t disable your subscriptions to Paging Groups 24 and 25.
Chapter 3: Using the Advanced Features of Your Phone The default setting is Disabled. When enabled, your phone will accept and play pages while you’re in an active call. When disabled, your phone won’t play pages while you’re in a call, but will hold them instead. Updating Your Phone’s Configuration You can update your phone’s configuration without restarting the phone. To update your phone’s configuration: 1 Press the Menu key, then select Settings > Basic > Update Configuration.
Chapter 4: Customizing Your Phone This chapter shows you how to customize your Polycom® SoundPoint® IP 32x/33x phone display by adjusting certain settings, such as time and date display, backlight intensity, and language. The topics include: • Changing the Time and Date Display • Changing the Backlight • Changing the Language • Saving the Corporate Directory Search Filter Changing the Time and Date Display The time and date appears on the graphic display of the SoundPoint IP 32x/33x phone.
SoundPoint IP 32x/33x User Guide Changing the Backlight The backlight is available only on the SoundPoint IP 335. You can adjust your phone’s backlight by doing the following: • Changing the brightness of the backlight. • Changing the backlight timeout.
Chapter 4: Customizing Your Phone 3 Select Backlight On Intensity. 4 Use the Up or Down arrow keys to select high, medium, low, or off, then press the Select soft key. The default level is High. 5 Select Backlight Idle Intensity. 6 Use the Up or Down arrow keys to select high, medium, low, or off, and then press the Select soft key. The default level is Low. 7 Select Maximum Intensity. 8 Press the Up or Down soft keys to increase or decrease the backlight intensity.
SoundPoint IP 32x/33x User Guide Changing the Language Many languages are supported by the SoundPoint IP 32x/33x SIP phone. To change the language: 1 Press the Menu key. 2 Select Settings > Basic > Preferences > Language. The Language screen displays as shown next. 3 Scroll through the list of available languages. 4 Press the Select key to confirm your choices. Text that appears on the screen will change to the language of your choice.
Chapter 4: Customizing Your Phone User Tip: Contact Directory Reconfiguration Depending on the size of your local contact directory, the reconfiguration may take a few minutes. Your phone will restart to set the new directory search mode if you pressed the Yes soft key.
Chapter 5: Troubleshooting Your Phone This chapter contains general troubleshooting information to help you solve any problems you might encounter when you use your Polycom® SoundPoint® IP 32x/33x phone. The tables in this chapter list possible trouble symptoms, the likely causes of these issues, and the recommended corrective actions to take.
SoundPoint IP 32x/33x User Guide Controls Table 5-2: Control The dial pad does not work If the dial pad on your phone does not respond, do one of the following: • Check for a response from other feature keys or from the dial pad. • Place a call to the phone from a known working telephone. Check for display updates. • Check if the LAN port is active or inactive. Press the menu key, and then select Status > Network > Ethernet.
Chapter 5: Troubleshooting Your Phone Calling Table 5-4: Calling There is no dial tone If there is no dial tone, power may not be correctly supplied to the phone, try one of the following: • Check that the display is illuminated. • Make sure the LAN cable is inserted properly at the rear of the phone (try unplugging and re-inserting the cable). • If using in-line powering, have your system administrator check that the switch is supplying power to the phone.
SoundPoint IP 32x/33x User Guide The Service Unavailable message displays on the screen This message displays if you pressed the New Call soft key, dialed a number with the handset on-hook, attempted to make a call from the contact directory when the phone was not registered, or if you tried to place a call when available phone lines were in use. If you see this message, contact your system administrator to see when your phone will be registered.
Chapter 5: Troubleshooting Your Phone Audio Table 5-6: Audio Issues There is no audio on the headset If there is no audio on your headset, the connections may not be correct. Do one of the following: • Ensure the headset is plugged into the jack marked Headset at the side of the phone. • Ensure the headset amplifier (if present) is turned on and/or adjust the volume). If the amplifier uses batteries, ensure they are fully charged. • Ensure that you have not picked up the handset.
SoundPoint IP 32x/33x User Guide To test your phone hardware, press the Menu key, and navigate to Status > Diagnostics > Test Hardware. From the Test Hardware menu, you can select Audio Diagnostics, Keypad Diagnostics, Display Diagnostics, or LED Diagnostics.
Chapter 6: Polycom UC Software Menu System 81
SoundPoint IP 32x/33x User Guide 82
Chapter 6: Polycom UC Software Menu System 83
SoundPoint IP 32x/33x User Guide 84
Safety Notices Service Agreements Please contact your Polycom Authorized Reseller for information about service agreements applicable to your product. Governing Law This Limited Warranty and Limitation of Liability shall be governed by the laws of the State of California, U.S.A., and by the laws of the United States, excluding their conflicts of laws principles.
SoundPoint IP 32x/33x User Guide • Unauthorized product modification or alteration. • Unauthorized use of common carrier communication services accessed through the product. • Abuse, misuse, negligent acts or omissions of Customer and persons under Customer’s control; or • Acts of third parties, acts of God, accident, fire, lightening, power surges or outages, or other hazards.
SoundPoint IP 32x/33x User Guide Russian Compliance Ministry of Information Technologies & Communication of the Russian Federation - Declaration of Conformity. DoC # Д-СПД-2950. Expiry 22.06.2012. Ministry of Information Technologies & Communication of the Russian Federation - Declaration of Conformity. DoC # Д-СПД-2948. Expiry 22.06.2012. Ministry of Information Technologies & Communication of the Russian Federation - Declaration of Conformity. DoC # Д-СПД-2949. Expiry 22.06.2012.
End-User License Agreement for Polycom® Software This End-User License Agreement (“Agreement”) is a legal agreement between you (either an individual or a single entity) and Polycom, B.V for the Polycom Software Product licensed by Polycom B.V in Europe, the Middle East, Africa, and Asia Pacific or Polycom, Inc., for the Polycom Software Product licensed by Polycom, Inc. in the rest of the world (collectively, “Polycom”).
SoundPoint IP 32x/33x User Guide Software Product. You may not reproduce the supporting documentation accompanying the Software Product. 2.3 Modifications. You may not modify, translate, or create derivative works of the Software Product. 2.4 Proprietary Notices. You may not remove or obscure any proprietary notices on or in the Software Product or the supporting documentation. 2.5 Software Transfer.
SoundPoint IP 32x/33x User Guide 4. TERMINATION. Without prejudice to any other rights, Polycom may terminate this Agreement if you fail to comply with any of the terms and conditions of this Agreement. In such event, you must destroy all copies of the Software Product and all of its component parts. You may terminate this Agreement at any time by destroying the Software Product and all of its component parts. 5. UPGRADES.
SoundPoint IP 32x/33x User Guide POLYCOM SHALL NOT BE LIABLE UNDER THIS WARRANTY IF ITS TESTING AND EXAMINATION DISCLOSE THAT THE ALLEGED DEFECT OR MALFUNCTION IN THE SOFTWARE PRODUCT DOES NOT EXIST OR WAS CAUSED BY YOUR OR ANY THIRD PERSON’S MISUSE, NEGLECT, IMPROPER INSTALLATION OR TESTING, UNAUTHORIZED ATTEMPTS TO MODIFY THE PRODUCT, OR ANY OTHER CAUSE BEYOND THE RANGE OF THE INTENDED USE, OR BY ACCIDENT, FIRE, LIGHTNING, POWER CUTS OR OUTAGES, OTHER HAZARDS, OR ACTS OF GOD. 7. LIMITATION OF LIABILITY.
SoundPoint IP 32x/33x User Guide for the International Sale of Goods (1980) is hereby excluded in its entirety from application to this Agreement. 10.2 General. This Agreement represents the complete agreement concerning this license and may amended only by a writing executed by both parties. If any provision of this Agreement is held to be unenforceable, such provision shall be reformed only to the extent necessary to make it enforceable. 10.3 Contact.