Setting Up the Polycom Instructor RP Version 1.0 November 2005 Edition 1725-22886-001/A Polycom Instructor RP Version 1.0 VideoVoiceDataWeb Connect. Any Way You Want.
Trademark Information Polycom® and the Polycom logo design are registered trademarks of Polycom, Inc. Polycom Instructor™ RP, PowerCam™, and VSX™ are trademarks of Polycom, Inc. in the United States and various other countries. All other brand and product names are trademarks or registered trademarks of their respective companies. Patent Information The accompanying product is protected by one or more U.S. and foreign patents and/or pending patent applications held by Polycom, Inc.
About this Guide Now that you’ve received your Polycom Instructor™ RP, you’ll probably want to set it up and start enjoying its functionality as soon as possible. This document, Setting Up the Polycom Instructor RP, explains how to unpack the system, connect the equipment, calibrate it, and perform all the steps you need to be ready to make calls and share data.
Setting Up the Polycom Instructor RP iv
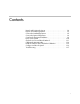
Contents Unpack and Position the System . . . . . . . . . . . . . . . . . . . . . . . . . 1–2 Prepare to Install the Equipment . . . . . . . . . . . . . . . . . . . . . . . . . 1–3 Connect the Standard Equipment . . . . . . . . . . . . . . . . . . . . . . . . 1–5 Connect the Optional Equipment . . . . . . . . . . . . . . . . . . . . . . . . 1–6 Complete the Equipment Installation . . . . . . . . . . . . . . . . . . . . . . 1–9 Power on the System . . . . . . . . . . . . . . . . . . . . . . . . . . . . . . .
Setting Up the Polycom Instructor RP vi
Setting Up the Polycom Instructor RP The Polycom Instructor RP combines the power of a Polycom VSX 8000 video conferencing system with the capabilities of a SMART Board interactive whiteboard. With a Polycom Instructor RP, you can make and receive video calls and share content, such as show slide presentations, just like you would in a typical video conference. But with the added SMART Board functionality, you can also annotate that video or content.
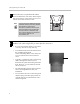
Setting Up the Polycom Instructor RP Unpack and Position the System 1 Work with another person to unpack the Polycom Instructor RP system. To perform this step, follow the instructions in Unpacking the Rear Projection SMART Board Interactive Whiteboard that is attached to the outside of the crate. Caution Be sure the wheels are unlocked before you try to move the system. Be careful when you move the system. Quick stops, excessive force, and movement over uneven surfaces can overturn the system.
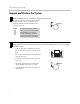
Prepare to Install the Equipment Prepare to Install the Equipment 1 Open the front doors of the cabinet and remove the accessory boxes and the video conferencing shelf.
Setting Up the Polycom Instructor RP 3 Remove the rear access panel from the cabinet. For more information, refer to the “Removing the Rear Access Panel” section of the Rear Projection SMART Board 3000i Installation Guide. Note 4 4 The Rear Projection SMART Board 3000i Installation Guide is produced by SMART Technologies Inc.
Connect the Standard Equipment Connect the Standard Equipment 1 Connect the PowerCam Plus to the Polycom Instructor RP. 1. Place the PowerCam Plus on the video conferencing shelf. 2. Connect one end of the PowerCam Plus cable to the VSX 8000 system as described in the Polycom Setting Up the VSX 8000 System document. The VSX 8000 system is located above the annotation box in the Polycom Instructor RP cabinet. 3.
Setting Up the Polycom Instructor RP Connect the Optional Equipment 1 Connect a document camera or another S-video device, such as an auxiliary PowerCam, to the Polycom Instructor RP. 1. Place the document camera or other S-video device wherever you want to locate it. 2. Find the S-video cable in the back of the Polycom Instructor RP system. One end of the cable is already connected to the system. Connect the other end to your document camera or other S-video device.
Connect the Optional Equipment software loaded on it. You can use it to show content (such as a slide presentation), but you cannot use it to annotate or perform other SMART Board and video conferencing functions. Note You cannot connect both an integrated computer and a guest laptop to the Polycom Instructor RP at the same time. If you want to connect a guest laptop, skip this step and go to step 5. To connect an integrated computer to the system: 1.
Setting Up the Polycom Instructor RP 4 Connect a guest laptop to the Polycom Instructor RP system. You can connect a guest laptop to the system whenever you want to show others content on the laptop, such as slides for a presentation. In contrast to the internal computer, the guest laptop can be attached and removed from the system at any time. It does not have the SMART or Polycom Instructor Tools software loaded on it.
Complete the Equipment Installation Complete the Equipment Installation 1 Connect the IR receiver for the wireless keyboard to the Polycom Instructor RP system. 1. Find the IR receiver in the back of the Polycom Instructor RP system. The cable for the receiver is already connected to the system. 2. Unwrap the IR receiver. 3. Stick the Velcro® to the top of the receiver and to the bottom of the video conferencing shelf. 4. Attach the IR receiver to the bottom of the video conferencing shelf.
Setting Up the Polycom Instructor RP Power on the System 1 Connect the external power cord to a power outlet. 2 Power on the standard and optional equipment. • Open the front doors of the cabinet and power on the annotation box. • Power on the VSX 8000. • Power on any other equipment you have, such as an integrated computer, a document camera, or a VCR or DVD player. VSX 8000 power button 3 Press the green projector lamp power button on the pen tray. The system takes about a minute to start.
Check the Screens and Run the Wizard Check the Screens and Run the Wizard 1 Make sure the Welcome screen image is centered properly on the screen. If you need to adjust the projected image, follow the instructions in the “Adjusting the Projected Image” section of the Rear Projection SMART Board 3000i Installation Guide. The adjustments that you make at this point are coarse adjustments; you will be able to make fine adjustments later. 2 Make sure the Welcome screen image is in focus.
Setting Up the Polycom Instructor RP 4 Make fine adjustments to the projector, if needed. To perform this step: 1. Select full-screen video by pressing Near on the Polycom remote control. 2. Make the fine adjustments to the projector by following the instructions the “Adjusting the Projected Image” section of the Rear Projection SMART Board 3000i Installation Guide. Calibrate the Annotation Box 1 Calibrate the touch screen for Camera 2. Camera 2 is typically the document camera.
Calibrate the Annotation Box 2 Calibrate the touch screen for Camera 3. Camera 3 is typically the VCR or DVD player. However, even if you do not have a VCR or DVD player connected to your system, you must still calibrate the touch screen for Camera 3. (You must calibrate each available camera and video source because the system stores separate calibration data for each.) CALIBRATE TOUCH SCREEN TOUCH UPPER LEFT TARGET To calibrate the touch screen for Camera 3: 1.
Setting Up the Polycom Instructor RP To calibrate the touch screen for Camera 4: 1. On the Polycom remote control, press Camera and select 4. — If you have an integrated PC or a guest laptop, you will see the video from the PC or laptop as well as the whiteboard icon in the upper right corner of the screen. — If you do not have an integrated PC or a guest laptop, you will see a blank whiteboard except for the whiteboard icon in the upper right corner of the screen.
Install the Software and Complete the Calibration Install the Software and Complete the Calibration 1 If you have an integrated computer connected to your Polycom Instructor RP system, install the Polycom Instructor Tools software on it. If you do not have an integrated computer, skip this step. The Polycom Instructor Tools software is on the Polycom CD. You simply need to insert the CD into the integrated computer and then follow the Setup Wizard. 2 Install the SMART Board software.
Setting Up the Polycom Instructor RP Configure and Use the System 1 Configure the VSX 8000 video conferencing system. To perform this step, follow the instructions in the Polycom Administrator’s Guide for the VSX Series. 2 Use the Polycom Instructor RP system. • For quick tips on common video conferencing and data sharing tasks, refer to Using the Polycom Instructor RP.
Troubleshooting Troubleshooting The Polycom Administrator’s Guide for the VSX Series contains troubleshooting information that can help you identify and correct issues associated with the VSX 8000 and the accessories connected to it. The Rear Projection SMART Board 3000i Installation Guide contains troubleshooting information that can help you identify and correct issues associated with the display and its annotation capabilities.
Setting Up the Polycom Instructor RP If the system... It often means... Correct it this way... Screen is blue. At least one of the video outputs from the annotation box is not connected to the appropriate video input on the VSX 8000 system.