MGC WebCommander Web Server Manager User’s Guide Version 9.
Copyright © 2007 Polycom, Inc. All Rights Reserved Catalog No. DOC2137C Version 9.0 Proprietary and Confidential The information contained herein is the sole intellectual property of Polycom, Inc. No distribution, reproduction or unauthorized use of these materials is permitted without the expressed written consent of Polycom, Inc. Information contained herein is subject to change without notice and does not represent commitment of any type on the part of Polycom, Inc.
Table of Contents Before You Begin . . . . . . . . . . . . . . . . . . . . . . . . . . . . . . . . . . 1-1 Overview . . . . . . . . . . . . . . . . . . . . . . . . . . . . . . . . . . . . . . . . . . . . . . . 1-1 MGC Web Server Architecture . . . . . . . . . . . . . . . . . . . . . . . . . . 1-1 The Network Server . . . . . . . . . . . . . . . . . . . . . . . . . . . . . . . . . . 1-2 About this User’s Guide . . . . . . . . . . . . . . . . . . . . . . . . . . . . . . . . . . . 1-4 Prerequisites . . . . . .
Table of Contents Auto Cascade . . . . . . . . . . . . . . . . . . . . . . . . . . . . . . . . . . . . . . . . . . . 4-2 Auto Cascading Mechanisms . . . . . . . . . . . . . . . . . . . . . . . . . . . 4-2 Chairperson Activation . . . . . . . . . . . . . . . . . . . . . . . . . . . . 4-3 Implementation of Chairperson DTMF features . . . . . . . . . 4-3 Auto Cascading Guidelines . . . . . . . . . . . . . . . . . . . . . . . . . . . . 4-4 Auto Cascade Configuration . . . . . . . . . . . . . . . . . . . . . .
Manually Adding Windows Users to the Users List . . . . . . . . . 5-32 Assigning Users to Groups . . . . . . . . . . . . . . . . . . . . . . . . . . . . 5-33 Ad Hoc Conferencing and Conference Access Using WebCommander for Authentication . . . . . . . . . . . . . . . . . . . . . 5-36 Ad Hoc Conferencing using WebCommander Server as the External Database Application for Conference Initiation Authentication . . . . . . . . . . . . . . . . . . . . . . . . . . . . . . . . . . .
Table of Contents iv
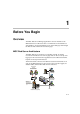
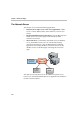
1 Before You Begin Overview The MGC Web Server Manager application is the user interface to the MGC Web Server. It allows the user to communicate via the Web Server with the MCUs. It provides database access via the Web pages and manages the Web site that contains the reservation pages. MGC Web Server Architecture The MGC Web site is a location on a computer network.
Chapter 1 - Before You Begin The Network Server The network server contains the following applications: • Database Server (SQL server or the Access application): enables access to various database tables, such as MCU list, Users list, and Groups • Internet Information Services (IIS) Server: runs the Web pages and enables users to access these pages via the Internet and make conference reservations • MGC Web Server: communicates with the IIS server, the Database server, and the MCUs.
MGC Web Server Manager User’s Guide From the MGC WebCommander Server Manager the following tasks are performed: • Connect/disconnect MCUs • Define access rights (Permissions) to the various modules of the MGC Web Server Manager application • Define Groups to organize the database. Users can only access Groups to which they are assigned. Reservation and Participant templates are created from within a Group and can be viewed only by Users who have access rights to that Group.
Chapter 1 - Before You Begin About this User’s Guide The MGC WebCommander Web Server Manager User Guide includes the following topics: • Chapter 1 - Overview Provides a general description of MGC WebCommander Server Manager, its configuration and its main features.
MGC Web Server Manager User’s Guide Prerequisites This document assumes that the user has the following knowledge: • Familiarity with the Windows NT environment and interface • Basic knowledge of video conferencing concepts Conventions Before using the MGC WebCommander Server Manager application, it is important to understand the terms and conventions used in this Guide. • The term "Double-click" is used when you need to click twice on an entry to modify it.
Chapter 1 - Before You Begin 1-6
2 MGC Web Server Manager Basics The MGC Web Server Manager enables users access to the database. The database is divided into two modules: • Administrative tables – the configuration tables that enable the administrator and users who have the right to modify these tables to define MCUs, system Defaults, Labels, Permissions, Users and Groups. In addition, the administrator can perform maintenance and configuration tasks relating to the database itself.
Chapter 2 - MGC Web Server Manager Basics Important! When both the MGC WebCommander and the MGC Manager applications use the same database, the administrator tables defined in the MGC Web Server Manager will apply to the MGC Database Manager and vice versa. Therefore, the various tables may include parameters that apply only to the WebCommander and others that will apply only to the MGC Manager.
MGC Web Server Manager User’s Guide Starting the MGC Web Server Manager Application To start the MGC Web Server Manager application: 1. On the Start – Programs menu, click MGC Web Manager ver 9.0, and then click MGC Web Server Manager. The Database Login dialog box opens. 2. Enter your Login Name and Password as defined in the database.
Chapter 2 - MGC Web Server Manager Basics Table 2-1: Default Users User Name Password Permission Type user2 123 Moderator (Monitoring Only) part1 123 Participant These users differ in the functions they are allowed to perform and the information they can access. For a detailed description of each of the default permission types, see Chapter 4, Permissions.
MGC Web Server Manager User’s Guide When Secure Mode is enabled for the WebCommander environment, the Secure Mode is indicated by a lock icon that appears in the right corner of the Status bar of the Web Server Manager application. Secure Mode indication To connect or disconnect MCUs to/from the MGC Web Server Manager application you must first connect to the MGC Web Server. For more information, see “Connecting to the MGC Web Server” on page 2-12.
Chapter 2 - MGC Web Server Manager Basics The Web Server Manager Toolbar The following buttons appear in the Web Server Manager toolbar: Icon 2-6 Name Description Copy Copies the selected record from a Web Server Manager table to the clipboard. Paste Pastes an entry from the clipboard to the selected table. This option is enabled when the table category is selected in the Browser area. Small Icons Lists each of the table entries using a small icon and the entry name.
MGC Web Server Manager User’s Guide Upgrading from a Previous Version When upgrading from a previous version of the MGC Web Server Manager, the old database is saved during the installation procedure. If there are discrepancies in the number of fields between the old and the new databases, the system queries whether to update the existing database to the new format. To upgrade the MGC Web Server Manager: 1. Start the MGC Web Server Manager application. 2.
Chapter 2 - MGC Web Server Manager Basics The Update Databases dialog box is displayed, indicating which databases require updating. It is recommended to update all the databases you intend to use. To cancel the update of a database, clear the check box next to that database name. 6. 2-8 Click the Apply button to update the selected databases. The updating process may take time, depending on the size of the database.
MGC Web Server Manager User’s Guide The Update Database Results dialog box is displayed only in Windows 95/98 environment. It is not displayed when the Operating System is Windows 2000/ NT. 7. Click OK to return to the Update Databases dialog box. When you open the MGC Web Server Manager for the first time after an upgrade and you have not yet updated the database, you can do it later using the Add/Remove Connection to the ODBC from the Options menu. 8.
Chapter 2 - MGC Web Server Manager Basics Displaying the Database Tables In the MGC Web Server Manager window, click the plus [+] icon next to the icon of the database whose tables to display. Browser Area Status Area Database Tables These tables are displayed only when an administrator is logged in The database tree is displayed. The tree categories, which represent the database tables, change according to the permission assigned to the user who logged into the database.
MGC Web Server Manager User’s Guide • Labels – Used to define labels. The labels may be assigned to conferences and participants, mainly for sorting purposes. Only users with the permission to configure the database may manage the Labels table. • MCUs – Enables the definition of MCUs that handle the multipoint video conferencing. Only users with the permission to configure the database may manage the MCUs list.
Chapter 2 - MGC Web Server Manager Basics Connecting to the MGC Web Server The MGC Web Server Manager application is the link between the MCUs and the MGC Web Server. Therefore, the MGC Web Server Manager application must first connect to the MGC Web Server before the connection to the MCU may be initiated. To connect to the Web Server: 1. In the Browser area, right-click the Server icon, and then click Connect Server.
MGC Web Server Manager User’s Guide Connecting/Disconnecting to/from an MCU Once the MCUs are defined in the database, you can connect to an MCU. This step is mandatory in order to run conferences, and it can be performed only after the MGC Web Server Manager is connected to the MGC Web Server. If all MCUs or the MGC Web Server are disconnected, remote users cannot run conferences via the Web. For more details on how to define a new MCU, see Chapter 5, “Defining an MCU” on page 5-1.
Chapter 2 - MGC Web Server Manager Basics MCU Statuses The possible MCU statuses are described in the following table: Table 2-2: MCU Status Options Status Description Connecting Connection in progress. Normal The connection is OK and the MCU is in the Normal state. Start-up The connection is OK and the MCU is starting up. Resetting The MCU is resetting. Low Memory The system has used up all its memory resource. In such a case, disconnect all running conferences and reset the MCU.
MGC Web Server Manager User’s Guide Setting the Communication Parameters Sometimes there may be a communication problem between the Web Server and the MCUs. One of the options to overcome this problem may be to change the communication parameters between the MCUs and the Web Server. Use discretion and consult your support engineer before modifying these parameters. To modify the Communication parameters: 1. On the Options menu, click Communication. The Communication dialog box opens.
Chapter 2 - MGC Web Server Manager Basics 2. Define the following parameters: Table 2-3: Communication Parameters 3. 2-16 Field Description Message Timeout If no message is received from the MCU for the time period specified in this field, an error is triggered. Default value is 25 seconds. A higher value should be entered when the connection is slow or all the slots in the MCU are occupied. In these cases, the recommended value is 120 seconds.
3 Setting Defaults The MGC Web Server Manager application and MGC Manager – Database Manager application enable users to customize their system to their needs by defining default values for reservations, participants and general system parameters. The default sets may be stored in a centralized database or in a local database.
Chapter 3 - Setting Defaults To display the defaults categories: 1. Once you are logged into the MGC Web Server Manager, click the plus [+] icon to expand the database tree. 2. 3-2 Click the plus [+] icon next to the Defaults icon to display the Defaults categories.
MGC Web Server Manager User’s Guide Defining Conference Defaults The Conference Defaults are used to define the default values of new conference templates created via the WebCommander application. To define the Conference Defaults: 1. Right-click the Conference Defaults icon, and then click Add New Conference Default. The Conference Properties – Settings1 dialog box opens. 2. In the Res Name box, enter the name of the Reservation Defaults set being created.
Chapter 3 - Setting Defaults 3. Define the following fields: Table 3-1: Reservation Defaults - Settings1 Parameters 3-4 Option Description Conf. Entry Password Enter a numeric password that will be used by the conference participants to connect to the conference. It is recommended to leave this field blank to let the WebCommander user to enter the password, or MCU to automatically allocate a numeric password.
MGC Web Server Manager User’s Guide Table 3-1: Reservation Defaults - Settings1 Parameters (Continued) Option Description Remarks Using up to 300 characters, you may enter any text regarding the conference. This text will be included with the conference properties and is also saved to the CDR file as part of the conference record to be retrieved later.
Chapter 3 - Setting Defaults Table 3-1: Reservation Defaults - Settings1 Parameters (Continued) 3-6 Option Description User Defined 1-3 (con’t) • Line Rate Specify the transfer rate in Kbps. In a Video Switching conference, you must select the highest transfer rate common to all participants. For example, if two participants can connect at a transfer rate of 384 Kbps and one participant can connect at a transfer rate of 128 Kbps, set the Line Rate to 2B or 128 Kbps (2B in Bonding mode).
MGC Web Server Manager User’s Guide Table 3-1: Reservation Defaults - Settings1 Parameters (Continued) Option Description Line Rate (con’t) Note: The high line rate transmission is enabled with the standard video card (version 1.43 and up) or with the Video+ card. The line rate of incoming ISDN/H.323 calls can be automatically detected and the participant can be connected according to his/her capabilities, without prior setting of the endpoint’s line rate during conference setup.
Chapter 3 - Setting Defaults Table 3-1: Reservation Defaults - Settings1 Parameters (Continued) 3-8 Option Description Audio Alg (con’t) When Siren7 (16, 24 or 32 bit) is available, select the audio algorithm in the following order: Siren 7 (16), G.728, G.722, G.711, Siren7 16 bit and G.728 algorithms are interchangeable, and a participant using either one will be fully connected when one of them is selected as the audio algorithm.
MGC Web Server Manager User’s Guide Table 3-1: Reservation Defaults - Settings1 Parameters (Continued) Option Description Restricted Select this option if all the participants are using Restricted lines whose Line Rate for each channel is 56 Kbps instead of 64 Kbps. If not all the participant use restricted lines, the Restrict option should be selected only in the participant settings. SilenceIT Select the Silence IT check box to enable this feature.
Chapter 3 - Setting Defaults Table 3-1: Reservation Defaults - Settings1 Parameters (Continued) Option Description T.120 Rate Select the desired T.120 data transfer rate. The lower the rate the slower the transfer rate and the response time. The same T.120 rate must be set for all the conference participants. The highest rate common to all participants should be selected. Select None to disable the T.120 mode. If the conference Line Rate is set to 2B, the following T.
MGC Web Server Manager User’s Guide Table 3-1: Reservation Defaults - Settings1 Parameters (Continued) Option Description Video Session Select the appropriate Video Session: Video Switching - To set a conference in which all the participants use the same video and audio formats, by setting the communication parameters to the common capabilities. Whenever a participant starts to speak, he/she appears on all screens as the conference is a voice activated video switching conference.
Chapter 3 - Setting Defaults Table 3-1: Reservation Defaults - Settings1 Parameters (Continued) Option Description Video Session (con’t) Continuous Presence (CP) - A Continuous Presence conference is a conference in which several participants can be viewed simultaneously. Each participant uses their own endpoint’s capabilities, thus maintaining the highest video, audio and data capability that can be achieved.
MGC Web Server Manager User’s Guide Table 3-1: Reservation Defaults - Settings1 Parameters (Continued) Option Description Pro-Motion Pro-Motion is enabled only in the Video Switching mode. Pro-Motion is a video encoding mechanism that improves the video quality in Video Switching conferences, set to NTSC or PAL (4CIF) resolution. Select either 50 Fields (PAL) or 60 Fields (NTSC). Pro-Motion is sent to the endpoint at 60 Fields Per Second (FPS) for NTSC and 50 FPS for PAL systems.
Chapter 3 - Setting Defaults Table 3-1: Reservation Defaults - Settings1 Parameters (Continued) 3-14 Option Description Dual Stream Mode In this mode, one of the endpoints sends two video streams: Video and data. The video streams are handled differently by the receiving endpoint. The different streams may be shown on separate screens. Select one of the following options: None - The Dual Video mode is unavailable. In such a case Video Protocol is set to Auto. H.239 and People+Content - H.
MGC Web Server Manager User’s Guide Table 3-1: Reservation Defaults - Settings1 Parameters (Continued) Option Description Dual Stream Mode (con’t) H.239 and People+Content supports the following features: • Entry Queues • • • • • Highest Common Phase 2 • H.239 is not supported in: H.264 4CIF Encryption FECC (H.320 and H.323) Limitations • In Continuous Presence conferences Software and Quad View modes are disabled • • • • • • ISDN (H.320) calls H.
Chapter 3 - Setting Defaults Table 3-1: Reservation Defaults - Settings1 Parameters (Continued) 3-16 Option Description Video Format CIF and QCIF are video formats used in video conferencing systems. Video Format specifies the data rate (in number of frames per second) and the resolution of each frame (number of lines in a frame and the number of pixels in each line). Video Format is enabled only in Video Switching mode and when the Video Protocol is set to H.261 or H.263.
MGC Web Server Manager User’s Guide Table 3-1: Reservation Defaults - Settings1 Parameters (Continued) Option Description Video Format (con’t) If one of the participants' endpoints does not support CIF, the conference video format will change to QCIF for all the participants. • Using the H.263 protocol, you can select one of the following options: Auto, QCIF, CIF, 4CIF, 16CIF, VGA, SVGA, XGA and NTSC.
Chapter 3 - Setting Defaults Table 3-1: Reservation Defaults - Settings1 Parameters (Continued) 3-18 Option Description Frame Rate The Frame Rate is enabled only in Video Switching mode and the Video Protocol is set to H.261 or H.263. If you have selected QCIF, CIF, 4CIF, 16CIF, VGA, SVGA, XGA, or NTSC, select the number of frames per second rate to define the quality of the video transmission. 7.5 indicates a video quality of lower than 30 frames per second.
MGC Web Server Manager User’s Guide Table 3-1: Reservation Defaults - Settings1 Parameters (Continued) Option Description Video Protocol (con’t) H264* - H.264* incorporates DCT (H.263) compression principles, but is provided at half the bit rate. H.264* provides CIF/4CIF video using low bit rates and implements a fixed video rate when the video stream of the endpoint becomes active ("people"). The endpoint that supports H.264* is iPower. H264 - The H.
Chapter 3 - Setting Defaults Table 3-1: Reservation Defaults - Settings1 Parameters (Continued) 3-20 Option Description Annexes Annexes are additions to the Video Format when using H.263 Video Protocol, increasing the quality of the video display. Annexes N, P and F are enabled only when you are in Video Switching mode and the Video Protocol is set to H.263. The Video Format may be set to QCIF, CIF, 4CIF, 16CIF, VGA, SVGA, XGA, or NTSC.
MGC Web Server Manager User’s Guide Table 3-1: Reservation Defaults - Settings1 Parameters (Continued) Option Description Chair Control Chair Control is an option that enables an endpoint to control the conference and other conference participants. This option is used to enable the Chair Control. This option is enabled when the Cascade field is set to None.
Chapter 3 - Setting Defaults Table 3-1: Reservation Defaults - Settings1 Parameters (Continued) 3-22 Option Description Roll Call Roll Call is a feature of the IVR Message Service used to record the participants name and play it back when entering and leaving a conference. The chairperson can request the system to play the names of all connected conference participants at the beginning of the conference, or at any time during the conference.
MGC Web Server Manager User’s Guide Table 3-1: Reservation Defaults - Settings1 Parameters (Continued) Option Description End Time Tone n Min Select this option to enable the End of Conference reminder tone to be played once, to all the connected participants, n minutes before the end of the conference. This tone is different from other tones. The tone is embedded in the MCU's software. Note: If the automatic extension of the conference is enabled for the MCU in the “confer.
Chapter 3 - Setting Defaults 4. Click the Settings2 tab to display additional parameters. The Attended and AV Msg Name fields change to IVR and IVR Msg Name if Audio is selected as the Media in the Settings1 tab. 5. Define the following parameters: Table 3-2: Reservation Defaults - Settings2 Parameters 3-24 Option Description Attended Select one of the following options: None - No Attended services are used during the audio only conference.
MGC Web Server Manager User’s Guide Table 3-2: Reservation Defaults - Settings2 Parameters (Continued) Option Description Attended (cont.) Welcome (No Wait) - Select this option for a Greet & Guide conference in which the participant is greeted by an audio message and after a predefined period, and automatically connects to the appropriate conference.
Chapter 3 - Setting Defaults Table 3-2: Reservation Defaults - Settings2 Parameters (Continued) 3-26 Option Description AV Message Name If you have selected the IVR Service in the Attended field, type the name of the IVR Service. If left blank, the system uses the default IVR Service. If you have selected a Welcome (No Wait) or Attended conference, type the name of the AV Service. The AV Service is defined in the MGC Manager application. If left blank, the system uses the default AV Message Service.
MGC Web Server Manager User’s Guide Table 3-2: Reservation Defaults - Settings2 Parameters (Continued) Option Description Entry Queue Access An Entry Queue is a special routing lobby queue to which one or more dial-in numbers are assigned. When callers dial the assigned number, they access a queue where they wait to be connected to the conference. While waiting in the queue, they hear the audio messages and prompts, and interact with the system using touch-tone signal (DTMF codes).
Chapter 3 - Setting Defaults Table 3-2: Reservation Defaults - Settings2 Parameters (Continued) 3-28 Option Description Min x Parties Available only when the Meet Me Per Conf. and Auto Add options are checked. It lets you reserve resources for the specified number of dial-in participants. This number includes the defined and undefined participants.
MGC Web Server Manager User’s Guide Table 3-2: Reservation Defaults - Settings2 Parameters (Continued) Option Description Start Conf. Requires Chairperson Select this check box to indicate that the conference will only start when the Chairperson connects to the conference. Participants that connect to the conference before the chairperson are placed on hold and hear background music. Once the chairperson connects to the conference, the participants are automatically connected to the conference.
Chapter 3 - Setting Defaults Table 3-2: Reservation Defaults - Settings2 Parameters (Continued) Option Description Encryption (continued) • Encrypted conferences with ISDN participants require the installation of MUX+ card on the MCU • Encrypted conferences with IP participants require the installation of IP+ card on the MCU • The encryption feature supports all conference types, including: Cascading, People and Content, Operator, Meeting Rooms, Entry Queues, and Ad Hoc conferences • In a cascade
MGC Web Server Manager User’s Guide Table 3-2: Reservation Defaults - Settings2 Parameters (Continued) Option Description Lecture Mode (con’t.) • Lecture Show - One-way communication mode in which conference participants see and hear the conference lecturer, however they are not seen or heard by the lecturer (one way communication). Notes: • Lecturer selection is mandatory at the reservation stage and Lecture Show is enabled only when one is selected.
Chapter 3 - Setting Defaults Table 3-2: Reservation Defaults - Settings2 Parameters (Continued) 3-32 Option Description Lecture Mode (con’t.) • Timer Select this check box to activate the automatic switching of the participants displayed in the video windows shown on the lecturer screen. It also enables the Interval option. Interval Enter the number of seconds a participant is displayed in the video window on the lecturer monitor before switching to the next participant.
MGC Web Server Manager User’s Guide Table 3-2: Reservation Defaults - Settings2 Parameters (Continued) Option Description Auto Layout In Auto Layout the system automatically selects the conference layout based on the number of participants participating in the conference. With Auto Layout, when a new video participant is connected/disconnected, the conference layout automatically changes format to reflect the new number of video participants. Audio Only participants do not affect the selected layout.
Chapter 3 - Setting Defaults Table 3-2: Reservation Defaults - Settings2 Parameters (Continued) 3-34 Option Description Lock Select this check box to lock the conference and prevent dial-in participants from joining the conference once the conference has started. Clear this check box to unlock the conference and allow dial-in participants to join the conference. A locked conference can be unlocked during an On Going conference.
MGC Web Server Manager User’s Guide Table 3-2: Reservation Defaults - Settings2 Parameters (Continued) Option Description Background/ Layout Border/ Speaker Notation If the conference is handled by the Video+ card, you can add visual effects such as borders and colors, to the video layouts display on the endpoints. The following modification options are available: • Background color - the color displayed when a video layout is empty.
Chapter 3 - Setting Defaults 6. Click OK to confirm and store the new Conference Defaults set. Defining Participant Defaults The Participant Defaults are used to define the default values of parameters in the new participant templates created in the WebCommander application. To define the Participant Defaults: 1. Right-click the Participant Default icon, and then click Add Participant Defaults. The Party Properties-Settings1 dialog box opens. 2.
MGC Web Server Manager User’s Guide 3. Define the following parameters: Table 3-3: Participant Defaults - Settings1 Parameters Option Description Name Enter the participant’s name using numerals and characters only. You must give each participant a distinct name. Interface Type Select the Interface Type. Select ISDN if the participant connects via ISDN lines, T1-CAS if the participant connects via T1-CAS lines, ATM if the participant is using the ATM network, H.
Chapter 3 - Setting Defaults Table 3-3: Participant Defaults - Settings1 Parameters (Continued) 3-38 Option Description Participant Phone Numbers This field applies to the ISDN/T1-CAS, Dial-out connection type, or to ISDN, Dial-in Meet Me Per MCU option (when selected). Type the participant’s phone number (including country and area codes when required) to be dialed by the operator when connecting the participant to the conference.
MGC Web Server Manager User’s Guide Table 3-3: Participant Defaults - Settings1 Parameters (Continued) Option Description Meet me per This field applies only to the ISDN, Dial-in connection type. Party - The participant dials a unique dial number for each group of channels he will use. Channel - The participant dials a different dial number for each channel. MCU – A single phone number is assigned to all the conferences running on a certain MCU.
Chapter 3 - Setting Defaults Table 3-3: Participant Defaults - Settings1 Parameters (Continued) 3-40 Option Description User Identifier String sent to the Recording system Enter the string sent to the Recording System via DTMF codes that identifies the recording. This identifier string is used later by the user connecting to the conference recorder Web site to identify the recording and retrieve it. You need a unique User Identifier String for each recording.
MGC Web Server Manager User’s Guide Table 3-3: Participant Defaults - Settings1 Parameters (Continued) 4. Option Description Owner Displays the name of the user to whom the default set is assigned. This field is disabled for users without permission to modify (write) database tables. Users with Administrator rights (that can read and write database tables) can assign the defaults set to any registered user. The Owner name may be used for filtering.
Chapter 3 - Setting Defaults 5. Define the following parameters: Table 3-4: Participant Defaults - Settings2 parameters 3-42 Option Description Aggregation This field applies to ISDN connections only. Select the aggregation method: H221 – The standard communication protocol, in which a different phone number is assigned to each channel. Bonding - A communication protocol that aggregates from two up to thirty 64-kbps B channels together to look like one large bandwidth channel.
MGC Web Server Manager User’s Guide Table 3-4: Participant Defaults - Settings2 parameters (Continued) Option Description Video Protocol Select the Video compression standard: H261 – The video compression standard mandatory to all codecs. H263 - A compression standard that provides improved video quality at a line rate lower than 384 Kbps. This standard is not supported by all codecs. Auto - select this option to use the conference’s Video Protocol settings. Voice This field applies to ISDN and H.
Chapter 3 - Setting Defaults Table 3-4: Participant Defaults - Settings2 parameters (Continued) Option Description Enhanced Video The MGC Manager can provide high quality video (30 frames per second for incoming and outgoing video streams) for line rates up to T1/ E1 in Transcoding and Continuous Presence conferences. This is done by allocating two video codecs to the participant instead of one. One of the video codecs is used for encoding, while the other is used for decoding the incoming video stream.
MGC Web Server Manager User’s Guide Table 3-4: Participant Defaults - Settings2 parameters (Continued) Option Description Encryption In the Participants Defaults - Settings2 you can select the appropriate Encryption default setting Auto/On/Off. Choose any of the following Encryption options: • Auto - When participants connect to a conference, the conference/Entry Queue encryption settings are automatically applied to the participant.
Chapter 3 - Setting Defaults Table 3-4: Participant Defaults - Settings2 parameters (Continued) Option Description H323 Participant Alias Type Select the format of the alias from the drop down list. Only E.164 and H.323 ID are supported. SIP Address sip: [user name]@[domain]. Note that the SIP URI adheres to URI rules: no spaces or special characters such as commas, quotation marks, inverted tags and so forth either in the user name or in the domain part. [To compare to H.
MGC Web Server Manager User’s Guide Table 3-4: Participant Defaults - Settings2 parameters (Continued) Option Description H323 Participant Auto Video Bit Rate Select this option to use the video transfer rate defined for the conference. Enable PSTN Dialin PSTN participants are able dial-in into an H.323 Meet Me Per Conference using the ISDN MeetMe Service number. For example, by calling 9251437, the ISDN’s Meet-Me Service number, a 3G cellular phone PSTN participant can connect as a H.
Chapter 3 - Setting Defaults Table 3-4: Participant Defaults - Settings2 parameters (Continued) 6. 3-48 Option Description Num-type This field applies only to ISDN connections. Select the program type from the drop-down list. The available options are Unknown, National, International, Network Specific, Subscriber, abbreviation and Taken from Service. These options represent the programs provided by the carrier and are defined in the Network Service.
MGC Web Server Manager User’s Guide Defining MGC Manager Defaults To define the MGC Manager Defaults: 1. Right-click the MGC Manager Defaults icon, and then click Add MGC Manager Defaults. The MGC Manager Defaults dialog box opens. 2. In the Name box, enter the name of the defaults set. 3. The Owner field displays the name of the user to which the default set is assigned. This field is disabled for users with no permission to modify (write) database tables.
Chapter 3 - Setting Defaults Table 3-5: MGC Manager Defaults parameters (Continued) 3-50 Option Description General Defaults (cont.) Linked Party – When enabled, the Linked Party checkbox will appear in the Participant Properties dialog box enabling the user to save the participant properties to the database. When disabled, participants defined during conference definition will be embedded participants only.
MGC Web Server Manager User’s Guide User Defined Defaults You can select whether to display the User Defined fields in the conference and participant properties dialog boxes in the MGC Manager and the WebCommander applications. You can define the titles of the User Defined fields. These titles replace the default titles (User Defined 1, 2 and 3) when the Database Manager Defaults are loaded to the MGC Manager application.
Chapter 3 - Setting Defaults The User Defined dialog box opens. 2. Define the following parameters: Table 3-6: User Defined parameters description 3-52 Field Description Name Enter the name of the User Defined default set. Owner Enter the name of the owner of this set. Only the owner and the administrator with the appropriate permission will be able to modify this set. Leave this field blank to assign this set to the current logged in user.
MGC Web Server Manager User’s Guide Table 3-6: User Defined parameters description (Continued) Field Description Show Reservations User Defined Fields Select this check box to display the User Defined fields in the Conference Properties - General dialog box. If you clear this check box, all three User Defined fields will be hidden. Show Participants User Defined Fields Select this check box to display the User Defined fields in the Participant Properties - Identification dialog box.
Chapter 3 - Setting Defaults 3. Click OK. The new User Defined Defaults set is added to the list. You can define several sets. All the sets are considered to be personal sets which only you can use. If you have administrator rights you can designate one set as a public set. This set may be loaded to the MGC Manager application by all the Web Server Manager and Database Manager users.
MGC Web Server Manager User’s Guide Managing the Default Sets The MGC Web Server Manager application is installed with an embedded Defaults set. If no Defaults set is defined as the Global Defaults set, the embedded Defaults set is active. A Defaults set may be set as Private or Global Defaults. A Global Defaults set is a default set that will apply to all the database users.
Chapter 3 - Setting Defaults To define Default set as Private set: • In the Status area, right-click the icon of the Defaults set, and then click Set As Private Default. The appropriate indication appears in the Status area and a check mark appears next to the Set As Private Default option. Defining a Default Set as Global Defaults Set Only the administrator can define a set as Global default.
MGC Web Server Manager User’s Guide Assigning a Default Set to other Users Only the administrator can assign default sets to other participants. To assign a Default set to other users: 1. In the Status area, right-click the icon of the default set to be assigned to other participants, and then click Set Default to Users. The Add Default to Users dialog box opens. The system displays the list of users currently defined in the database. 2.
Chapter 3 - Setting Defaults Designating a Database as the Private or Global Default Database Only the administrator can assign a Private or Global Default Database. 1. In the Browser area, right-click the database icon to be designated as the Private or Global Default database. A pop-up menu appears. 2. Click Set As Private Default to designate this database as the source for the Private Default set, or click Set As Global Default to designate this database as the source for the Global Default set. 3.
4 Options Settings In the Web Server Manager Options menu, the following topics are listed: • Web Configuration - For further information, see the MGC Web Manager, Installation and Configuration Guide, Chapter 5. • Auto Cascade Configuration - see “Auto Cascade” on page 4-2. • Redundancy Configuration • Backup Configuration • Personal Scheduler Configuration - For further information, see the MGC Personal Scheduler, Quick Start Guide, Chapter 2.
Chapter 4 - Options Settings Auto Cascade The Auto Cascade feature enables automatic cascading of conferences. Both audio only and video conferences can be cascaded. The automatic cascading of conferences is beneficial in distributed MCU environment, when MCUs are installed in different locations. A maximum of six conferences can be Auto Cascaded into one conference. The MCU network can support multiple Auto Cascaded conferences simultaneously.
• If none of the conferences has a chairperson, then the conference that is running on the MCU which is highest in the MCUs table in the Web Server Manager will be assigned as the master conference. • If there is more than one conference with a chairperson, then the conference with a chairperson that is running on the MCU which is highest in the MCUs table in the Web Server Manager will be assigned as the master conference.
Chapter 4 - Options Settings Auto Cascading Guidelines • To enable the Auto Cascading, the Conference Numeric ID routing mode is required, therefore the system.cfg flag in the GREET AND GUIDE/ IVR section - QUICK_LOGIN_VIA_ENTRY_QUEUE must be set to NO on all MCUs. • H.239/People + Content is not supported with Auto Cascading. • The Auto Cascade feature can only be implemented for the database assigned as the Global Default in the Web Server Manager.
• In the MGC Manager application, for each MCU define an Ad Hoc Auto Cascade Entry Queue. The cascaded link is established when one MCU dials the connection string of the Entry Queue defined on the second MCU followed by the Conference Numeric ID. Calls to Auto Cascade Entry Queues will be considered as MCU calls and no IVR will be played. For more information refer to the MGC Manager User’s Guide Volume II, Ad Hoc Cascading.
Chapter 4 - Options Settings The Cascade Links List dialog box opens. 3. Select the Enable Cascade Links check box. When enabled, the system displays the list of primary and secondary links between each two MCUs defined in the MCUs table of the Web Server Manager.
4. Define the cascaded link parameters for the primary links, and optionally for the secondary links. For each cascaded link define the following parameters: Table 4-1: Cascaded Link Parameters Column Description Link Priority Indicates whether this row contains a primary or secondary link definition. Source MCU The name and IP address of the first MCU. Direction Contains an icon indicating the dialing direction of the link between the MCUs, as follows: The destination MCU dials to the source MCU.
Chapter 4 - Options Settings MCU Redundancy The Central Server Service is designed to monitor the activity of assigned pairs of MCUs, so if one MCU in the pair encounters a problem that prevents it from running conferences, the other MCU will take over smoothly. In Central Server Service environment, as described in Figure 4-1, MCU A and MCU B are both registered in the gatekeeper with the same prefix and they are designated as backup to each other in the WebCommander Central Server Service.
When one MCU is down (for example, power shortage), the gatekeeper will identify that one MCU (A) is unavailable and will automatically forward the calls to the second MCU (B). The participants are connected to the conference that was copied from MCU A with the same name. When the first MCU (A) is up and running again, the gatekeeper will connect the participants to conferences running on MCU A.
Chapter 4 - Options Settings The following conference parameters are NOT copied: — Remarks and Remarks History — Lecturer Name (as the backup conference does not include participants) — Video Forcing (as the backup conference does not include participants) If a new conference is started or scheduled on one MCU, and the MCU failed before the conference was backed up on the second MCU, this conference will not be backed up.
5. Select the MCU pair(s) that you want to use to backup each other. 6. Click OK. From this point on, all conferences, Meeting Room and Reservations will be mirrored between the MCUs in the select pairs.
Chapter 4 - Options Settings MCU Backup The Central Server Service enables you to schedule automatic system backup of selected MCUs. The automatic backup includes: • System configuration (including Network Services and IVR Services) • Meeting Rooms • Reservations • Conference Profiles • Entry Queues Defining the Backup Parameters The backup interval and target path are defined once.
6. Select the Interval in which the backups will be performed. 7. In the Target Path, click the Browse button to select the destination disk/ folder where the backed up files will be stored. 8. Click OK. The system automatically performs the first backup of all the connected MCU. The information is saved to the selected target path (disk), creating a folder whose name is derived from the MCU IP address.
Chapter 4 - Options Settings Automatic Email Language Formatting In the MGC Web Server Manager you can customize the language and default email format of a new Meeting, configuring the email settings for the WebCommander and Personal Scheduler. You can customize the language and the text of the e-mail sent to participants with the conference invitation. The customization applies to Meeting invitations sent from the WebCommander and Personal Scheduler. To change the format of an email: 1.
The E-mail Format dialog box is displayed. 2. Select the language to customize and then click the Customize Format button. The language setting for the Meeting invitation can be selected in the WebCommander - Login screen and in the MGC Personal Scheduler - Polycom Office page. The Customize E-mail Format - English dialog box opens. You can define the language of the email by clicking E-mail Format from the Options menu.
Chapter 4 - Options Settings Text that appears in the body area of the email, and lists conference details Text that appears in the subject area of the email Listing of parameters that can be added to the Body text This is conditional text Text that appears in the subject area of the email An annotation sent for a recurrent conference Not all Conference Parameters listed will appear in the Personal Scheduler appointment body.
Table 4-1: Email notification format parameters Option Description Body In the body, subject and recurrent reservations fields, enter the in the text that you want to appear in the body area of the email. The email contains Conference parameters. The body, subject and recurrent reservations fields can be composed of two elements - free text and the appropriate parameter, that consists of a value entered automatically by the MCU.
Chapter 4 - Options Settings Table 4-1: Email notification format parameters Option Description Conference parameters In the Conference parameters box, select the desired parameter and then click the < - Add button. The parameter is added to the text, where the cursor is. For example: To enter the conference date and time you need to select the Conference parameter Start-time in local time and then click the < - Add button.
Table 4-1: Email notification format parameters Option Description Start Conditional Text Click the Start Conditional Text button. A bracket [can be placed in the Subject, Body or Addition for recurrent reservations only field, prior to the inclusion of a parameter. Any parameter entered between the bracket(s) becomes conditional text. Also, see End Conditional Text listed below. End Conditional Text Click the End Conditional Text button.
Chapter 4 - Options Settings 4. Click OK. The new settings are applied to the customized language format as shown in the E-mail Format dialog box. If customization was selected for a language, the appropriate indication appears in the E-mail format column. Repeat steps 2 to 5 to customize additional languages. — To cancel customization and use system default format, select a language and click the Restore Default Format button. Click OK. — 5.
Configuring the Sender’s & Meeting Organizer’s Default E-mail Addresses You can set the WebCommander to use a fixed e-mail address that is automatically added in the From field when sending a conference invitation. When this options is enabled, the fixed Email addresses added to the From field cannot be replaced. To configure a fixed sender’s e-mail address: 1. From the Web Server Manager’s Options menu, select E-mail Format. The E-mail Format window opens. 2.
Chapter 4 - Options Settings 4. Click OK. When the conference invitation is sent, the email address defined in the Fixed Email Address field appears in the From field and cannot be altered. Add the meeting organizer’s e-mail address to the e-mail recipient list: 1. From the Web Server Manager’s Options menu select E-mail Format. The E-mail Format window opens. 4-22 2. Select the Add the meeting organizer to the e-mail recipient list check box. 3. Click OK.
Fixed Email Address Meeting Organizer Email Address Figure 4-2: Sample email with Fixed Sender Email and Meeting Organizer email addresses 4-23
Chapter 4 - Options Settings Application Error Information In the WebCommander, the user is able to send Debugging information to his next level of support. When an exception occurs in the MGC Manager or WebCommander, the operator/administrator can send an email to support with information that will help analyze the source of the problem. In the Web Server Manager you can enable/disable the email notifications function in the Options menu. To enable/disable email crash notifications: 1.
2. Enable the Automatic Email Crash Notification box. When enabled other options are displayed. If the Automatic Email Crash Notification box is disabled, the system disables the Application Error Window dialog box and the report is not mailed. Edit the email format using the following options: Table 4-1: Email format parameters Option Description Target Email Address Enter the email address of the recipient.
Chapter 4 - Options Settings Administrator Email Notification Settings When an Reservation, On Going conference in WebCommander or new Meeting in Personal Scheduler is created, an optional email can be sent to the system administrator. The system administrator has the option to configure the WebCommander and Personal Scheduler by enabling the system to automatically send an email.
2. Click the Send Email Notification box. 3. In the Admin Email Address box leave the default type your email address. The default email address of the meeting organizer appears. • In MGC Personal Scheduler this is the e-mail address of the user that organized the Meeting or Appointment. • 4. In the WebCommander the login name of the user that organizes the conference. With NT authentication, the login name of the user is used.
Chapter 4 - Options Settings Text that appears in the body area of the email, and lists conference details Text that appears in the subject area of the email Listing of parameters that can be added to the Body text This is conditional text Text that appears in the subject area of the email An annotation sent for a recurrent conference There are a number of “time” fields marked by an asterisks (*) in the Customize E-mail Format window.
Table 4-1: Email notification format parameters Option Description Body In the body box enter the text that you want to appear in the body area of the email. The email contains Conference parameters. The text is composed of two elements - free text and the appropriate parameter, that is a value entered automatically by the MCU.
Chapter 4 - Options Settings Table 4-1: Email notification format parameters 4-30 Option Description Conference parameters (con’t) • IP dial in number - A listing of defined IP participants and their IP addresses. • Conference ID - The conference numeric ID used for routing from the Entry Queue to the conference. • Recurrent reservations pattern - The frequency pattern of the recurrent reservation. • Number of recurrent reservations - The number of recurring reservation.
Table 4-1: Email notification format parameters Option Description Preview Displays the format of the email based on the selected customization: Subject (WebCommander Only) - The subject heading of the email. Body - The text selected by the user, using the Conference parameters. 6. Click OK. Enabling the “time” fields in the Web Server Manager: 1. Click the Include time fields in E-mail Format option.
Chapter 4 - Options Settings 4-32
5 Administrator’s Tasks This chapter describes the tasks that can be performed only by users with the administrator’s permission (configure the database). Defining an MCU To be able to run conferences, you must establish the connection between the MCU and the MGC Web Server in the database. To define a new MCU: 1. In the Browser area, right-click the MCU icon, and then click Add New MCU to dB. The MCU Properties dialog box opens.
Chapter 5 - Administrator’s Tasks 2. Define the following parameters: Table 5-1: MCU Properties 5-2 Option Description Name Type the name of the MCU. Specify a name that clearly identifies the MCU. IP Address Type the IP Address of the MCU. Login Enter the login name that will be used when connecting to the MCU. Password Enter the password that will be used when connecting to the MCU. In Secure Mode configuration, the password is hidden by a series of asterisks (****).
MGC Web Server Manager User’s Guide Table 5-1: MCU Properties Option Description Last Number Type the last phone number in the range of dial in numbers allocated by the MCU. These numbers are added to the Prefix number to compose the complete number dialed by participants when connecting to the MCU. For example if you enter 9999, and the prefix is 97865, the last dial in number in the range will be 978659999.
Chapter 5 - Administrator’s Tasks 5. Click OK to confirm and add the MCU to the MCUs list. Viewing the MCUs List • In the Browser area, click the Server icon. The MCUs list is displayed in the Status area. The system displays in a table format the MCU Name, MCU Status (which is displayed only if the Server is connected to the Web Server Manager), MCU IP address, Order, the Login Name and Password used to connect to the MCU, Order, the ISDN Prefix of the MCU dial-in number, the H.
MGC Web Server Manager User’s Guide Defining a New Label Labels may be used to group reservation or parties templates. Labeling enables the remote user to filter conferences or participant templates when accessing the database to schedule or monitor conferences. To define a new Label: 1. In the Browser area, right-click the Labels icon, and then click Add New Label to DB. The Label Properties dialog box opens. 2. In the Name box, enter the label name.
Chapter 5 - Administrator’s Tasks Viewing the Labels List • In the Browser area, click the Labels icon. The Labels list is displayed in the Status area. The system displays the Label Names in a table format. Sorting the Labels List You can sort the labels alphabetically by name in ascending or descending order by clicking on the Name column heading.
MGC Web Server Manager User’s Guide Defining Permissions Permissions define the access rights to various functions of the MGC WebCommander, MGC Web Server Manager and MGC Database Manager (a module of the MGC Manager application). You can define various permission types according to your needs, creating a wide range of user types. Once defined, the permission is assigned to a user, setting the user rights to various functions. The database includes five default permission types.
Chapter 5 - Administrator’s Tasks 3. Define the following options: Table 5-2: Permission Properties - Settings1 Parameters 5-8 Option Description Permission Name Enter the name for this set of options determining the access rights to various functions. This set will be assigned to users and will determine their access rights.
MGC Web Server Manager User’s Guide Table 5-2: Permission Properties - Settings1 Parameters (Continued) Option Description Parameters view From the drop-down list, select one of the following options: Partial – The user will be able to see only a limited set of reservation parameters. In such a case, the remaining parameters are taken from the reservation default settings. Full – The user will be able to view and modify all the reservation parameters.
Chapter 5 - Administrator’s Tasks Table 5-2: Permission Properties - Settings1 Parameters (Continued) 5-10 Option Description Enable Reservation Calendar (Web Only) Select this check box to enable users to access the Calendar and view the scheduled conferences/ Meeting Rooms in the Calendar. When cleared, the user will not be able to access the Calendar.
MGC Web Server Manager User’s Guide 4. Click the Settings2 tab. This dialog box enables you to set the access rights to the WebCommander’s Meeting Director module and to perform various tasks while monitoring on going conferences. In addition, general user behavior may be defined. 5.
Chapter 5 - Administrator’s Tasks Table 5-3: Permission Properties - Settings2 Parameters (Continued) 5-12 Option Description Change conference end time Select this check box to let the user change the conference duration (extend or terminate it) by modifying the conference end time. Extend conference end time Select this check box to enable the user to activate the automatic extension of a conference feature.
MGC Web Server Manager User’s Guide Table 5-3: Permission Properties - Settings2 Parameters (Continued) Option Description Change Web/ Chairperson Password Enables you to change the password used by the participant to identify himself/herself as the conference chairperson. The password is also used to access the conference properties and to monitor the conference in WebCommander. Change Conf. Entry Password Enables you to change the password used by the participant to access the conference.
Chapter 5 - Administrator’s Tasks Table 5-3: Permission Properties - Settings2 Parameters (Continued) Option Description Control Questioner Session Select this check box to enable the user to control the questioner session from the Question and Answer queues during On Going conferences.
MGC Web Server Manager User’s Guide Table 5-3: Permission Properties - Settings2 Parameters (Continued) Option Description Video forcing Select this check box to allow the user to video force (select a specific participant to appear in a given video window) participants to various video layout windows. Turn on/off AGC The Auto Gain Control mechanism regulates noise and audio volume by keeping the received signal to all participants balanced.
Chapter 5 - Administrator’s Tasks Table 5-3: Permission Properties - Settings2 Parameters (Continued) Option Description Print/Export ongoing participants Select this check box to enable the ongoing conference’s participants list be printed or exported to an .xls (Excel) formatted file. General 5-16 View Mode Set the View Mode to Administrator to allow the user to access Conference Reservation Templates and Participant Templates.
MGC Web Server Manager User’s Guide Table 5-3: Permission Properties - Settings2 Parameters (Continued) Option Description Limit Maximum number of participants The number of participants a user can add to a Video or Audio Only conference in the WebCommander site can be limited. When this option is enabled, the user cannot start a conference in which the number of participants exceeds the limit defined in his/her permissions.
Chapter 5 - Administrator’s Tasks Table 5-3: Permission Properties - Settings2 Parameters (Continued) 6. Option Description Allow Connection Type Changes A user may start a conference in the WebCommander site that includes Dial-In, Dial-Out and/or Direct participants, and add new participants of Dial-In, Dial-Out and/or Direct connection type.
MGC Web Server Manager User’s Guide The system shows, for each Permission, the currently defined access rights to three main modules. • • • Define/Initiate Conference – indicates whether the user has access to the Meeting Scheduler module. This option is not relevant to the MGC Manager users. Monitoring Conference – indicates whether the user has access to the Meeting Director module. This option is not relevant to the MGC Manager users.
Chapter 5 - Administrator’s Tasks Permission Type Administrator Operation 5-20 Operator Moderator Moderator (without Participant initiating) View Participants Start Immediately Start At + Res.
MGC Web Server Manager User’s Guide Permission Type Administrator Operation Operator Moderator Moderator (without Participant initiating) Conference lock Place conference on hold Designate exclusive speaker Mute “Meet Me” Parties Control the voting session Change web/chair person password Change conf entry password Modify User Defined Conference fields Recording Control
Chapter 5 - Administrator’s Tasks Permission Type Administrator Operation Moderator (without Participant initiating) Connect/Disconnect participants Mute participants Add participants from database Create New Participants Modify participant Properties Modify participant’s Volume Video Forcing Turn On/Off AGC Change to chairperson Modify participant’s listening vo
MGC Web Server Manager User’s Guide Permission Type Administrator Operation Operator Moderator Moderator (without Participant initiating) Change Password Modify Conference Billing Code General – Always Prompt for conference password General – Limit maximum number of participants Dial-in Dial-out direct Same as Administrator Send E-mail Participant Phone Number/IP address in E-mail Allow Connection
Chapter 5 - Administrator’s Tasks Defining a New User The database includes the list of all users that can access the database via the MGC Web Server Manager or the WebCommander. Depending on the permission assigned to the user, access to the Meeting Scheduler, Meeting Director and Database configuration may be denied and/ or various fields and operations may be disabled. NT authenticated users added to the database automatically inherit the permissions of the default user.
MGC Web Server Manager User’s Guide 2. Define the following parameters: Table 5-4: User Properties Option Description Name Enter the name of the user. Password Enter the password to be used by the user when accessing the database via the MGC Web Server Manager, the WebCommander and the MGC Database Manager. The password is hidden to increase system security. Confirm Password Confirm the password by re-typing it. The password is hidden to increase system security.
Chapter 5 - Administrator’s Tasks 3. Click the Creation & Authentication button to display additional parameters. 4. Define the following parameters: Table 5-5: Conference Creation and Authentication Parameters Option Description Conference Creation Billing Code 5-26 Enter the billing code that will be added to the conference parameters when starting a new on going conference from the New Meeting window or from the MGC Personal Scheduler (Outlook’s Addon application).
MGC Web Server Manager User’s Guide Table 5-5: Conference Creation and Authentication Parameters (Continued) Option Description Entry Password Enter the conference entry password the participants will have to enter to connect to the conference. This password is assigned to the conference scheduled or started from the New Meeting window or from the MGC Personal Scheduler (Outlook’s Add-on application).
Chapter 5 - Administrator’s Tasks Table 5-5: Conference Creation and Authentication Parameters (Continued) Option Description Ad Hoc Conferences Numeric ID In Ad Hoc Conferencing, the Numeric ID is used for authentication purposes. When a participant connects to an Ad Hoc-enabled Entry Queue, which is configured to access the WebCommander as the external database application, the Numeric ID is used to verify whether the participant is authorized to start a new on going conference.
MGC Web Server Manager User’s Guide Table 5-5: Conference Creation and Authentication Parameters (Continued) Option Description VIP Select whether this user will be set as VIP when connecting to the conference. This field overwrites the VIP definition of the Participant properties for this user when connecting to the conference. 5. Click OK. 6. To designate MCUs for a user, in the Properties window, select the Custom MCU check box, and then click the Select MCUs button.
Chapter 5 - Administrator’s Tasks The order of the MCUs in the Selected MCUs list determines the order in which the system will look for a free MCU to run a conference scheduled by this user. To cancel the assignment of MCUs to the user, in the Selected MCUs list, click the MCU name(s) and then click the Remove [<<] button. Multiselection is available using standard Windows conventions. The unassigned MCUs appear in the MCUs list. 8. Click OK to return to the User Properties dialog box. 9.
MGC Web Server Manager User’s Guide Automatically Adding Authenticated Windows Users to the Users List Users registered in the Windows domain may be automatically added to the Users list, based on their Windows user Name and Password and parameters defined in the Participant Defaults. The users are added to the Users table in the database if the Automatically add authenticated Windows users to WebCommander Users list is selected in the Web Configuration window.
Chapter 5 - Administrator’s Tasks Manually Adding Windows Users to the Users List In the MGC Server Manager application, define the users that are authorized to access the MGC WebCommander Web site based on their Windows login name and password. To manually add Users when working in Windows Authentication mode: 1. Expand the database tree. 2. In the Browser pane, right-click the Users icon, and then click Add New User to dB. The User Properties dialog box opens. 5-32 3.
MGC Web Server Manager User’s Guide 6. It is recommended to enter the user’s E-mail address, if the conference default name format will be configured to include the E-mail address. 7. If the Ad Hoc Conferencing is configured on the MCU and WebCommander users may start on going conferences using Ad Hoc conferencing, define the Conference Creation properties as described in “Conference Creation and Authentication Parameters” on page 5-26. 8. Click OK.
Chapter 5 - Administrator’s Tasks 2. Right-click the icon of the user whose access right to define, and then click Assign groups to user. The Group Assignment dialog box opens, listing the Groups to which the user has access rights. The list displays the groups currently assigned to the User with the access rights the user has to each of these groups.
MGC Web Server Manager User’s Guide You may modify the user’s access rights to a specific group by clicking the group and then selecting the appropriate Read and Write properties. For more details, see the assignment of new groups, next. 3. To assign additional groups to the user, click the Add Assignment button. To remove an assigned group, select the Group you wish to delete and then click the Delete Assignment button. If you have selected to Add Assignment, the following dialog box opens.
Chapter 5 - Administrator’s Tasks In the View MCU Conferences, select one of the following options: — No – The user will not be able to view the reservations, Meeting Rooms and On Going conferences assigned to other users of the same Group, even if the View All options are enabled in the Permissions assigned to this user.
MGC Web Server Manager User’s Guide Conference access authentication can be part of the Ad Hoc conferencing flow (conference initiation authentication), or independent of Ad Hoc conferencing. In this case each participant’s connection to a conference is validated by the external database application (such as the WebCommander server).
Chapter 5 - Administrator’s Tasks On Going conference with this numeric ID, the participant is moved to that conference and another authentication process may occur, depending on the conference IVR Service configuration. 4. If there is no On Going conference with that Numeric ID, the MCU sends the Numeric ID to the WebCommander Web Server to verify if its database contains a user with this assigned Numeric ID and if this user is allowed to initiate new conferences. 5.
MGC Web Server Manager User’s Guide 8. If the new On Going conference is assigned an IVR service with conference entry password and chairperson password functionality but without External database authentication and prompts, the participant is requested to enter these passwords in order to connect to the conference.
Chapter 5 - Administrator’s Tasks Conference Access Authentication Request using WebCommander as the External Database Application An additional security measure of verifying the conference entry password can be added to the Ad Hoc conference initiation. Which mean participants with valid passwords can connect to the conference. Conference access authentication can be independent of Ad Hoc conferencing (conference initiation authentication).
MGC Web Server Manager User’s Guide the Participant Properties in the MGC Manager application or the WebCommander Web site. — If a user with this PIN code is found, but the conference numeric ID is not identical to the numeric ID defined for the User, the participant enters the conference as an identified standard participant; the participant name, VIP state and Participant Information (corresponding to the User Defined 1 field in the Participant Properties definition) are taken from the Users table.
Chapter 5 - Administrator’s Tasks conference is created via Ad Hoc-enabled Entry Queue, the IVR Service must be assigned to the Profile used for the Ad Hoc Conferencing. The WebCommander Server Manager-Users table must include the Participant PIN Code for each user. The Participant Information and VIP state may also be defined. For more details on User definition, see “Conference Creation and Authentication Parameters” on page 5-26.
MGC Web Server Manager User’s Guide 3. At this point, the participant that identified himself/herself as the conference chairperson can enter: — His/her personal PIN Code, as defined in the Users table — The chairperson password as defined for the conference. If Ad Hoc conferencing was used to initiate the conference, the Chairperson Password is either defined in the Profile, or by the parameters sent from the external database application to the MCU at the conference start time 4.
Chapter 5 - Administrator’s Tasks Figure 5-3: Ad Hoc Conferencing with Conference Numeric ID and Chairperson Password Authentication To enable this workflow, the same components as for the Ad Hoc Conferencing using WebCommander Server as the External Database Application for Conference Initiation Authentication workflow must be defined in the system with the following additions: • The IVR Service assigned to the destination conference must be configured to check the external database server for the Chair
MGC Web Server Manager User’s Guide Defining Groups The User Tables (Participants and Reservations Tables) are organized in Groups. The Groups increase the system security, as they limit the access to conferences and participant data to authorized users only. The Groups are part of the administrative tables.
Chapter 5 - Administrator’s Tasks Users are assigned access rights to specific Groups. The users can add or modify only Participant templates and/or Conference templates that are assigned to Groups to which they have access rights. One user may be assigned to many Groups and one Group may be assigned many users. New Conference and Participant templates are created within the selected Group and they are automatically assigned to that Group.
MGC Web Server Manager User’s Guide On first entry, only the Root group is listed when expanding the Groups tree. When upgrading from a previous version that did not support Groups, the Update Database process automatically performed by the Web Server Manager will create a group for each of the listed users, and will assign access rights to that group. Participant and Conference templates are automatically assigned to the appropriate user group according to the user name that appears in the Owner field.
Chapter 5 - Administrator’s Tasks Setting the Access Rights to the Group To set the access rights to a Group: 1. In the Browser area, right-click the icon of the group whose access right to define, and then click Set Users Rights. The Set Users Rights dialog box opens. This dialog box lists all the currently defined users. It also displays their current Read and Write permissions to the Conference and Participant templates assigned to this group.
MGC Web Server Manager User’s Guide 2. To set or modify the access rights of a user to the group: — Click the user name(s) (multi selection is available using the standard Windows conventions) — Select the Reservation Templates Read and Write check boxes to enable/disable the user to view (read) and/or add (write) conference templates to the Group. Select the Write check box to automatically select the Read check box.
Chapter 5 - Administrator’s Tasks Default Group Five Conference templates, representing each of the main types of conferences, are included in the database that is shipped with the WebCommander. The parameters defined in each of these conferences represent the most commonly used properties for the specific type of conference. A new Group - Default - is included with the database and it stores the default conference templates.
MGC Web Server Manager User’s Guide From the MGC WebCommander application, users with the appropriate permissions may: • Add new conference templates to the Default Group • Modify the system Default conference templates New Private Groups The Web Server Manager application can be configured to automatically add a new group for users who have been automatically added to the WebCommander Users table of the database.
Chapter 5 - Administrator’s Tasks The Configuration dialog box opens. 2. 5-52 Select Create private groups for automatically added users check box and then click OK.
MGC Web Server Manager User’s Guide Once the new Private Group is created, it can be displayed in the New Meeting window, enabling the users to add new contacts to this personal address book and invite contacts from the Private Group to the new meeting.
Chapter 5 - Administrator’s Tasks Defining Personal Scheduler Templates A user who has the MGC Personal Scheduler plug-in installed on his/her PC can schedule new conferences directly from his/her Microsoft Outlook application. The parameters of the possible types of conferences are defined in the MGC Web Server Manager, in the Personal Scheduler Templates area. To create a new Personal Scheduler Template: 1.
MGC Web Server Manager User’s Guide Refreshing the Database List Databases can be added to the database list used by the MGC Web Server Manager externally, via the Control Panel – Data Source (ODBC). In such a case, you need to refresh the database list to gain access to that database from the MGC Web Server Manager application. To refresh the database list in the MGC Web Server Manager: On the Options menu, click Refresh dB List.
Chapter 5 - Administrator’s Tasks Refreshing the Database Databases may be accessed by several users concurrently from the MGC Web Server Manager application as well as from the MGC Database Manager module of the MGC Manager application. In such cases, the information that you see in the MGC Web Server Manager window may not be updated with the latest changes performed by other users. It is recommended to refresh the database to make sure that the latest data is displayed.
A Appendix A: Using a Web Portal to Link with the WebCommander Three WebCommander conferencing features can be accessed from a Web Portal via links that are available in the Web Portal: • Calendar - for conference reservations • On Going Conference - for monitoring ongoing conferences • New Meeting - for starting on going conferences WebCommander New Meeting pane inserted into the Web Portal HTTP Links to the WebCommander pages Customer’s Web/ Portal Figure A-1: Web Portal Sample A-1
Appendix A: Using a Web Portal to Link with the WebCommander In this configuration, the Web Portal users are automatically registered with the WebCommander application and if they have the appropriate permission, they can access any of these WebCommander pages. The automatic login for both Web Portal and WebCommander is enabled by transferring user data from the Web Portal to the WebCommander. The WebCommander database includes a users table (CustomerUser) that is shared with the Web Portal.
Embedding the WebCommander in the Web Portal To embed the WebCommander in the Web Portal and allow the use of the portal’s login and authentication system for accessing the WebCommander application, the following configurations must be performed: • Optional. In the WebCommander Web Server application, define the appropriate Permission to be assigned to the default user and modify the Default User properties.
Appendix A: Using a Web Portal to Link with the WebCommander The name of the user is derived from the User Name, Surname and UID. Figure A-2: User Properties (Web Server Manager) Creating the Links from the Web Portal to the WebCommander Up to three URL links can be included in the Portal page as hyper-links: • Calendar/Reservation • OnGoing Conferences • New Meeting The HTTP header must include the User ID ("UID") in a server variable called: “HTTP_X-uid”.
• The string: default.asp?URL=DirectAccess.asp?Target=ID&lang=ID, where Target includes the code of the WebCommander page and Lang is the code for the language in which the page is displayed.
Appendix A: Using a Web Portal to Link with the WebCommander The link is created in the following format: http://Server /linkedwebcommander/default.asp?URL= DirectAccess.asp? Target=targetID&lang=langID For example, the http link to the New Meeting page in German would appear as: http://172.22.172.162/linkedwebcommander/ default.asp?URL=DirectAccess.asp?Target=2&lang=2.
B Appendix B: Monitoring a Conference in the WebCommander using a URL or Form In version 6.0, a single conference can be monitored from any browser based application by entering the URL that includes the user login name and password to the WebCommander site. In this mode, the user name and password were not secured and appeared in the recent URL. In version 7.5 & 8.0, the user name and password can be sent separately, using the HTTP Form method, hence increasing the connection security.
Appendix B: Monitoring a Conference in the WebCommander using a URL or Form When an incorrect conference password is sent, the user is prompted for the conference entry password prior to being granted access the conference. b. 2. When the user’s permission "Always prompt for conference password" is not selected, the user enters the conference without having to enter the conference entry password (and therefore it does not have to be included in the URL).
Table B-1: Variable Definitions (Continued) Variable Description MCUIp The IP address of the MCU. Optional variables: LoginFromForm (available in version 6.01) LoginFromForm=1 must be entered as part of the URL to indicate that the Form method is used when transferring the user name and user password. Param1 The conference entry password of the On Going WebCommander conference. Param2 The user name used to access the WebCommander.
Appendix B: Monitoring a Conference in the WebCommander using a URL or Form Form example: