
Data Sheet
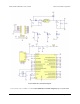

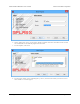

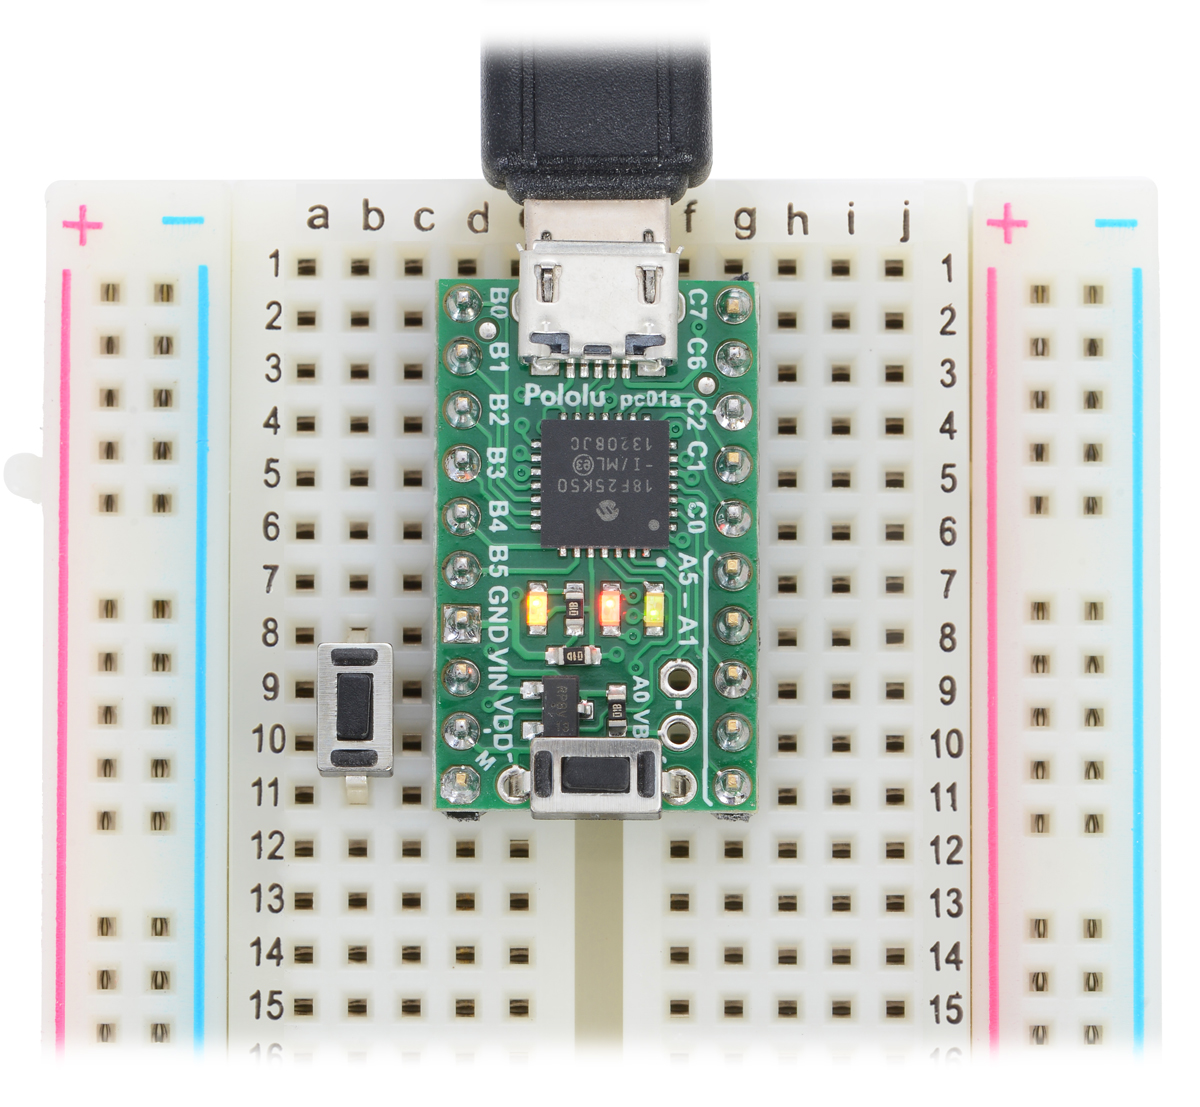
Another option is to connect a bootloader button between VDD and RB6 and a reset button between GND and
MCLR as shown in the picture below, and reset the P-Star while you are holding down the bootloader button.
The buttons shown in the picture below are Pololu item #1400 [https://www.pololu.com/product/1400].
P-Star 25K50 Micro on a breadboard with a reset button (left) and a bootloader
button (onboard).
The bootloader button can be used for other purposes while your application is running. However, be careful to
never drive the RB6 line low, or else pressing the button could cause a short circuit.
Starting the bootloader from your application
The bootloader can also be started by the application without requiring a reset. To do this, the application can
simply jump to address 4 using the assembly instruction goto 4. If the application uses USB, it should disable
the USB module by clearing USBEN and then wait for at least 100 ms before starting the bootloader, in order to
give the computer time to detect that the application has disconnected.
For convenience, we recommend that any P-Star applications with a USB interface implement a USB command
that for starting the bootloader. This would allow you to get into bootloader mode, upload the new firmware, and
run it, entirely using USB and not needing any physical interaction with the board. For example, an application
Pololu P-Star 25K50 Micro User’s Guide © 2001–2017 Pololu Corporation
5. Getting started Page 14 of 38