
User's Manual DATA PROJECTOR U4-232, U4-232h
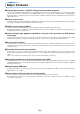
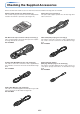
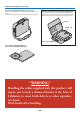
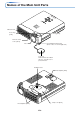
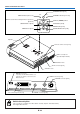
Table Of Contents
- INDEX
- English
- IMPORTANT SAFETY INFORMATION
- Major Features
- Table of Contents
- Checking the Supplied Accessories
- Names of the Main Unit Parts
- Names of the Remote Control Parts
- Preparing the Remote Control
- The Procedure Up to Projecting to the Screen
- Placement Guide
- Connecting Personal Computers and Video Equipment
- Power Cable Connections and Switching the Power On/Off
- Adjustment of the Projection Screen
- General Operation
- Input Selection
- Automatic Adjustment of Analog RGB
- Selection of Aspect Ratio
- Freezing a Moving Picture
- Cancelling Video and Audio Temporarily
- Lamp Mode
- Keystone
- Adjustment of the Volume
- Enlargement of the Image and Video Movement
- Using the Presentation Timer
- Protecting the Projector with the Security Lock
- Using the Quick Menu
- Menu Operation Method
- Image
- Color
- View
- Setup
- Option
- Info.
- When an Indicator is Lit or Blinking
- Troubleshooting
- Cleaning
- Replacing the Lamp Cartridge
- Specifications
- Table of Supported Frequencies
- Cabinet Dimensions
E-9
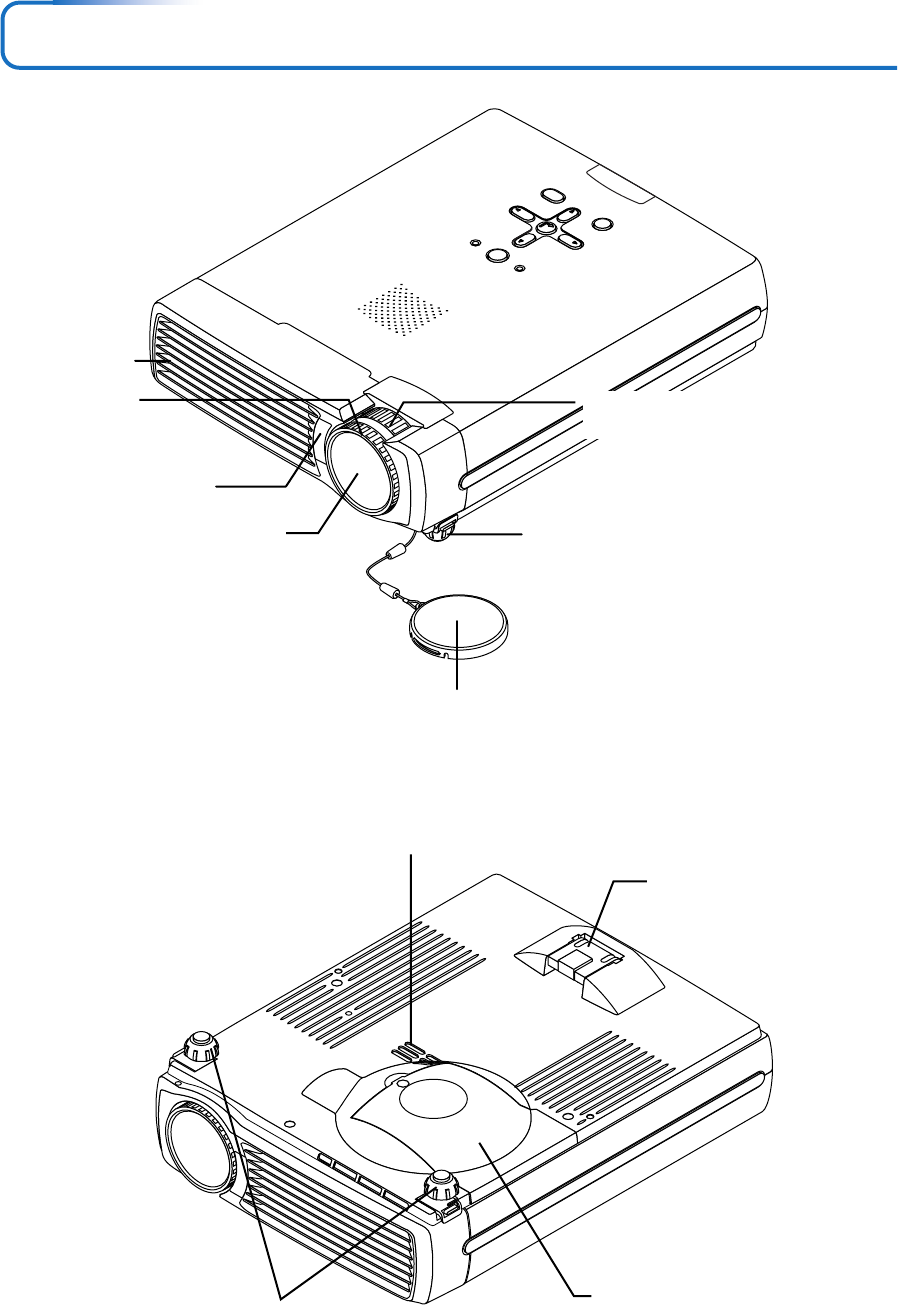
Names of the Main Unit Parts
STAT U
S
SO
URCE
STAN
DB
Y
AUTO
M
EN
U
QU
ICK
MENU
Front adjuster button [E-25]
(There is also one on the right side.)
Focus ring
[E-25]
Exhaust vents
Front adjusters [E-25]
Rear adjuster [E-25]
Lamp cover [E-59]
Ventilation slots
Lens cap
Remove before use. Attach
the lens cap after use to
protect the lens.
Remote control
sensor [E-12]
Lens
Zoom ring [E-24]