
User's Manual DATA PROJECTOR U4-232, U4-232h
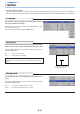
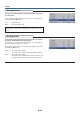

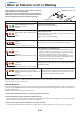

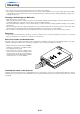
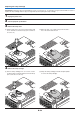
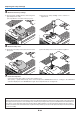
Table Of Contents
- INDEX
- English
- IMPORTANT SAFETY INFORMATION
- Major Features
- Table of Contents
- Checking the Supplied Accessories
- Names of the Main Unit Parts
- Names of the Remote Control Parts
- Preparing the Remote Control
- The Procedure Up to Projecting to the Screen
- Placement Guide
- Connecting Personal Computers and Video Equipment
- Power Cable Connections and Switching the Power On/Off
- Adjustment of the Projection Screen
- General Operation
- Input Selection
- Automatic Adjustment of Analog RGB
- Selection of Aspect Ratio
- Freezing a Moving Picture
- Cancelling Video and Audio Temporarily
- Lamp Mode
- Keystone
- Adjustment of the Volume
- Enlargement of the Image and Video Movement
- Using the Presentation Timer
- Protecting the Projector with the Security Lock
- Using the Quick Menu
- Menu Operation Method
- Image
- Color
- View
- Setup
- Option
- Info.
- When an Indicator is Lit or Blinking
- Troubleshooting
- Cleaning
- Replacing the Lamp Cartridge
- Specifications
- Table of Supported Frequencies
- Cabinet Dimensions
E-59
Replacing the Lamp Cartridge
Preparations: Turning the projector upside-down on top of a soft cloth, etc., so that it does not get scratched makes it easier to
replace the lamp cartridge. Turn the projector right-side up after replacing the lamp cartridge.
1
Unplug the power cord.
2
Turn the projector upside-down.
3
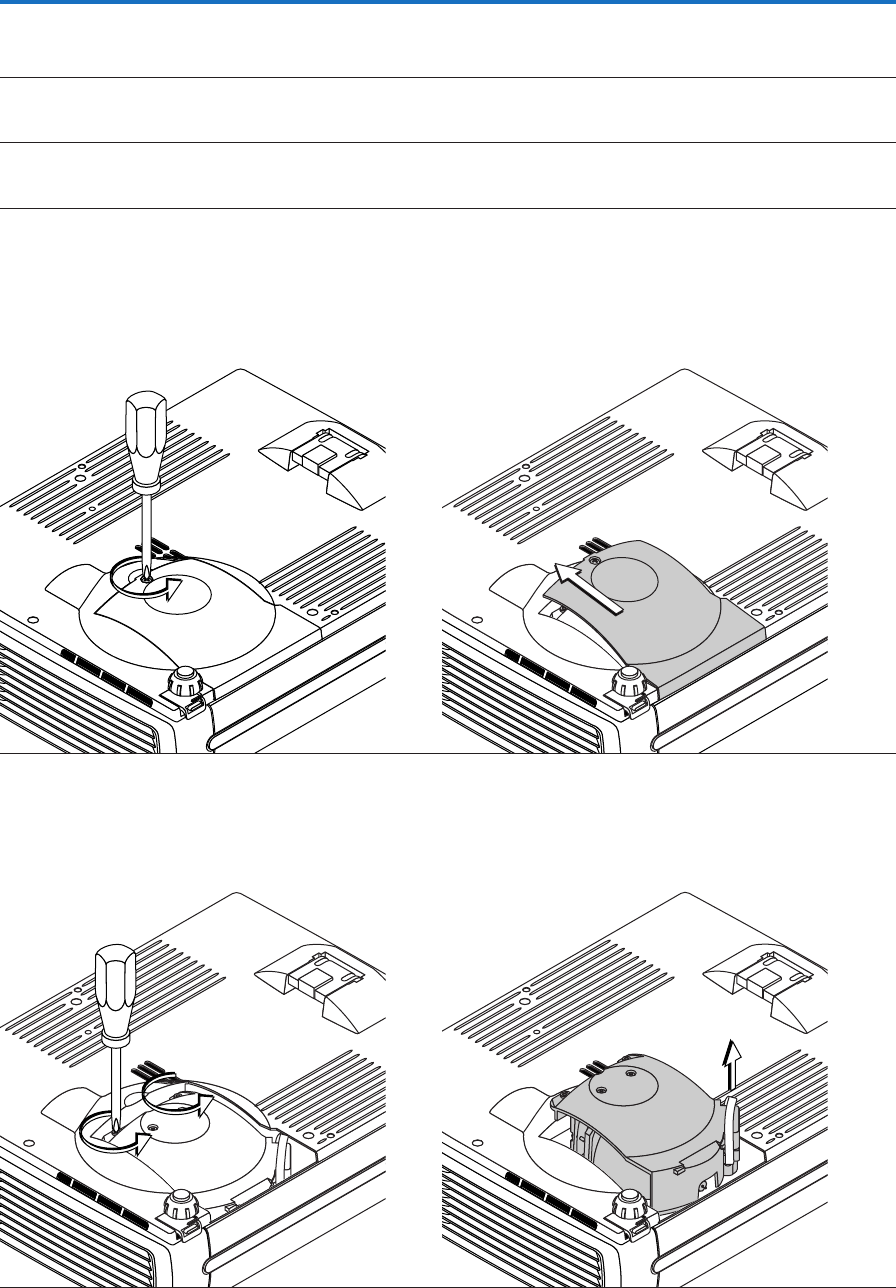
Remove the lamp cover.
(1) Turn the lamp cover’s set screw counterclockwise and
loosen until the screw turns freely. (The screw does
not come off.)
(2) Open the lamp cover a little, then pull it in the direc-
tion of the arrow and remove it.
4
Remove the lamp cartridge.
(1) Turn the lamp cartridge’s two set screws counter-
clockwise and loosen them until the screws turn freely.
(The screws do not come off.)
(2) Grasp the lamp cartridge’s handle and pull upward
to remove the lamp cartridge.