
User's Manual DATA PROJECTOR U4-232, U4-232h
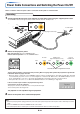
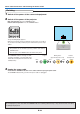
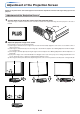
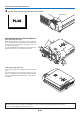
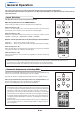
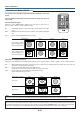
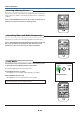

Table Of Contents
- INDEX
- English
- IMPORTANT SAFETY INFORMATION
- Major Features
- Table of Contents
- Checking the Supplied Accessories
- Names of the Main Unit Parts
- Names of the Remote Control Parts
- Preparing the Remote Control
- The Procedure Up to Projecting to the Screen
- Placement Guide
- Connecting Personal Computers and Video Equipment
- Power Cable Connections and Switching the Power On/Off
- Adjustment of the Projection Screen
- General Operation
- Input Selection
- Automatic Adjustment of Analog RGB
- Selection of Aspect Ratio
- Freezing a Moving Picture
- Cancelling Video and Audio Temporarily
- Lamp Mode
- Keystone
- Adjustment of the Volume
- Enlargement of the Image and Video Movement
- Using the Presentation Timer
- Protecting the Projector with the Security Lock
- Using the Quick Menu
- Menu Operation Method
- Image
- Color
- View
- Setup
- Option
- Info.
- When an Indicator is Lit or Blinking
- Troubleshooting
- Cleaning
- Replacing the Lamp Cartridge
- Specifications
- Table of Supported Frequencies
- Cabinet Dimensions
E-25
Adjustment of the Projection Screen
(
1
)
STATUS
SOURCE
STANDBY
AUTO
MENU
QUICK
M
ENU
(
1
)
(
2
)
D
V
I
A
U
D
IO
V
ID
E
O
S
-V
ID
E
O
M
O
U
S
E
STATUS
SOURCE
STANDBY
AUTO
MENU
QUICK
MENU
3
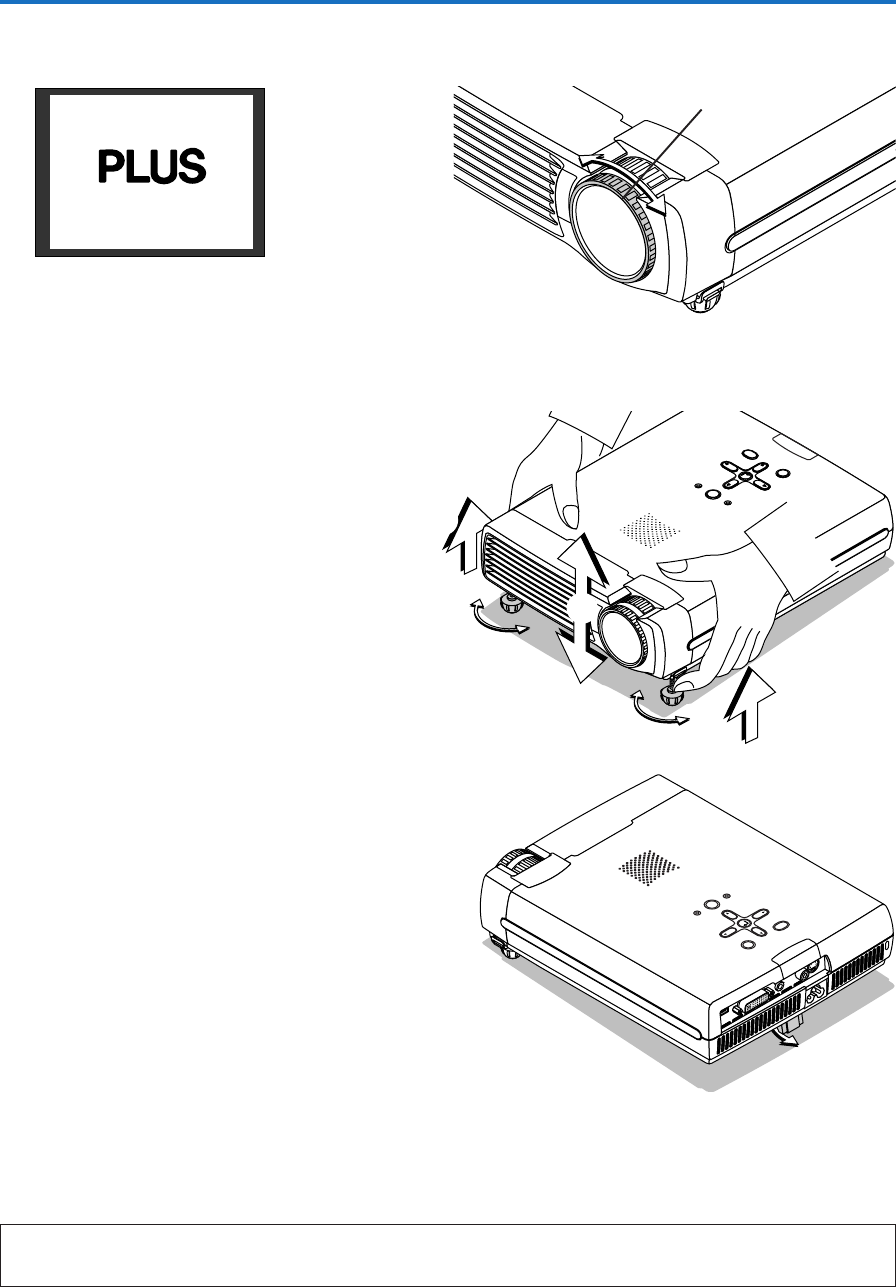
Turn the focus ring and adjust the focus of the screen
Focus ring
Making Adjustments with the Adjusters
Raising the projection image
While viewing the projection image, (1) press and hold
the front adjuster buttons located at the left and right and,
(2) raise the projector to align the image with the screen,
then release your fingers.
Turn the left and right front adjusters for fine adjustment.
Adjust so that there is no shaking of the projector.
Lowering the projection image
Lower the front adjusters using the operation described
above.
To lower the projection screen further, raise the rear ad-
juster. Fine adjustments are made by turning the left and
right front adjusters. Make adjustments so that there is
no rattling.
Note:
When the projector has a suspended or rear installation is used, the orientation of the projection will need to be changed.
Please see “Vertical Flip/Horizontal Flip” on Page E-48.