
User's Manual DATA PROJECTOR U4-232, U4-232h
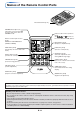
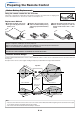

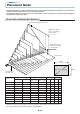
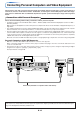


Table Of Contents
- INDEX
- English
- IMPORTANT SAFETY INFORMATION
- Major Features
- Table of Contents
- Checking the Supplied Accessories
- Names of the Main Unit Parts
- Names of the Remote Control Parts
- Preparing the Remote Control
- The Procedure Up to Projecting to the Screen
- Placement Guide
- Connecting Personal Computers and Video Equipment
- Power Cable Connections and Switching the Power On/Off
- Adjustment of the Projection Screen
- General Operation
- Input Selection
- Automatic Adjustment of Analog RGB
- Selection of Aspect Ratio
- Freezing a Moving Picture
- Cancelling Video and Audio Temporarily
- Lamp Mode
- Keystone
- Adjustment of the Volume
- Enlargement of the Image and Video Movement
- Using the Presentation Timer
- Protecting the Projector with the Security Lock
- Using the Quick Menu
- Menu Operation Method
- Image
- Color
- View
- Setup
- Option
- Info.
- When an Indicator is Lit or Blinking
- Troubleshooting
- Cleaning
- Replacing the Lamp Cartridge
- Specifications
- Table of Supported Frequencies
- Cabinet Dimensions
E-16
Connecting Personal Computers and Video Equipment
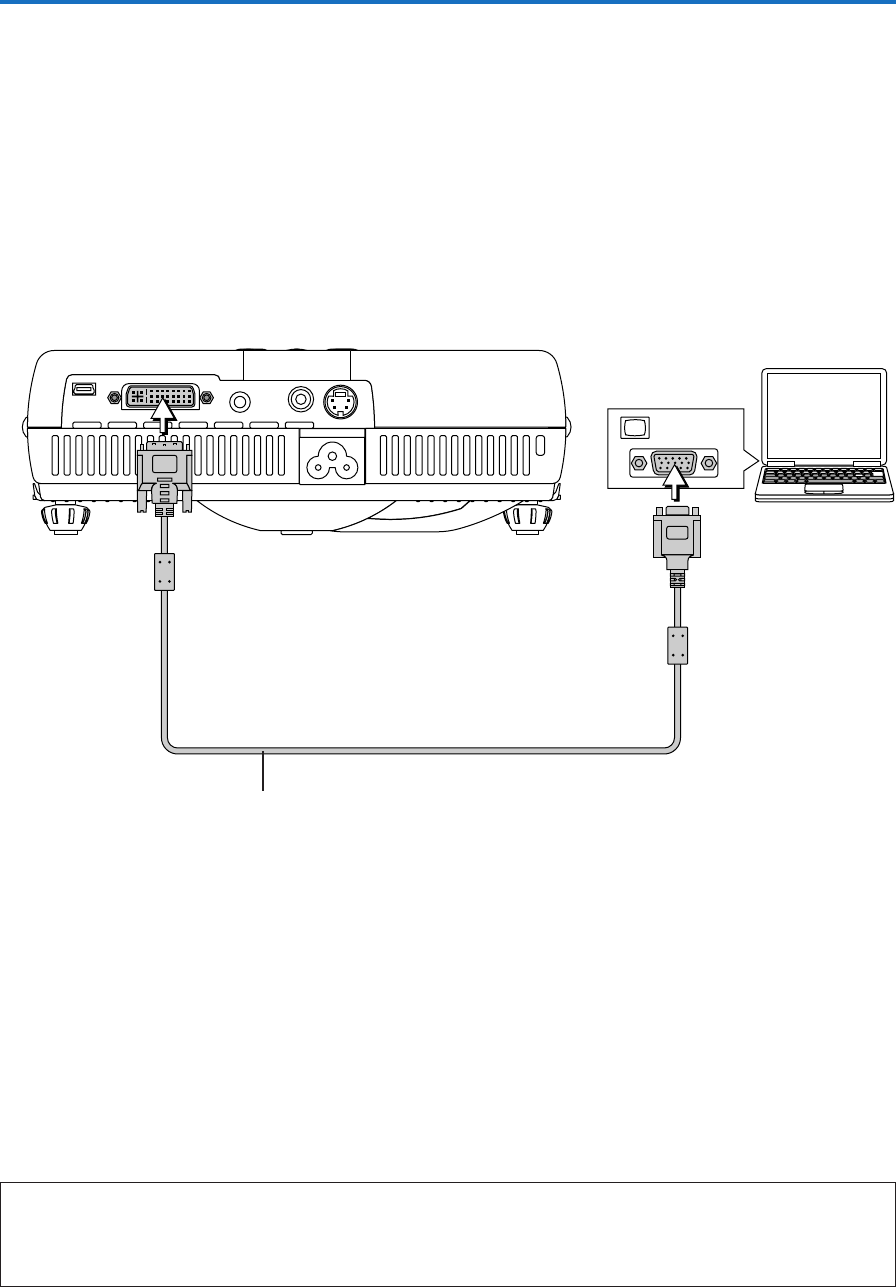
Personal Computers with a Mini D-Sub 15-Pin Connector
• When making connections with the DVI connector of the projector, please make the connection via the supplied DVI/mini D-
Sub 15-pin conversion cable.
The projector has been set to “Auto” at the factory; however, if it does not project, please change the input setting to “RGB”
using the menu sequence of [Setup] → [Input Format] → [PC].
See “Input Format” on Page E-50.
MONITOR OUT
Personal computer
DVI/mini D-Sub 15-pin conversion cable (Supplied item)
Note:
* Before making connections, check the power of the projector and the equipment to be connected is switched off.
* When projection will be with a notebook computer connected, knowledge will be required for the cable connection and notebook computer
startup procedure as well as the operation that follows startup. Please consult the instruction manual of your notebook computer or the on-
line help.