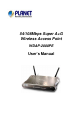
54/108Mbps Super A+G Wireless Access Point WDAP-2000PE User’s Manual
Copyright Copyright© 2005 by PLANET Technology Corp. All rights reserved. No part of this publication may be reproduced, transmitted, transcribed, stored in a retrieval system, or translated into any language or computer language, in any form or by any means, electronic, mechanical, magnetic, optical, chemical, manual or otherwise, without the prior written permission of PLANET.
Safety This equipment is designed with the utmost care for the safety of those who install and use it. However, special attention must be paid to the dangers of electric shock and static electricity when working with electrical equipment. All guidelines of this and of the computer manufacture must therefore be allowed at all times to ensure the safe use of the equipment. CE Mark Warning This is a Class A product.
TABLE OF CONTENTS CHAPTER 1 INTRODUCTION ......................................................................... 3 1.1 Package Contents .......................................................................................... 3 1.2 Features........................................................................................................... 3 1.3 Physical Details .............................................................................................. 4 1.4 Specification .......................
4.5.6 Grant Remote Access for Users ........................................................... 40 4.6 802.1x Client Setup on Windows XP .......................................................... 41 4.6.1 Client Certificate Setup.......................................................................... 41 4.6.2 802.1x Authentication Setup ................................................................. 44 4.7 Using 802.1x Mode ................................................................................
Chapter 1 Introduction 1 PLANET WDAP-2000PE is an IEEE 802.11a+g dual band Wireless Access Point with PoE. With the latest innovative Super A/G technology integrated, the maximum data rate of WDAP-2000PE is 108Mbps, which doubles the speed of standard 802.11a/g. WDAP-2000PE is also backward compatible and interoperable with IEEE 802.11b compliant wireless devices.
1.3 Physical Details Top View LED POWER PWR Status Description Steady Green – Power on OFF – Power off Steady Green - Link is active Link/Act Flashing Green - Transmit or receive data OFF - No connection LAN Steady Green - Link is active on 100M speed 100M Flashing Green - Transmit or receive data OFF - Link is active on 10M speed Steady Green - Link is active on 802.11a mode 5 GHz Flashing Green - Transmit or receive data OFF - No connection WLAN Steady Green - Link is active on 802.11b/g mode 2.
Installation Rear View Connector Description ANT Two dipole antennas are supplied. Best result is usually obtained with the antenna in a vertical position. Power Connect the supplied power adapter here. In order to clear ALL settings and restore to factory Reset Button default, holding the Reset Button down continuously for 5 seconds. LAN (PoE) Use a standard LAN cable (RJ-45 connectors) to connect this port to a 10BaseT or 100BaseT hub on your LAN. 1.
Management Web based configuration CLI configuration Message Log Firmware upgrade UPnP support Configuration file Backup/Restore Data Rate Super A/G mode Up to 108Mbps 802.11g Up to 54Mbps (6/9/12/18/24/36/48/54) 802.11b Up to 11Mbps (1/2/5.
Installation Chapter 2 Installation 2 2.1 General Installation Before you proceed with the installation, it is necessary that you have enough information about the WDAP-2000PE. 1. Locate an optimum location for the WDAP-2000PE. The best place for your WDAP2000PE is usually at the center of your wireless network, with line of sight to all of your mobile stations. 2. Assemble the antennas to WDAP-2000PE. Try to place them to a position that can best cover your wireless network.
Chapter 3 Setup & Management 3 3.1 Overview This chapter describes the setup procedure to make the WDAP-2000PE a valid device on your LAN, and to function as an Access Point for your Wireless Stations. The WDAP-2000PE can be configured using either the Web Browser or the CLI (Command Line Interface). Please refer to appendix B for the commands of CLI. 3.2 Setup using a Web Browser Web configuration provides a user-friendly graphical interface to manage your WDAP-2000PE.
If you can't connect: It is likely that your PC’s IP address is incompatible with the WDAP-2000PE’s IP address. The default IP address of the Wireless Access Point is 192.168.1.1, with a Network Mask of 255.255.255.0. If your PC’s IP address is not compatible with this, you must change your PC’s IP address to an unused value in the range 192.168.1.2 ~ 192.168.1.254, with a Network Mask of 255.255.255.0. 3.
Assign static IP If selected, the following data must be entered. to this device • IP Address - The IP Address of this device. Enter an unused IP address from the address range on your LAN. • Subnet Mask - The Network Mask associated with the IP Address above. Enter the value used by other devices on your LAN. • Gateway - The IP Address of your Gateway or Router. Enter the value used by other devices on your LAN. • DNS - Enter the DNS (Domain Name Server) used by PCs on your LAN.
Network ID (SSID) The SSID (up to 32 printable ASCII characters) is the unique name identified in a WLAN. The ID prevents the unintentional merging of two co-located WLANs. Please make sure that the SSID of all stations in the same WLAN network are the same. The default SSID is “default”. If this option is unselected, every wireless station located within Disable SSID Broadcasting the coverage of this access point can discover this access point easily.
rity Policy connect to your network. WEP: WDAP-2000PE allows you to use WEP data encryption to secure your data from being eavesdropping by unauthorized users. There are WEP64, WEP128 and WEP152 provided for data encryption. You can either use ASCII format or Hex format to enter a key. With Hex format, 2 digits represent 1 byte. Once you enable the WEP function, please make sure that exactly the same WEP keys are set on the Wireless AP as well as on wireless client stations.
3.4 Device Status You can monitor the system general information from the Device Information field. 3.4.1 System Log The system log allows you to track events that have occurred in the system. Such event messages can sometimes be helpful in determining the cause of a problem that you may have encountered. 3.4.2 Wireless Client Table The wireless client table lists the current wireless clients and its MAC address, state, and traffic statistics.
3.4.3 Bridge Table The bridge table shows all MAC entries learned from the wired LAN interface, wireless clients, and WDS peers (if running in the WDS mode).
3.4.4 Radio Table Radio table lists current Mode, channel, client associated with them and transmit packet, received packet, data error. 3.4.5 Site Survey Table This page shows other APs currently in the environment that the system can detect.
3.5 Advanced Settings The advanced settings tab contains more configurations for experienced users. However, changing your login password from the default factory setting is highly recommended for security purposes. 3.5.1 Password Settings The default administrative password is “password”. To change the password, type the current password followed by the new password twice. The entered characters will appear as asterisks. Click “APPLY” to save the new setting. 3.5.
Local Management System Administration UPnP This option allows you to enable/disable management from WLAN connection. The Access Point allows you to designate special port numbers other than the standard 80 for http for remote management. It also allows you to specify the duration of idle time (inactivity) before a web browser session times out. The default time-out value is 10 minutes.
Bridge Syslog Email Log You can enable/disable the 802.1d STP (Spanning Tree Protocol) function on the bridge of WLAN and Ethernet (i.e. the LAN interface). Enable this function can detect loops in your LAN environment and then protect the LAN from being saturated with infinite loop traffic. When the WDAP-2000PE encounters an error or warning condition (e.g., a log-in attempt with an invalid password), it will create a log in the system log table.
are enabled, the device can send out TRAP messages automatically to the TRAP manager if configured. Assign System Information System Name: A name that you assign to your WDAP-2000PE. It is an alphanumeric string of up to 30 characters. System Location: Description of where your WDAP-2000PE is physically located. It is an alphanumeric string of up to 60 characters. System Contact: Contact information for the system administrator responsible for managing your WDAP-2000PE.
When selected, no MAC address filtering will be performed. Disable MAC address control list Enable GRANT address When selected, data traffic from only the specified devices in the table will be allowed in the network. control list Enable DENY address When selected, data traffic from the devices specified in the table will be denied/discarded by the network. control list To add a MAC address into the table, enter a mnemonic name and the MAC address, and click ADD.
Once this function is enabled, you can specify an individual VLAN Enable VLAN for all SSIDs ID and priority tag for each SSID. In this way, you can separate traffic from stations using different SSIDs and so protect the wired network from being accessed by unauthorized stations using certain SSIDs. If this function is enabled, packets from a SSID will be forwarded to the Ethernet with the corresponding configured VLAN tag.
Configure the security policy for the SSID. Select security policy 3.5.6 Wireless Settings Beacon interval The WDAP-2000PE broadcasts beacon frames regularly to announce its existence. Default is 100, i.e., ten beacons per second. Decreasing the beacon interval makes passive scanning more reliable and faster. Increasing the beacon interval may improve throughput by decreasing contention for the medium. RTS threshold RTS/CTS frames are used to gain control of the medium for transmission.
Fragmentation DTIM interval When the size of a unicast frame exceeds the fragmentation threshold, it will be fragmented before the transmission. It should have a value of 256-2346 bytes, with a default of 2346. If you experience a high packet error rate, you should slightly decrease the Fragmentation Threshold. The WDAP-2000PE buffers packets for stations that operate in the power saving mode.
WDS devices. ure Access Point This means the device is working on AP-only Mode, and is for wireless client users only. Wireless Distribution This mode can help you to group different wired networks together by multiple WDAP-2000PE. The single system can support up to 8 WDAP-2000PE in WDS mode. System (Bridge mode) Additional configurations for WDS mode If the device is working on 'Wireless Distribution System (Bridge Mode)', you must add the MAC addresses of the grouped WDAP2000PE to the table.
Check this if you want to enable RADIUS authentication using the Enable Primary/Secondary primary/secondary Radius Server. If both are selected, the primary server will be tried first. Server The IP address of the RADIUS server. Server IP Port number Shared secret Retry times The port number that your RADIUS server uses for authentication. The default setting is 1812. This is used by your RADIUS server in the Shared Secret field in Radius protocol messages.
Ping flooding filtering When the ping (to the AP) traffic reaches the configured degree (e.g. High, Low), any more such ping packets will be dropped. Higher degree allows less ping traffic to the AP.
3.6 System Tools 3.6.1 Firmware Upgrade You can upgrade the firmware of your WDAP-2000PE. Normally, this is done when a new version of firmware is released. Upgrade procedures: Step 1: Select System Tools Firmware Upgrade from the menu. Step 2: To update the WDAP-2000PE firmware, first download the firmware from the distributor’s web site to your local disk, and then from the above screen enter the path and filename of the firmware file (or click Browse to locate the firmware file).
3.6.2 Configuration Save and Restore You can save system configuration settings to a file, and later download it back to the WDAP2000PE by following the steps below. Step 1: Select Configuration Save and Restore from the System Tools menu. Step 2: Enter the path of the configuration file to save-to/restore-from (or click the Browse button to locate the configuration file).
3.6.3 Factory Default You can reset the configuration of your WDAP-2000PE to the factory default settings. Step 1: Select Factory Default from the System Tools menu. Step 2: Click YES to go ahead and restore the configuration to the factory default. 3.6.4 Reboot System You can reset your WDAP-2000PE from the Browser. Step 1: Select Reboot System from the System Tools menu. Step 2: Click YES to reboot the WDAP-2000PE.
Chapter 4 PC and Server Configuration 4 4.1 Overview All Wireless Stations need to have settings which match the Wireless Access Point. These settings depend on the mode in which the WDAP-2000PE is being used. • If using WEP or WPA-PSK, it is only necessary to ensure that each Wireless station's settings match those of the WDAP-2000PE, as described below. • For WPA and 802.1x modes, configuration is much more complex.
Security • The Pre-shared Key entered on the WDAP-2000PE must also be entered on each Wireless client. • The Encryption method (e.g. TKIP, AES) must be set to match the WDAP-2000PE. 4.4 Using WPA This is the most secure and most complex system. WPA mode provides greater security and centralized management, but it is more complex to configure. Wireless Station Configuration For each of the following items, each Wireless Station must have the same settings as the WDAP-2000PE.
• rras • webserver (IIS) • Radius Server (Internet Authentication Service) • Certificate Authority 4.5.1 Windows 2000 Domain Controller Setup 1. Run dcpromo.exe from the command prompt. 2. Follow all of the default prompts, ensure that DNS is installed and enabled during installation. 4.5.2 Services Installation 1. Select the Control Panel - Add/Remove Programs. 2. Click Add/Remove Windows Components from the left side. 3.
6. Enter the information for the Certificate Authority, and click Next. 7. Click Next if you don't want to change the CA's configuration data. 8. Installation will warn you that Internet Information Services are running, and must be stopped before continuing. Click Ok, then Finish. 4.5.3 DHCP server configuration 1. Click on the Start - Programs - Administrative Tools - DHCP 2. Right-click on the server entry as shown, and select New Scope.
3. Click Next when the New Scope Wizard Begins. 4. Enter the name and description for the scope, click Next. 5. Define the IP address range. Change the subnet mask if necessary. Click Next. 6. Add exclusions in the address fields if required. If no exclusions are required, leave it blank. Click Next. 7. Change the Lease Duration time if preferred. Click Next. 8. Select Yes, I want to configure these options now, and click Next. 9. Enter the router address for the current subnet.
11. If you don't want a WINS server, just click Next. 12. Select Yes, I want to activate this scope now. Click Next, then Finish. 13. Right-click on the server, and select Authorize. It may take a few minutes to complete. 4.5.4 Certificate Authority Setup 1. Select Start - Programs - Administrative Tools - Certification Authority. 2. Right-click Policy Settings, and select New - Certificate to Issue. 3. Select Authenticated Session and Smartcard Logon (select more than one by holding down the Ctrl key).
4. Select Start - Programs - Administrative Tools - Active Directory Users and Computers. 5. Right-click on your active directory domain, and select Properties. 6. Select the Group Policy tab, choose Default Domain Policy then click Edit.
7. Select Computer Configuration - Windows Settings - Security Settings - Public Key Policies, right-click Automatic Certificate Request Settings - New - Automatic Certificate Request. 8. When the Certificate Request Wizard appears, click Next. 9. Select Computer, then click Next.
10. Ensure that your certificate authority is checked, then click Next. 11. Review the policy change information and click Finish. 12. Click Start - Run, type cmd and press enter. Enter secedit /refreshpolicy machine_policy This command may take a few minutes to take effect. 4.5.5 Internet Authentication Service (Radius) Setup 1. Select Start - Programs - Administrative Tools - Internet Authentication Service 2. Right-click on Clients, and select New Client. 3.
9. Click Permitted, then OK. Select Next. 10. Select Grant remote access permission. Click Next. 11. Click Edit Profile... and select the Authentication tab. Enable Extensible Authentication Protocol, and select Smart Card or other Certificate. Deselect other authentication methods listed. Click OK. 12. Select No if you don't want to view the help for EAP. Click Finish. 4.5.6 Grant Remote Access for Users 1. Select Start - Programs - Administrative Tools- Active Directory Users and Computers. 2.
3. Select the Dial-in tab, and enable Allow access. Click OK. 4.6 802.1x Client Setup on Windows XP Windows XP ships with a complete 802.1x client implementation. If using Windows 2000, you can install SP4 (Service Pack 4) to gain the same functionality. If you don't have either of these systems, you must use the 802.1x client software provided with your wireless adapter. Refer to the documentation of your wireless adapter for setup instructions.
4. On the first screen (below), select Request a certificate, click Next. 5. Select User certificate request and select User Certificate, the click Next.
6. Click Submit. 7. A message will be displayed, then the certificate will be returned to you. Click Install this certificate.
8. . You will receive a confirmation message. Click Yes. 9. Certificate setup is now complete. 4.6.2 802.1x Authentication Setup 1. Open the properties for the wireless connection, by selecting Start - Control Panel - Network Connections. 2. Right Click on the Wireless Network Connection, and select Properties. 3. Select the Authentication Tab, and ensure that Enable network access control using IEEE 802.1X is selected, and Smart Card or other Certificate is selected from the EAP type.
Encryption Settings The Encryption settings must match the APs (WDAP-2000PE) on the Wireless network you want to join. • Windows XP will detect any available Wireless networks, and allow you to configure each network independently. • Your network administrator can advise you of the correct settings for each network. 802.1x networks typically use EAP-TLS. This is a dynamic key system, so there is no need to enter key values.
2. Select the wireless network from the Available Networks list, and click Configure. 3. Select and enter the correct values, as advised by your Network Administrator. For example, to use EAP-TLS, you would enable Data encryption, and click the checkbox for the setting: The key is provided for me automatically, as shown below. Setup for Windows XP and 802.1x client is now complete.
4.7 Using 802.1x Mode The procedures are similar to using 802.1x. The only difference is that on your client, you must NOT enable the setting: The key is provided for me automatically. Instead, you must enter the WEP key manually, ensuring it matches the WEP key used on the Access Point. Note: On some systems, the "64 bit" WEP key is shown as "40 bit" and the "128 bit" WEP key is shown as "104 bit".
Appendix A Troubleshooting Problem 1: Can't connect to the WDAP-2000PE to configure it. Solution 1: Check the following: A • The WDAP-2000PE is properly installed, LAN connections are OK, and it is powered ON. Check the LEDs for port status. • Ensure that your PC and the WDAP-2000PE are on the same network segment. (If you don't have a router, this must be the case.) • If your PC is set to "Obtain an IP Address automatically" (DHCP client), restart it.
Appendix B Command Line Interface B If desired, the Command Line Interface (CLI) can be used for configuration. This creates the possibility of creating scripts to perform common configuration changes. Using the CLI - Telnet 1. 2. Start your Telnet client, and establish a connection to the WDAP-2000PE. e.g. Telnet 192.168.1.1 You will be prompted for the password. Enter the same login password as used for the HTTP (Web) interface. The default values are password for the Password. 3.
Description: Set the HTTP server port (for device management) to the one specified. set http timeout Description: Set the timeout value for the HTTP management session. set prompt Description: Set the command line prompt. set system contact Description: Configure a string describing the system contact information. This is the value of the SNMP system contact MIB.
show snmp statistics Description: Display the current SNMP statistics. show trap manager [] Description: Display the settings of the specified SNMP trap manager. If no trap manager is specified, this command displays the settings of all trap managers. (4) Diagnostics Commands disable log Description: Disable the log function on the specified facility. disable syslogd Description: Disable the remote log function.