
VIP-321 DECT VoIP Phone User's Manual
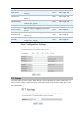
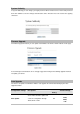

Step5. Press the Up or Down key to choose the base number you want. Press the SELECT key in
order to search the base. The display shows "Searching:”
Step6. Press SELECT key to confirm, then the display asks you to enter the base PIN code (preset
to 1590) which acts as phone's authentication code (AC). Enter this code and press the
SELECT key.
Step7. If the registration has performed successfully, the new handset will show the phone and base
numbers (e.g. HS (2) BS (1)) and returns to Standby mode.
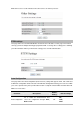
Deactivating a Hand
If
set
ration of a registered handset in order to stop its access to one or
t deactivate the handset you are using. Just follow these steps.
necessary, you can clear the regist
more base units, but you can no
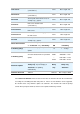
Step1. Press MENU key to display the main menu items.
Step2. Press the navigation keys repeatedly to choose , and then press the SELECT key.
Enter the current base (preset to 1590) , then prePIN Code SELECTss the key.
Step3. To select BASE Cfg item, then press the Up or Down key to choose Remove Handset and
then press the key. SELECT
Step4. Press the numeric key related to the handset number you want to clear the registration, and
then press the key. SELECT
NOT SUB
se.
The display of the handset which you have cleared the registration shows and it
cannot be used anymore with the ba
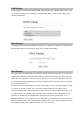
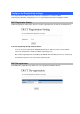
Setting Date & Time
In
show the current date and time to help you keep your appointments.
he date and time so that the date and time when messages or calls are
Standby mode, the unit can
However, you need to set t
received can be displayed correctly.
Step1. Press MENU nu items. key to display the main me
Step2. Press the navigation keys repeatedly to choose , then press the SELECT key to
r line in the
Step3.
The handset can be registered to up to four different base
units in order to extend the radio coverage.
ÍNote
choose , the current settings are displayed: the time on the uppeClock Hours:
Minutes format and the date in the Day – Month format in.
Please enter the current date and time using the number keypad (4 digits for each as
explained)
Step4. Press the SELECT key to save the setting.