Pre-N Wireless Router WNRT-610 User’s Manual
Copyright Copyright© 2007 by PLANET Technology Corp. All rights reserved. No part of this publication may be reproduced, transmitted, transcribed, stored in a retrieval system, or translated into any language or computer language, in any form or by any means, electronic, mechanical, magnetic, optical, chemical, manual or otherwise, without the prior written permission of PLANET.
Federal Communication Statement Commission (FCC) Radiation Exposure This equipment complies with FCC radiation exposure set forth for an uncontrolled environment. In order to avoid the possibility of exceeding the FCC radio frequency exposure limits, human proximity to the antenna shall not be less than 20 cm(8 inches) during normal operation. CE Mark Warning This is a Class B product.
Revision User’s Manual for PLANET Wireless Pre-N Broadband Router Model: WNRT-610 Rev: 1.0 (January. 2007) Part No.
TABLE OF CONTENTS CHAPTER 1 INTRODUCTION...........................................................................................................1 1.1 PACKAGE CONTENTS ......................................................................................................................2 1.2 SYSTEM REQUIREMENTS ................................................................................................................2 1.3 FEATURES .......................................................................
3.7.5 Remote Administration.........................................................................................................27 3.7.6 Upgrade Firmware...............................................................................................................28 3.8 LOG OUT ......................................................................................................................................29 3.9 RESTART ................................................................................
Chapter 1 Introduction The Planet WNRT-610 is a wireless Pre-N router that supports high-speed wireless networking for home or SOHO users. The WNRT-610 provides data rate up to 300 Mbps when used with other wireless Pre-N Planet products, like USB adapter WNL-U550 and PCI WNL-9310. The Pre-N standard is backwards compatible with 802.11b and 802.11g products. There is no need to change existing network to maintain connectivity. You may sacrifice some of 802.11g’s performance when using 802.11b and 802.
1.1 Package Contents Make sure that you have the following items: • • • • One WNRT-610 One AC Power Adapter One User’s Manual CD One Quick Installation Guide Note: If any of the above items are missing, contact your supplier as soon as possible. 1.2 System Requirements Before installation, please check the following requirements with your equipment.
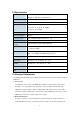
1.4 Specification Standards IEEE 802.3u 100BASE-TX Fast Ethernet IEEE802.11n, IEEE 802.11g, IEEE 802.11b Protocol CSMA/CD Radio Technology OFDM Data Transfer Rate 802.11b: 1, 2, 5.5, 11Mbps 802.11g: 6, 9, 12, 18, 24, 36, 48, 54Mbps Pre-802.
exact operating range of WNRT-610 in a specific location without testing. 3. Antenna adjustment The bundled antenna of WNRT-610 is adjustable. Firstly install the antenna pointing straight up, then smoothly adjust it if the radio signal strength is poor. But the signal reception is definitely weak in some certain areas, such as location right down the antenna. Moreover, the original antenna of WNRT-610 can be replaced with other external antennas to extend the coverage.
Chapter 2 Hardware Installation Before you proceed with the installation, it is necessary that you have enough information about the WNRT-610. 2.1 Hardware Connection 1. Locate an optimum location for the WNRT-610. The best place for your WNRT-610 is usually at the center of your wireless network, with line of sight to all of your mobile stations. 2. Connect the power adapter to the receptor at the rear panel of the WNRT-610, and plug the other end of the power adapter to a wall outlet or power strip.
2.2 LED Indicators Security Wireless LAN Power LED (Blue) WAN Internet On - Wireless security is On. Off - Wireless security is Off. On - Wireless enabled. Off - No Wireless connections currently exist. Flashing - Data is being transmitted or received via the Wireless access point. This includes "network traffic" as well as user data. On - Corresponding LAN (hub) port is active. Off - No active connection on the corresponding LAN (hub) port.
Chapter 3 Configure through Web Browser Web configuration provides a user-friendly graphical user interface (web pages) to manage your WNRT-610. WNRT-610 contains an HTTP server. This enables you to connect to it, and configure it, using your Web Browser. Your Browser must support JavaScript. The configuration program has been tested on the following browsers: Netscape 7.1 or later. Mozilla 1.6 or later or Internet Explorer V5.5 or later 1. Open your web browser. 2.
3.1 Setup Wizard 3.1.1 Dynamic IP address Please refer to your Internet connection method to select the Connection Type. And please configure those settings per the information your ISP provides. If you choose the Dynamic IP address type, click the “ Next “,you wil see the following web screen. Connection Type: Select the connection type, Dynamic, Fixed IP, PPPoE, or PPTP from the drop-down list.
3.1.2 Fixed IP address If you choose Fix IP address type, click the “ Next “,you wil see the following web screen. Set the IP address, IP Subnet Mask, and Gateway IP Address , and DNS Server.
3.1.3 PPPoE When using PPPoE, enter the following information in the fields (some information are provided by your ISP): Login Name: Type your PPPoE user name. Password: Type your PPPoE password. IP Address: Select whether you want the ISP to provide the IP address automatically, or whether you want to assign a static IP address to the WNRT-610 WAN interface. When “Specify IP” is selected, type the PPPoE IP address in the field. Your ISP will provide you with this information.
3.1.4 PPTP When using PPTP, enter the following information in the fields (some information are provided by your ISP): PPTP Server : Type the IP address or name of server which offers Internet service. Your ISP will provide you with this information. Login Name: Type your PPTP account. PPTP Password: Type your PPTP password. Auto-reconnect: If this function is enabled, WNRT-610 will try to rebuild Internet connection once the link is down.
3.2 LAN You can configure WNRT-610 DHCP server function in this screen. When configuration is completed, please click “Save” to save and restart WNRT-610. IP address: Set for the Wireless Broadband Router, as seen from the local LAN. Use the default value unless the address is already in use or your LAN is using a different IP address range. In the latter case, enter an unused IP Address from within the range used by your LAN. Subnet Mask: The default value 255.255.255.
3.3 Wireless This screen enables you to configure advanced wireless functions. Region: Select the correct domain for your location. Wireless Radio: Enable or disable wireless LAN via the WNRT-610. SSID: Type an SSID in the field. The SSID of any wireless device must match the SSID typed here in order for the wireless device to access the LAN and WAN via the WNRT-610. Mode: Select the Mode off / 802.11b / 802.11b + g /802.11b + g + n/ 802.11 g + n /802.
3.3.1 Wireless Security Authentication Type: Select the type from the listed options. If WEP is selected, the screen would appear as above. WEP Type: You can choose to use Open system or Shared key. Mode: Select the key code you want to use for WEP Key, HEX or ASCII. When Hex is selected, you may enter alphanumeric characters in the range of “A-F”, “a-f” and “0-9” in the WEP Key entry field. Alternatively, you may enter digit hexadecimal values in the range of “a-z”, “A-Z” and “0-9”.
If WPA/WPA2-PSK is selected, the screen appears as below. Please enter a hard-to-guess passphrase (between 8 and 63 characters) in the field. 3.4 Password The password screen allows you to assign a password to the Wireless Broadband Router. Old Password: Enter the existing password in this field. New password: Enter the new password here. Verify password: Re-enter the new password here.
3.5 Status This screen enables you to view the router LAN, wireless LAN, and WAN configuration. Connection Details : Click this button to open a sub-window and view a detailed description of the current connection. Depending on the type of connection, a "log" may also be available. 3.6 Advanced Features 3.6.1 Internet Type a host IP address for the DMZ. The computer with this IP address acts as a DMZ host with unlimited Internet access.
3.6.2 URL Filter If you want to limit access to certain sites on the Internet, you can use this feature. The URL filter will check each Web site access. If the address, or part of the address, is included in the block site list, access will be denied. Current Filter Strings: The list contains the current list of items to block. Add Filter String : To add to the current list, type the word or domain name you want to block into the field provided, then click the Add button.
3.6.3 Access Control The Access Control feature allows administrators to restrict the level of Internet Access available to PCs on your LAN. With the default settings, everyone has unrestricted Internet access. Select the desired options for the current group: None - Nothing is blocked. Use this to create the least restrictive group. Block all Internet access - All traffic via the WAN port is blocked. Use this to create the most restrictive group.
3.6.4 Dynamic DNS You can configure WNRT-61O to use DDNS service if you already have a registered DDNS account. This free service is very useful when combined with the Virtual Server feature. It allows Internet users to connect to your Virtual Servers using a URL, rather than an IP Address. This also solves the problem of having a dynamic IP address. With a dynamic IP address, your IP address may change whenever you connect, which makes it difficult to connect to you. DDNS Services work as follows: 1.
3.6.5 Firewall Rules The Firewall Rules screen allows you to define "Firewall Rules" which can allow or prevent certain traffic. "Traffic" means incoming connection attempts, not packets. By default: All Outgoing traffic is permitted. All Incoming traffic is denied. Because of this default behavior, any Outgoing rules will generally Block traffic, and Incoming rules will generally Allow traffic. 3.6.
3.6.7 Virtual Servers This feature, sometimes called Port Forwarding, allows you to make Servers on your LAN accessible to Internet users. Normally, Internet users would not be able to access a server on your LAN because: Your Server does not have a valid external IP Address. Attempts to connect to devices on your LAN are blocked by the firewall in this device. The "Virtual Server" feature solves these problems and allows Internet users to connect to your servers, as illustrated below. 192.168.0.
Defaults : This will delete any Servers you have defined, and set the pre-defined Servers to use their default port numbers. Disable All : This will cause the "Enable" setting of all Virtual Servers to be set OFF. Update Selected Server : Update the current Virtual Server entry, using the data shown in the "Properties" area on screen. Add as new Server : Add a new entry to the Virtual Server list, using the data shown in the "Properties" area on screen.
3.6.9 Schedule This Schedule can be used for the Firewall Rules and the URL filter. Day : Each day of week can scheduled independently. Session 1 and Session 2: Two separate sessions or periods can be defined. Session 2 can be left blank if not required. Start Time : Enter the start using a 24 hour clock. Finished Time : Enter finish using a 24 hour clock Time Zone : In order to display your local time correctly, you must select your "Time Zone" from the list.
3.7.1 PC Database PC Database : This is the list of PCs shown when you select the "DMZ PC" or a "Virtual Server". This database is maintained automatically, but you can add and delete entries for PCs which use a Fixed (Static) IP Address. The PC Database is used whenever you need to select a PC (e.g. for the "DMZ" PC). It eliminates the need to enter IP addresses. Also, you do not need to use fixed IP addresses on your LAN.
3.7.2 Network Diagnostics Ping this IP Address : Enter the IP address you wish to ping. The IP address can be on your LAN, or on the Internet. Note that if the address is on the Internet, and no connection currently exists, you could get a "Timeout" error. In that case, wait a few seconds and try again. Ping Button : After entering the IP address, click this button to start the "Ping" procedure. The results will be displayed in the Ping Results pane.
3.7.3 Config File This feature allows you to download the current settings from the WNRT-610, and save them to a file on your PC. You can restore a previously-downloaded configuration file to WNRT-610, by uploading it to the Wireless Broadband Router. This screen also allows you to set WNRT-610 back to its factory default configuration. Any existing settings will be deleted. An example Config File screen is shown below.
3.7.4 Logs The Logs record various types of activity on the Wireless Broadband Router. This data is useful for troubleshooting, but enabling all logs will generate a large amount of data and adversely affect performance. 3.7.5 Remote Administration If enabled, this feature allows you to manage the Wireless Broadband Router via the Internet. Enable Remote Management : Check to allow administration/management via the Internet. (To connect, see below).
port number is recommended. The default value is 8080. The port number must be specified in your Browser when you connect. See the following section for details. To connect from a remote PC via the Internet Ensure your Internet connection is established, and start your Web Browser. In the "Address" bar, enter "HTTP://" followed by the Internet IP Address of the Wireless Broadband Router. If the port number is not 80, the port number is also required.
3.8 Log Out If you want to leave the manage web browser from WNRT-610, Please click “Log Out”button. Only one lan or wan manager can log in the WNRT-610 manage web browser. If you do not manage the WNRT-610 for fewer minutes ,you must retype the password to manage the web browser. 3.9 Restart You can click :Restart: button to reboot WNRT-610.
Appendix A TCP/IP Settings for PC The network TCP/IP settings differ based on the computer’s operating system (2000/XP) and are as follows. Windows 2000 Double click on the “My computer” icon on the desktop. When “My computer” window opens, open the “Control panel” and then open the “Network dialup connection” applet. Double click on the “Local area network connection” icon. Select “Properties” to enter the TCP/IP setting window. 1. In the “Local area network status” window, click on “Properties.” 2.
- 31 -